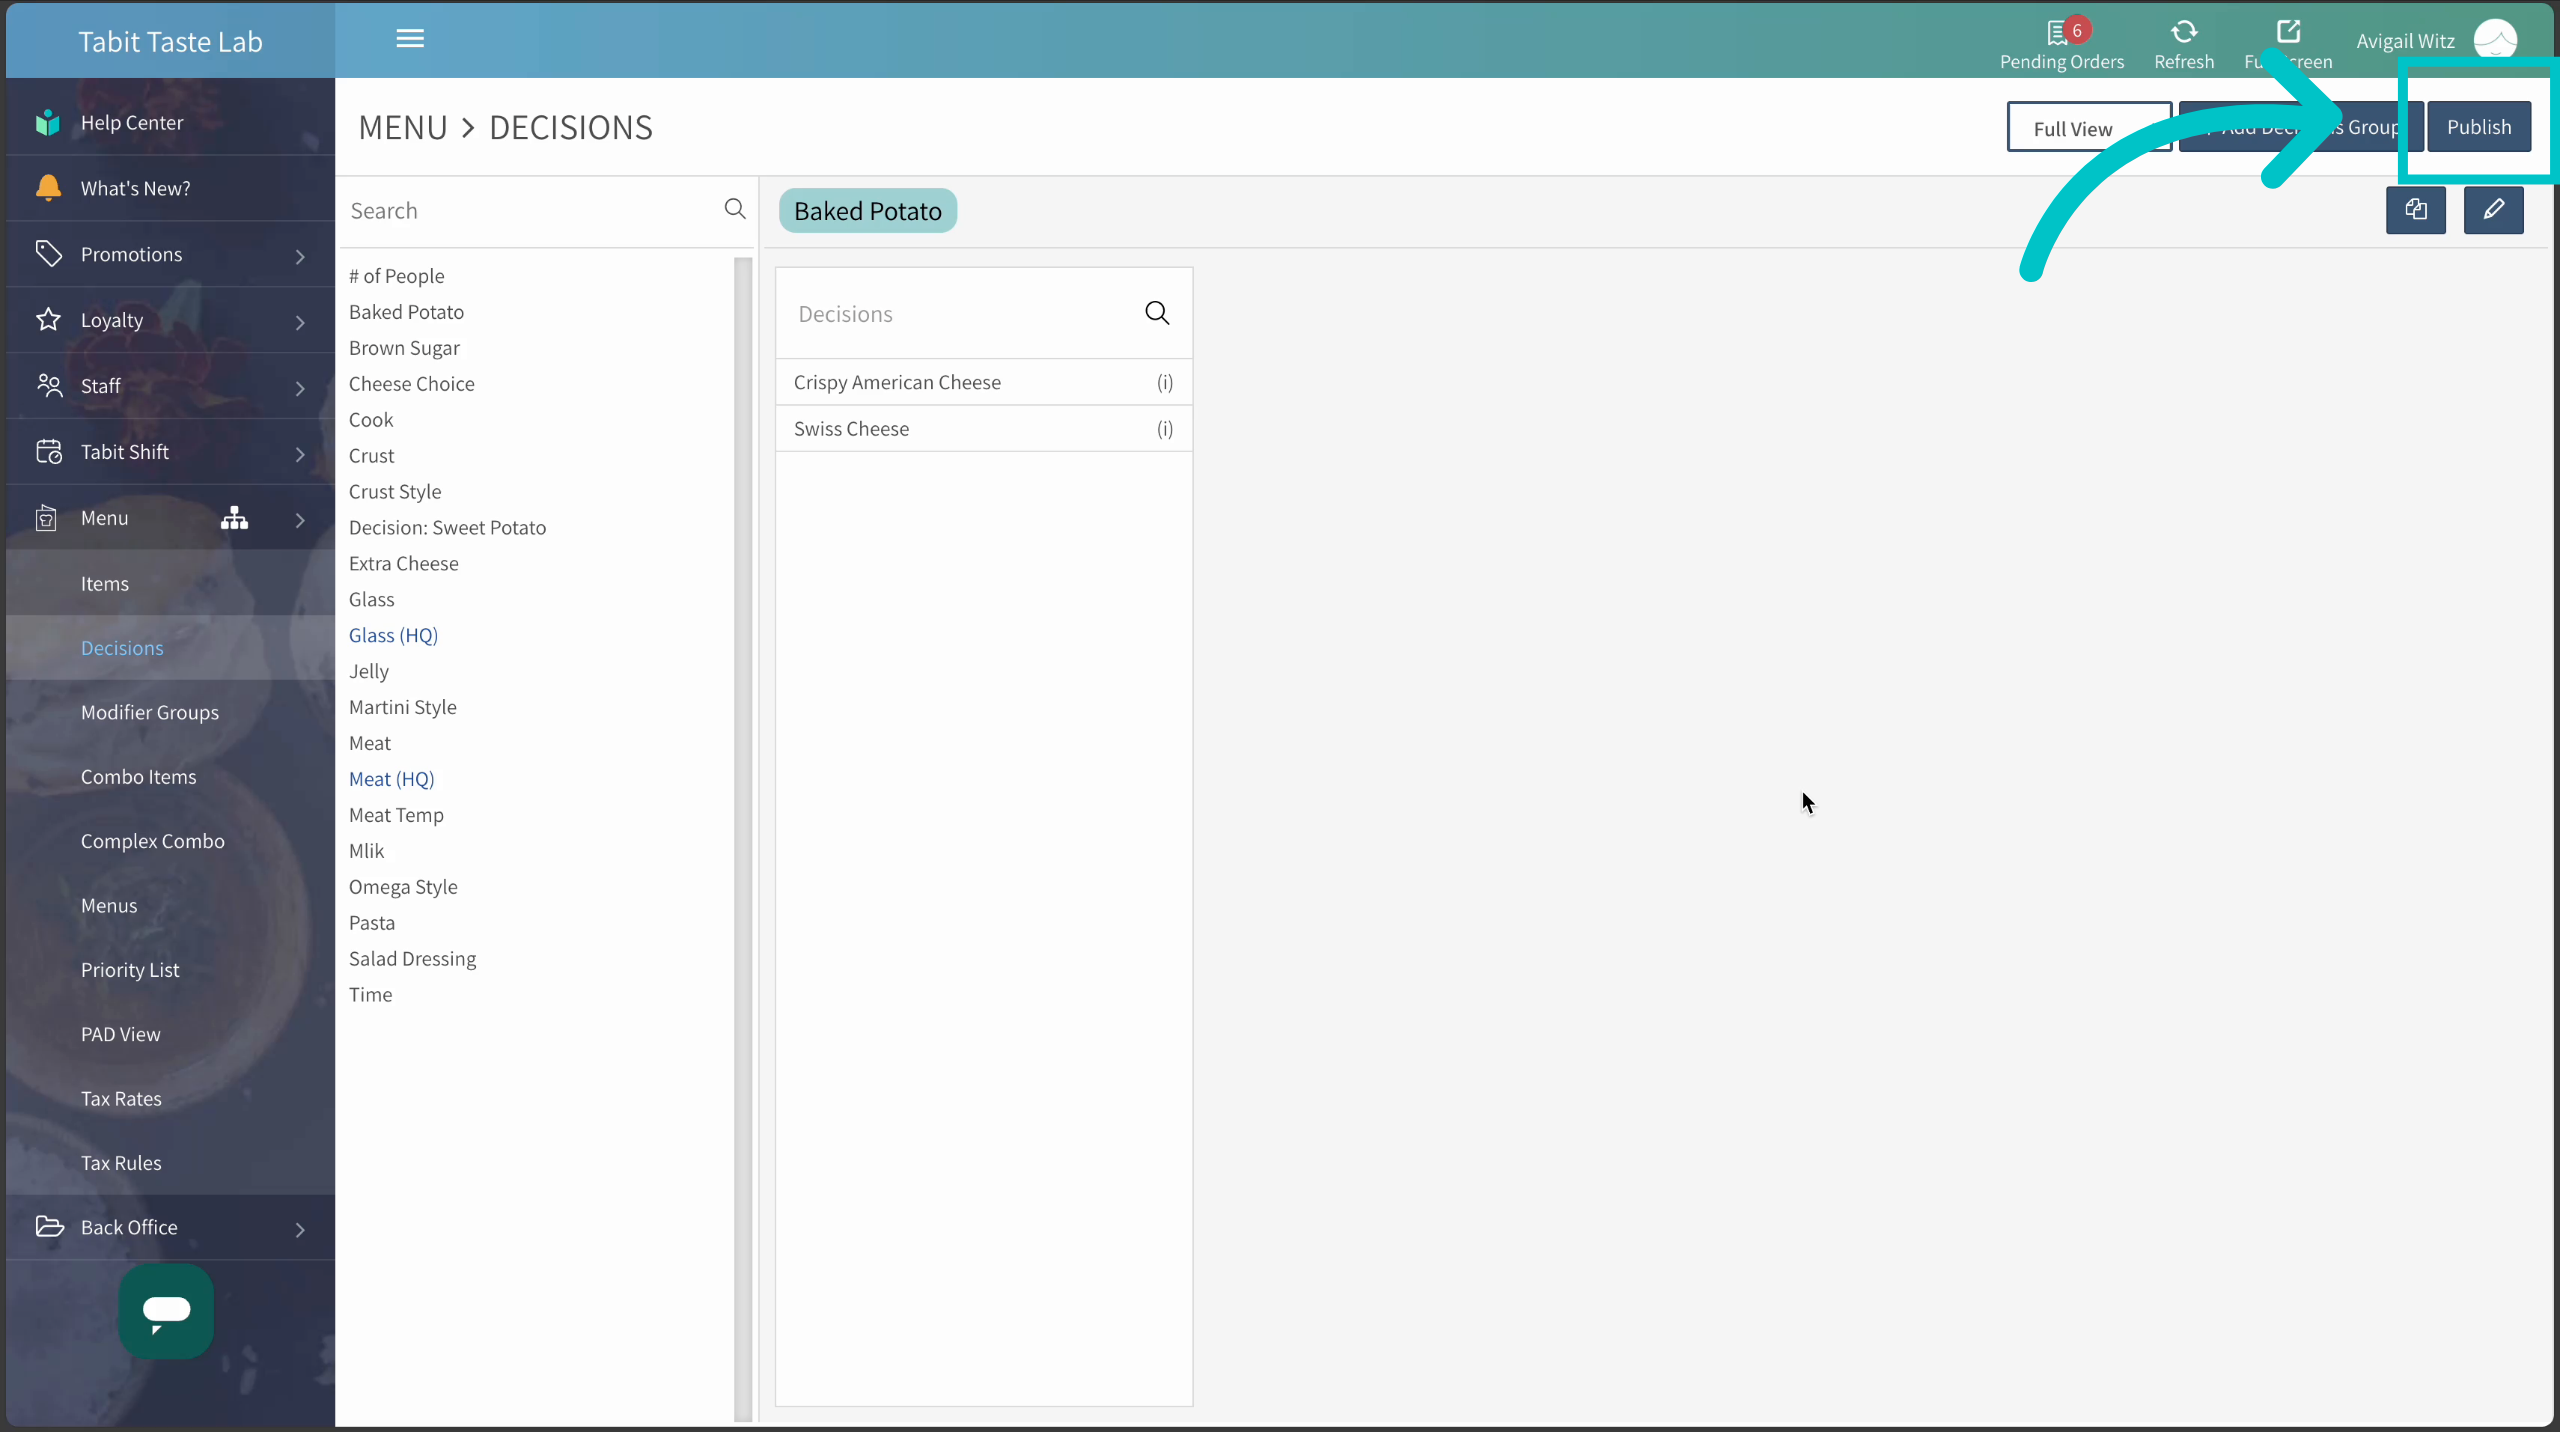
Decision Groups are typically used for simple, essential decisions or common modifications, like choosing milk for coffee or meat temperature for steaks. Here, you will learn how to adjust your Decision Groups to meet your evolving menu needs.
Follow the steps below to edit a Decision Group:
Through the lead item
-
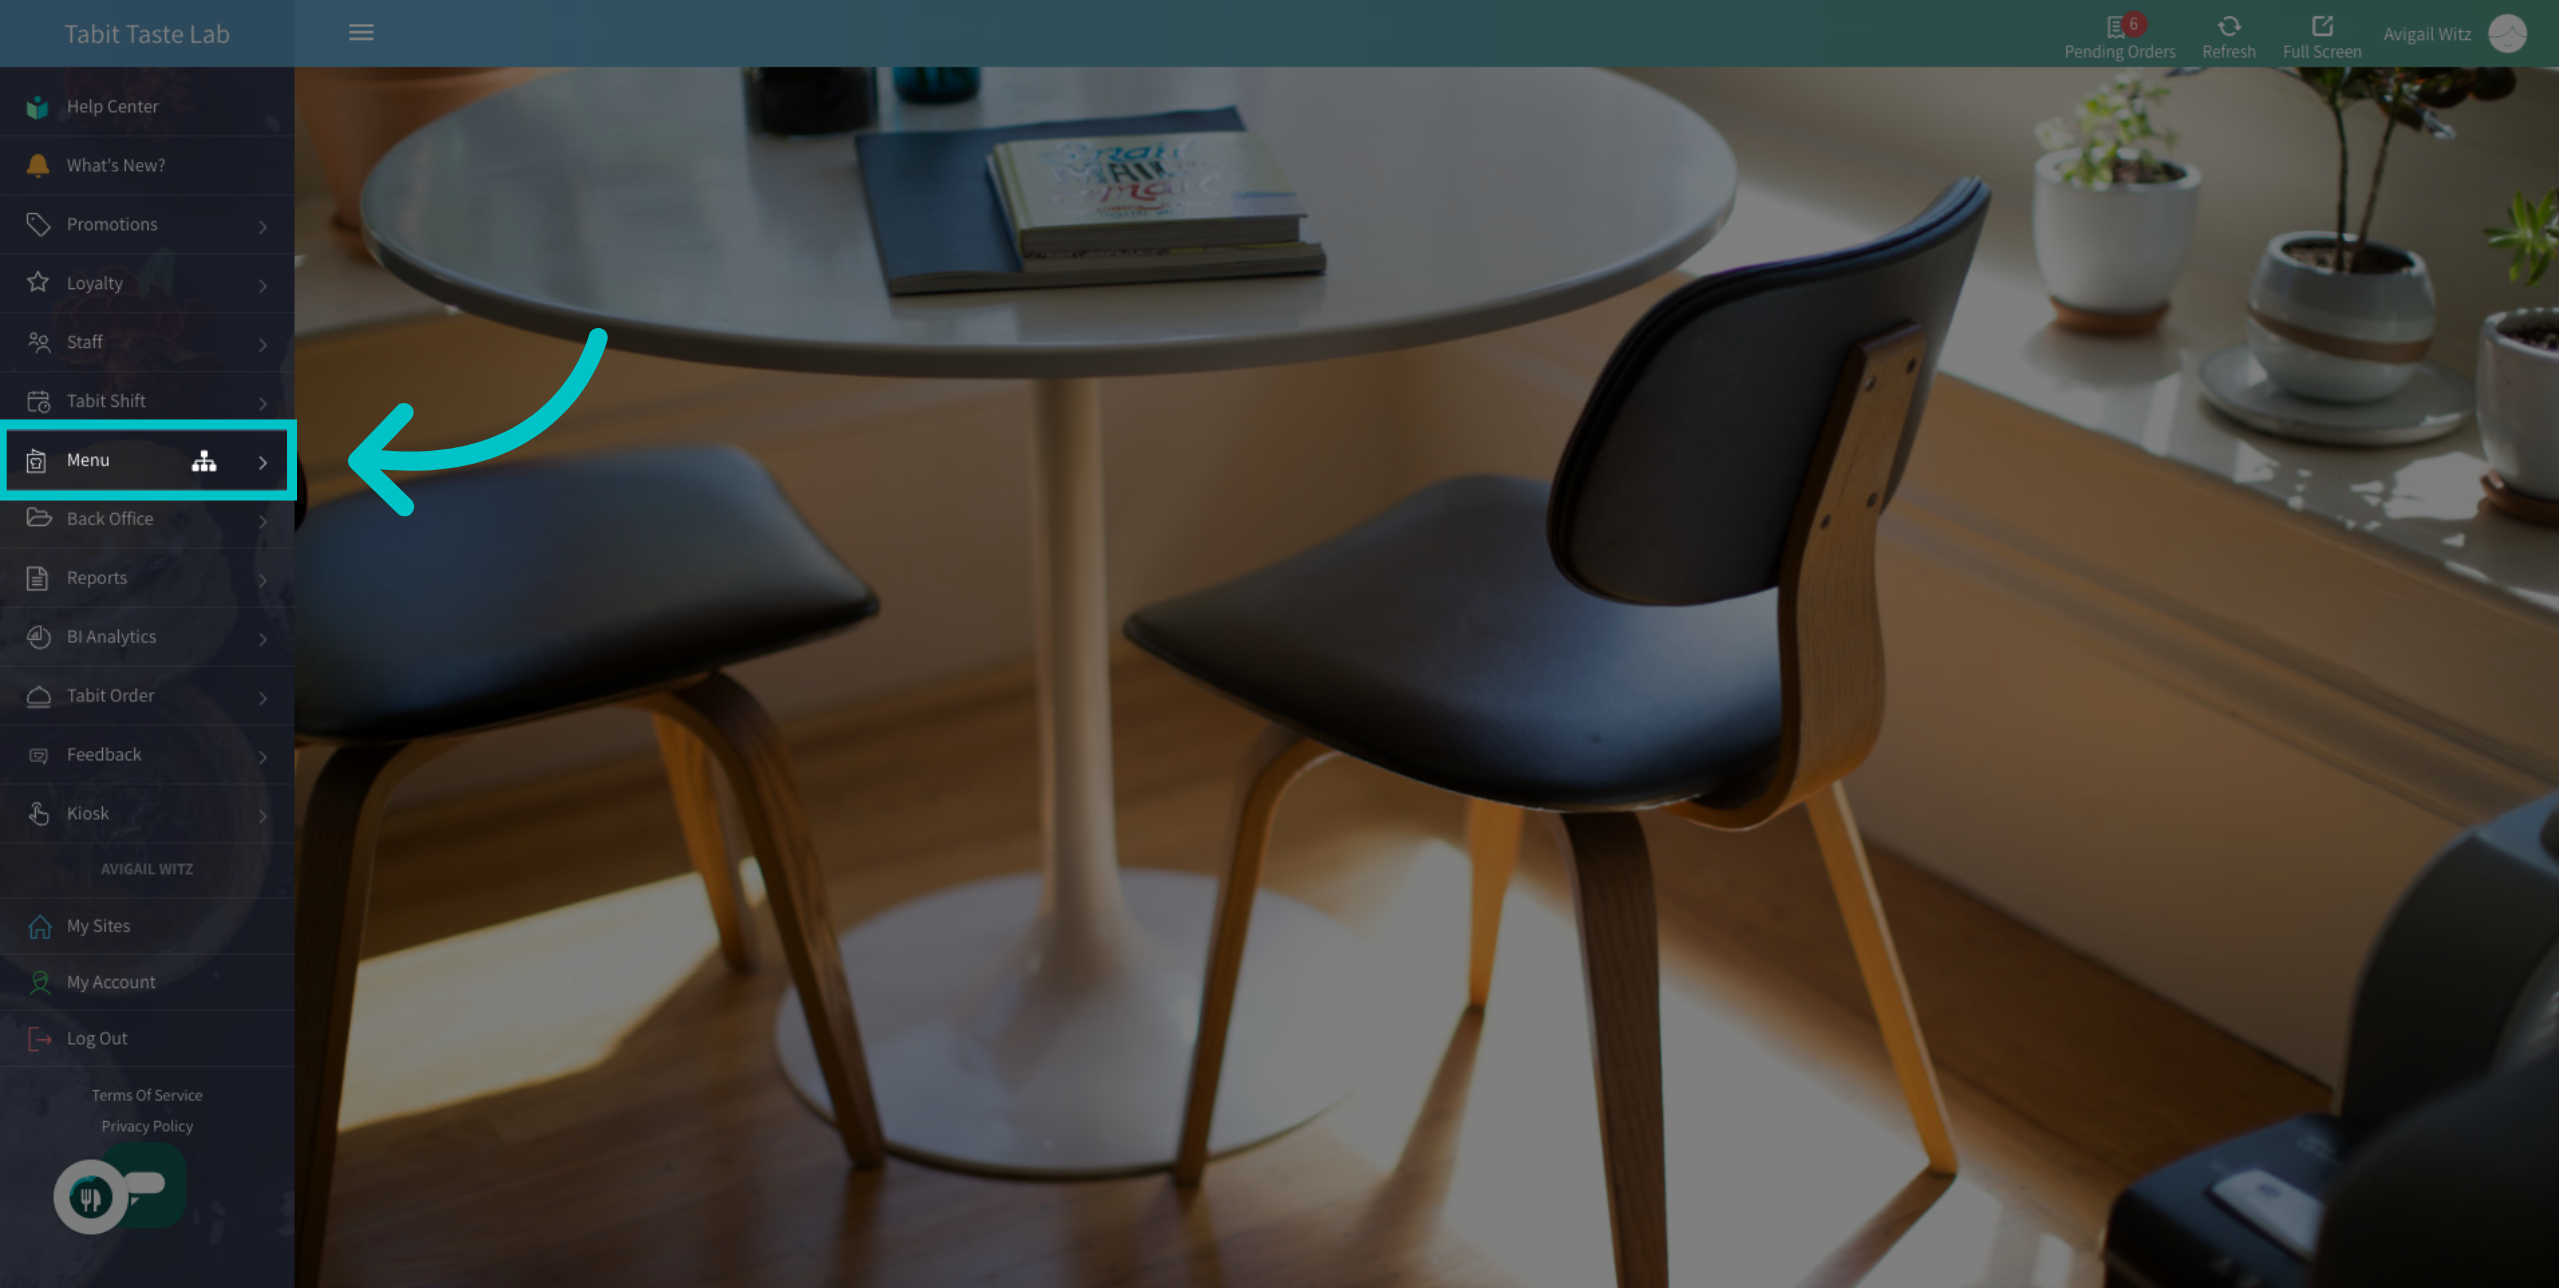
In Tabit Office, go to Menu
-
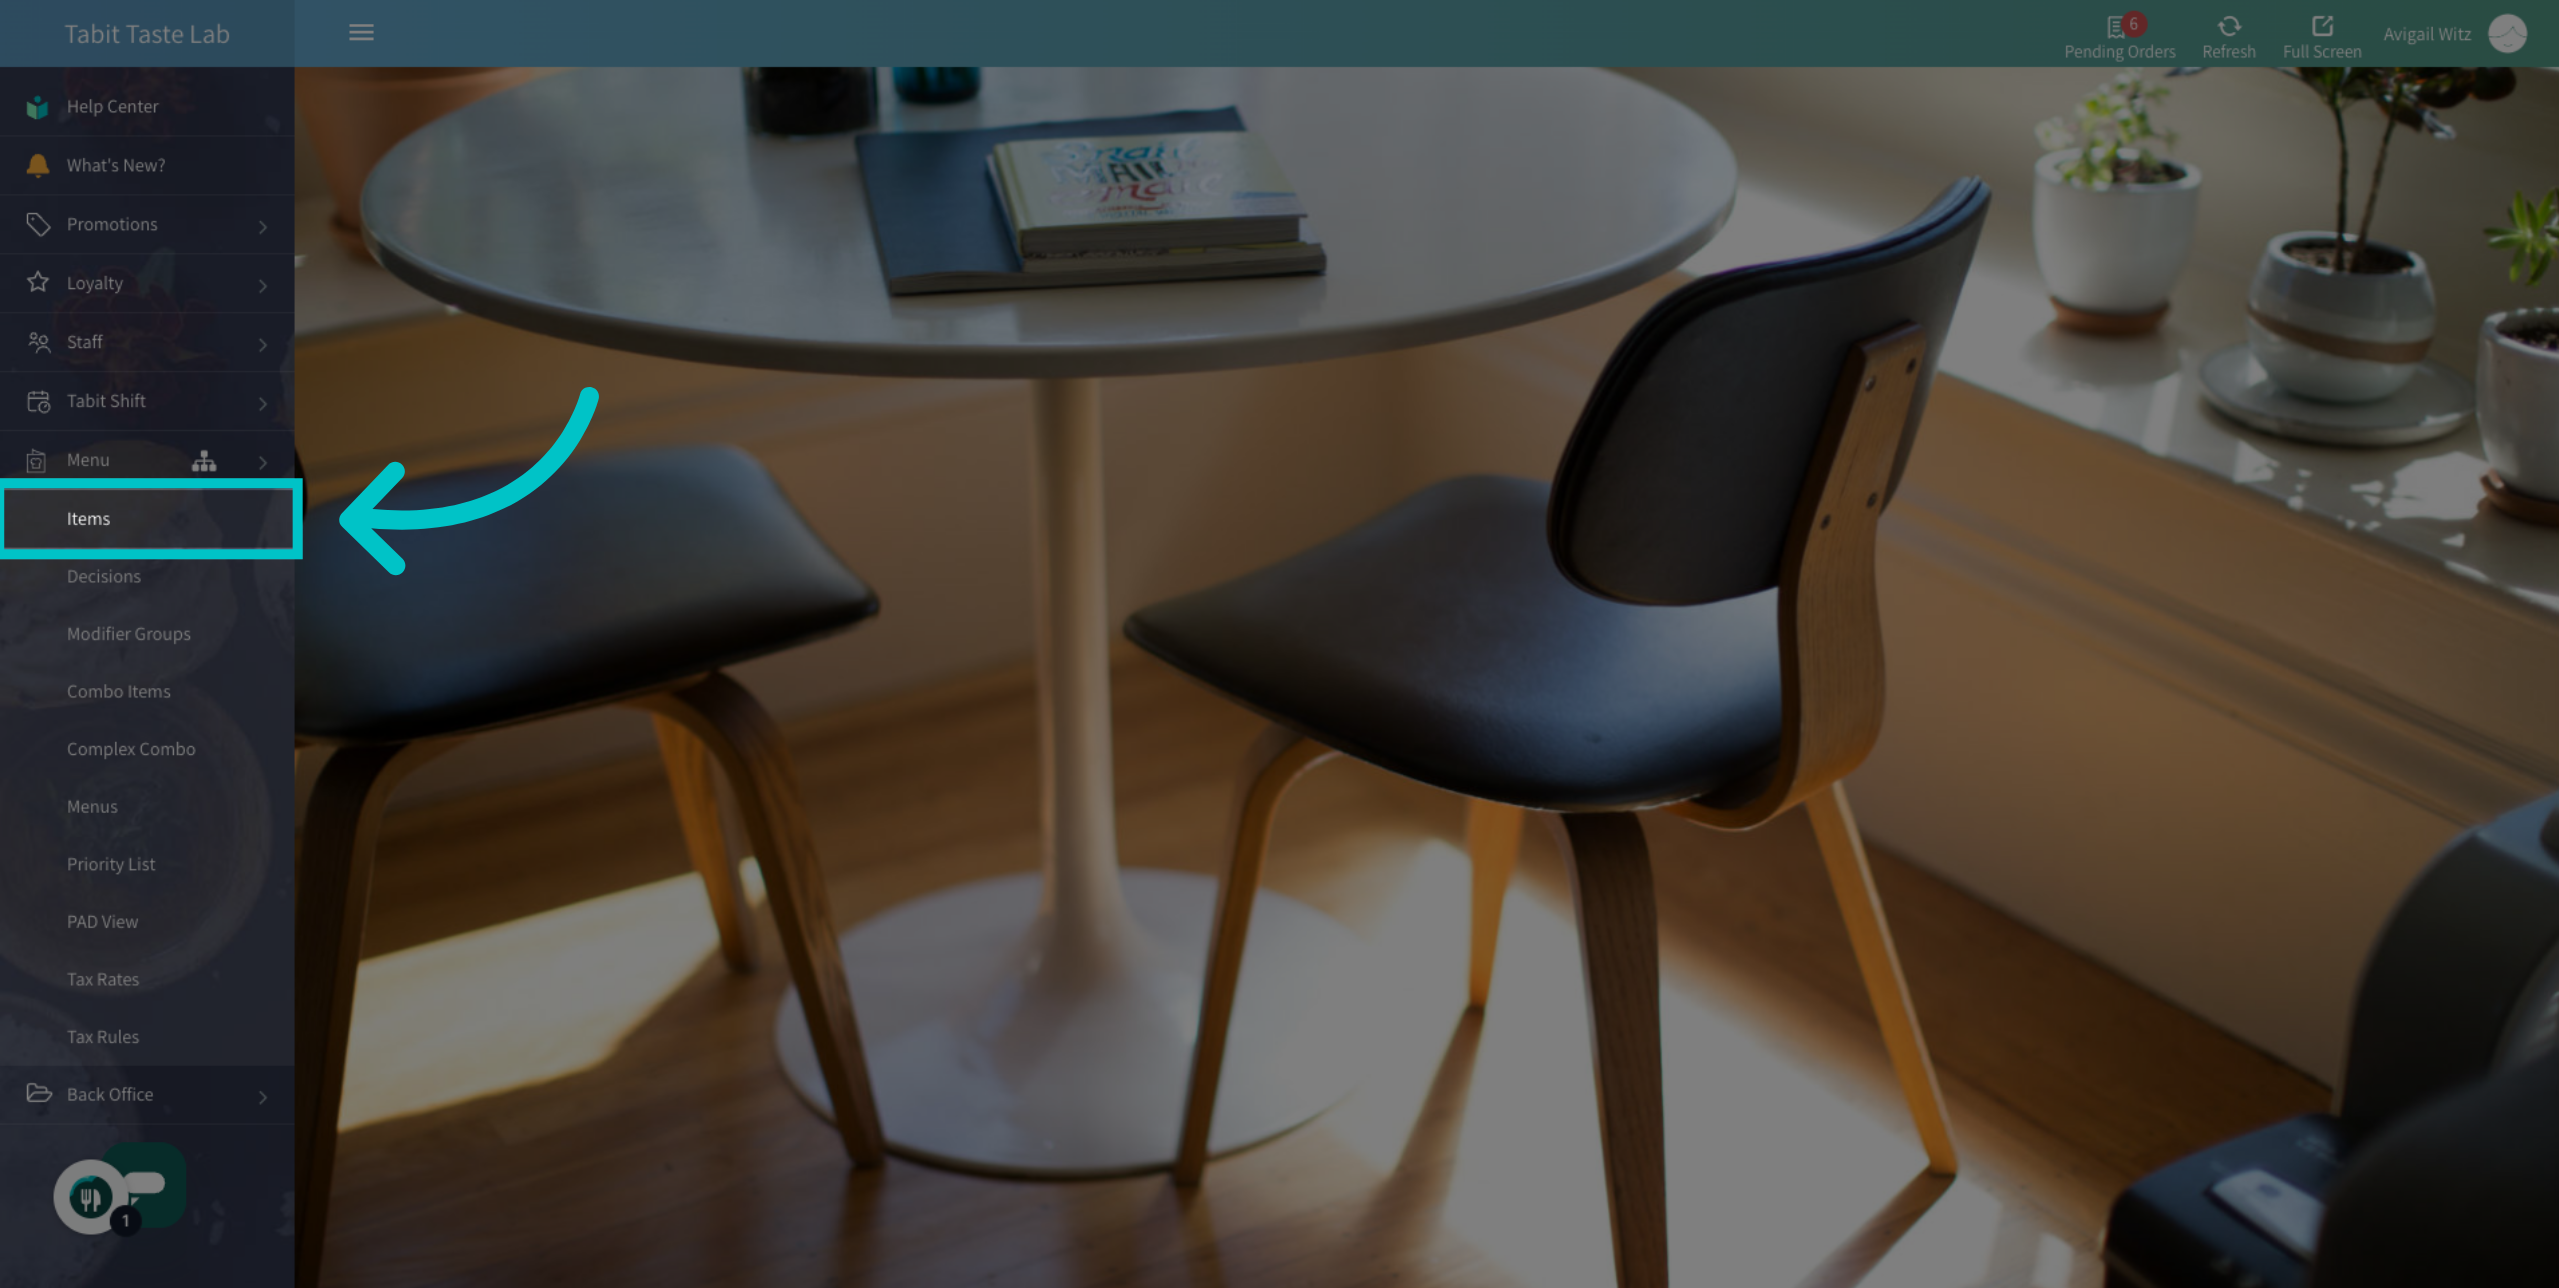
Navigate to the Items section
-
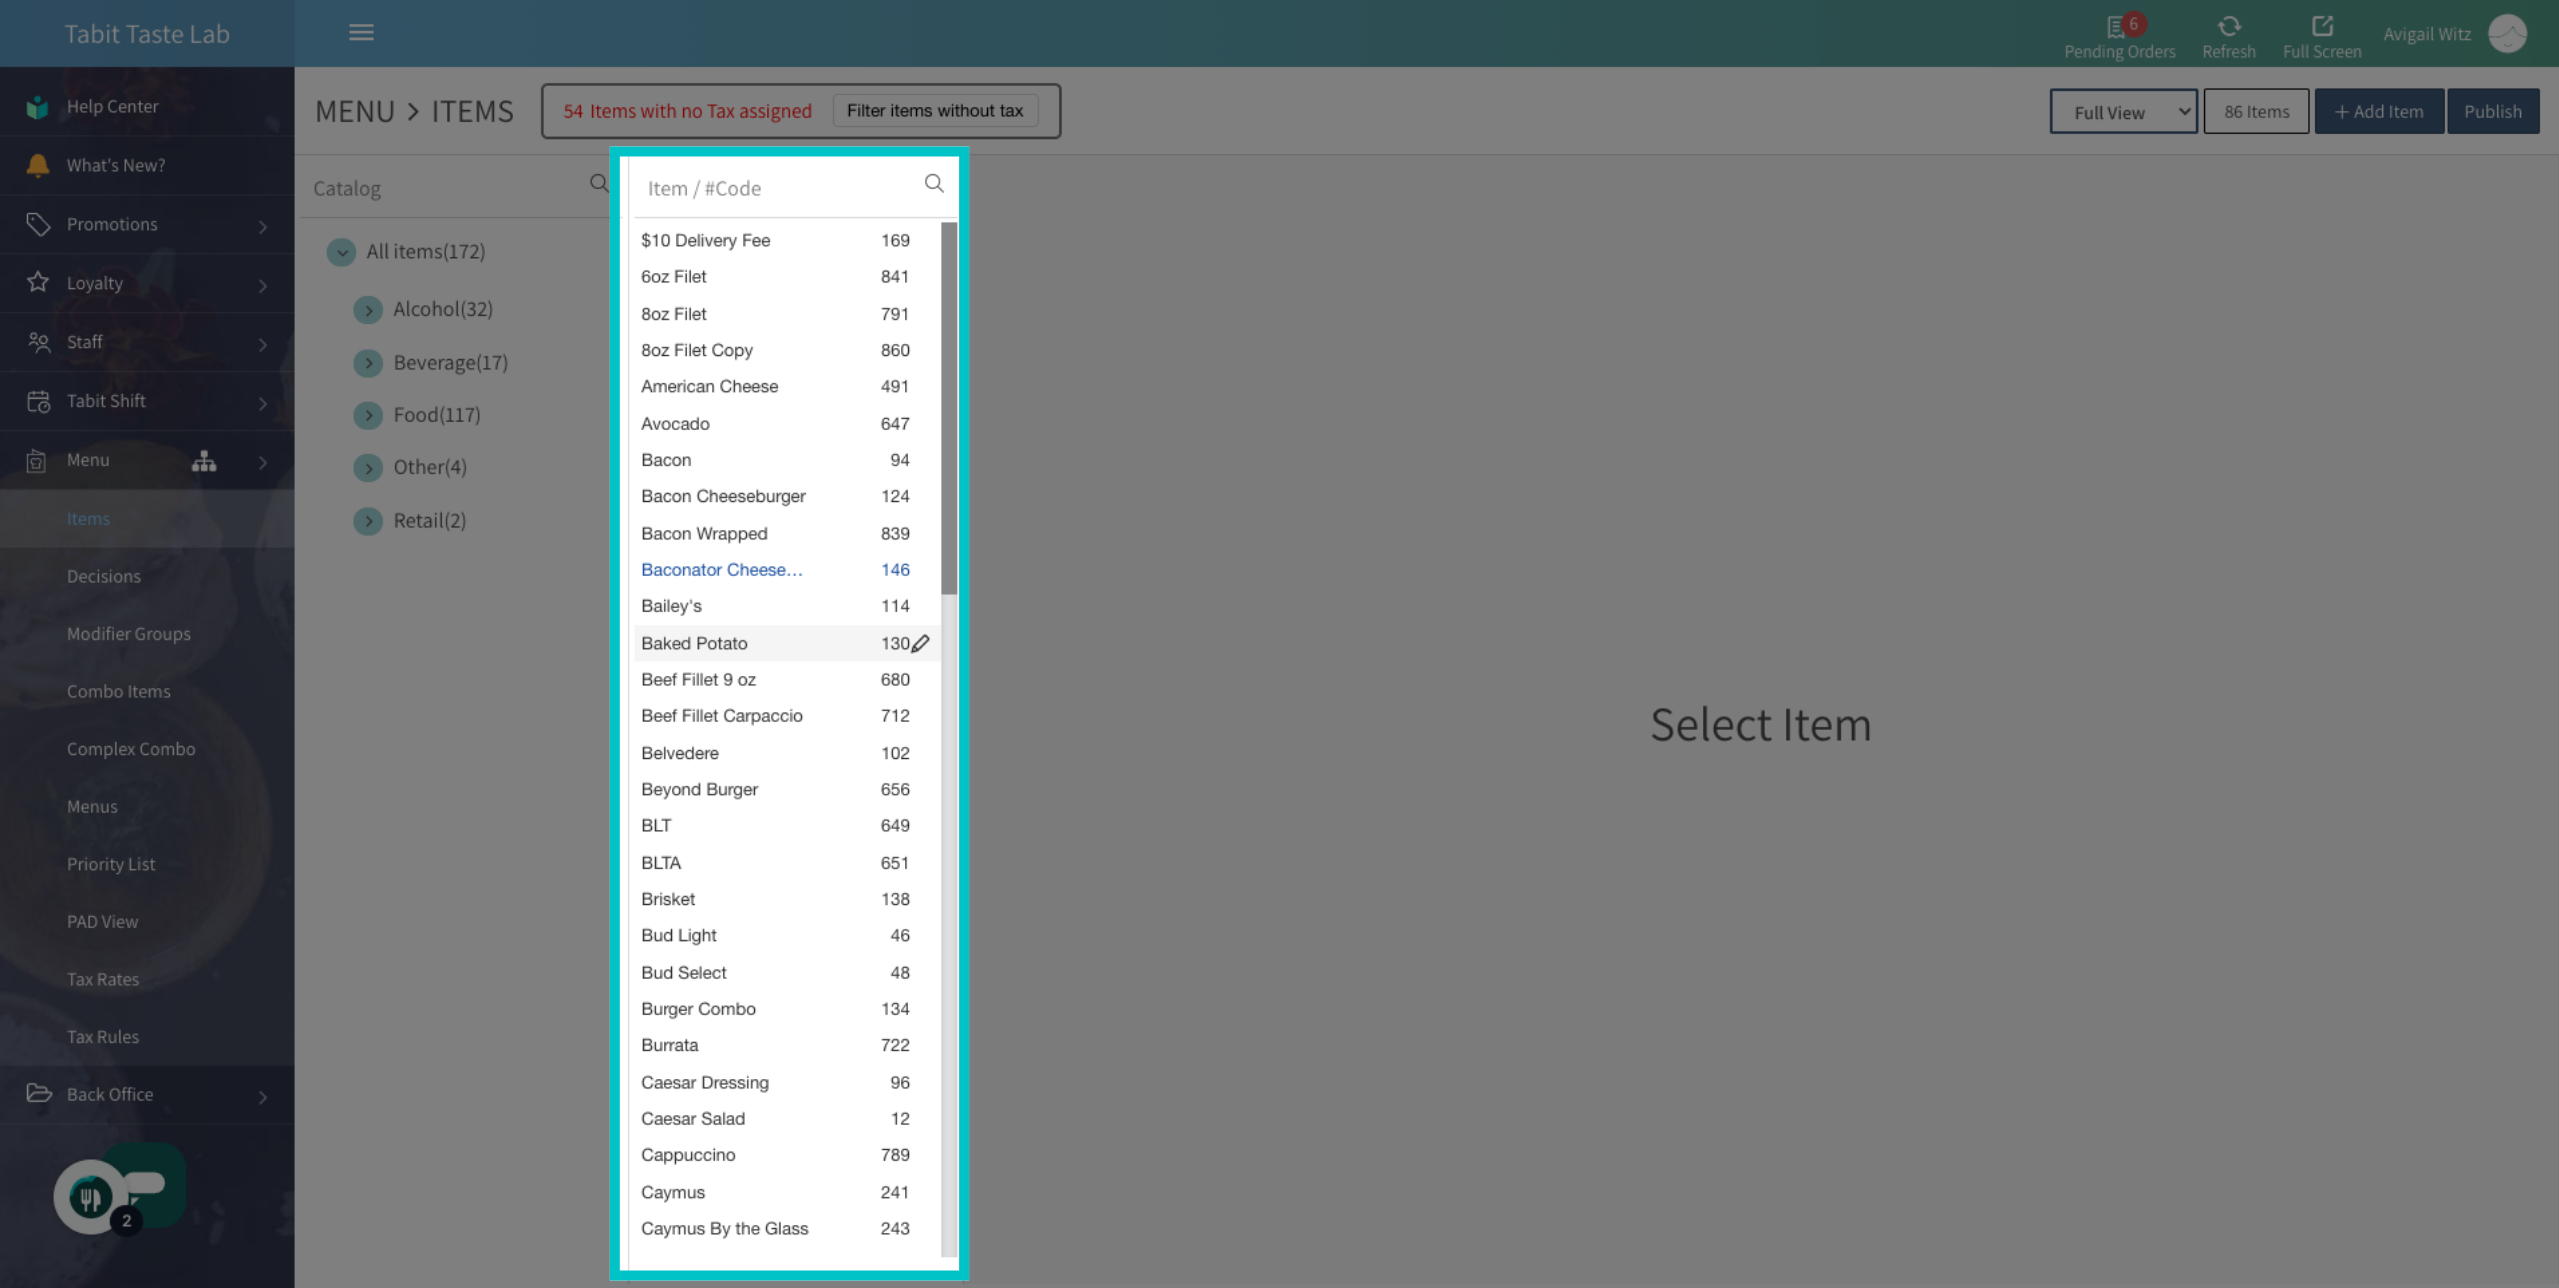
Search and select the relevant item containing the group you want to edit
-
Select the Edit icon next to decisions
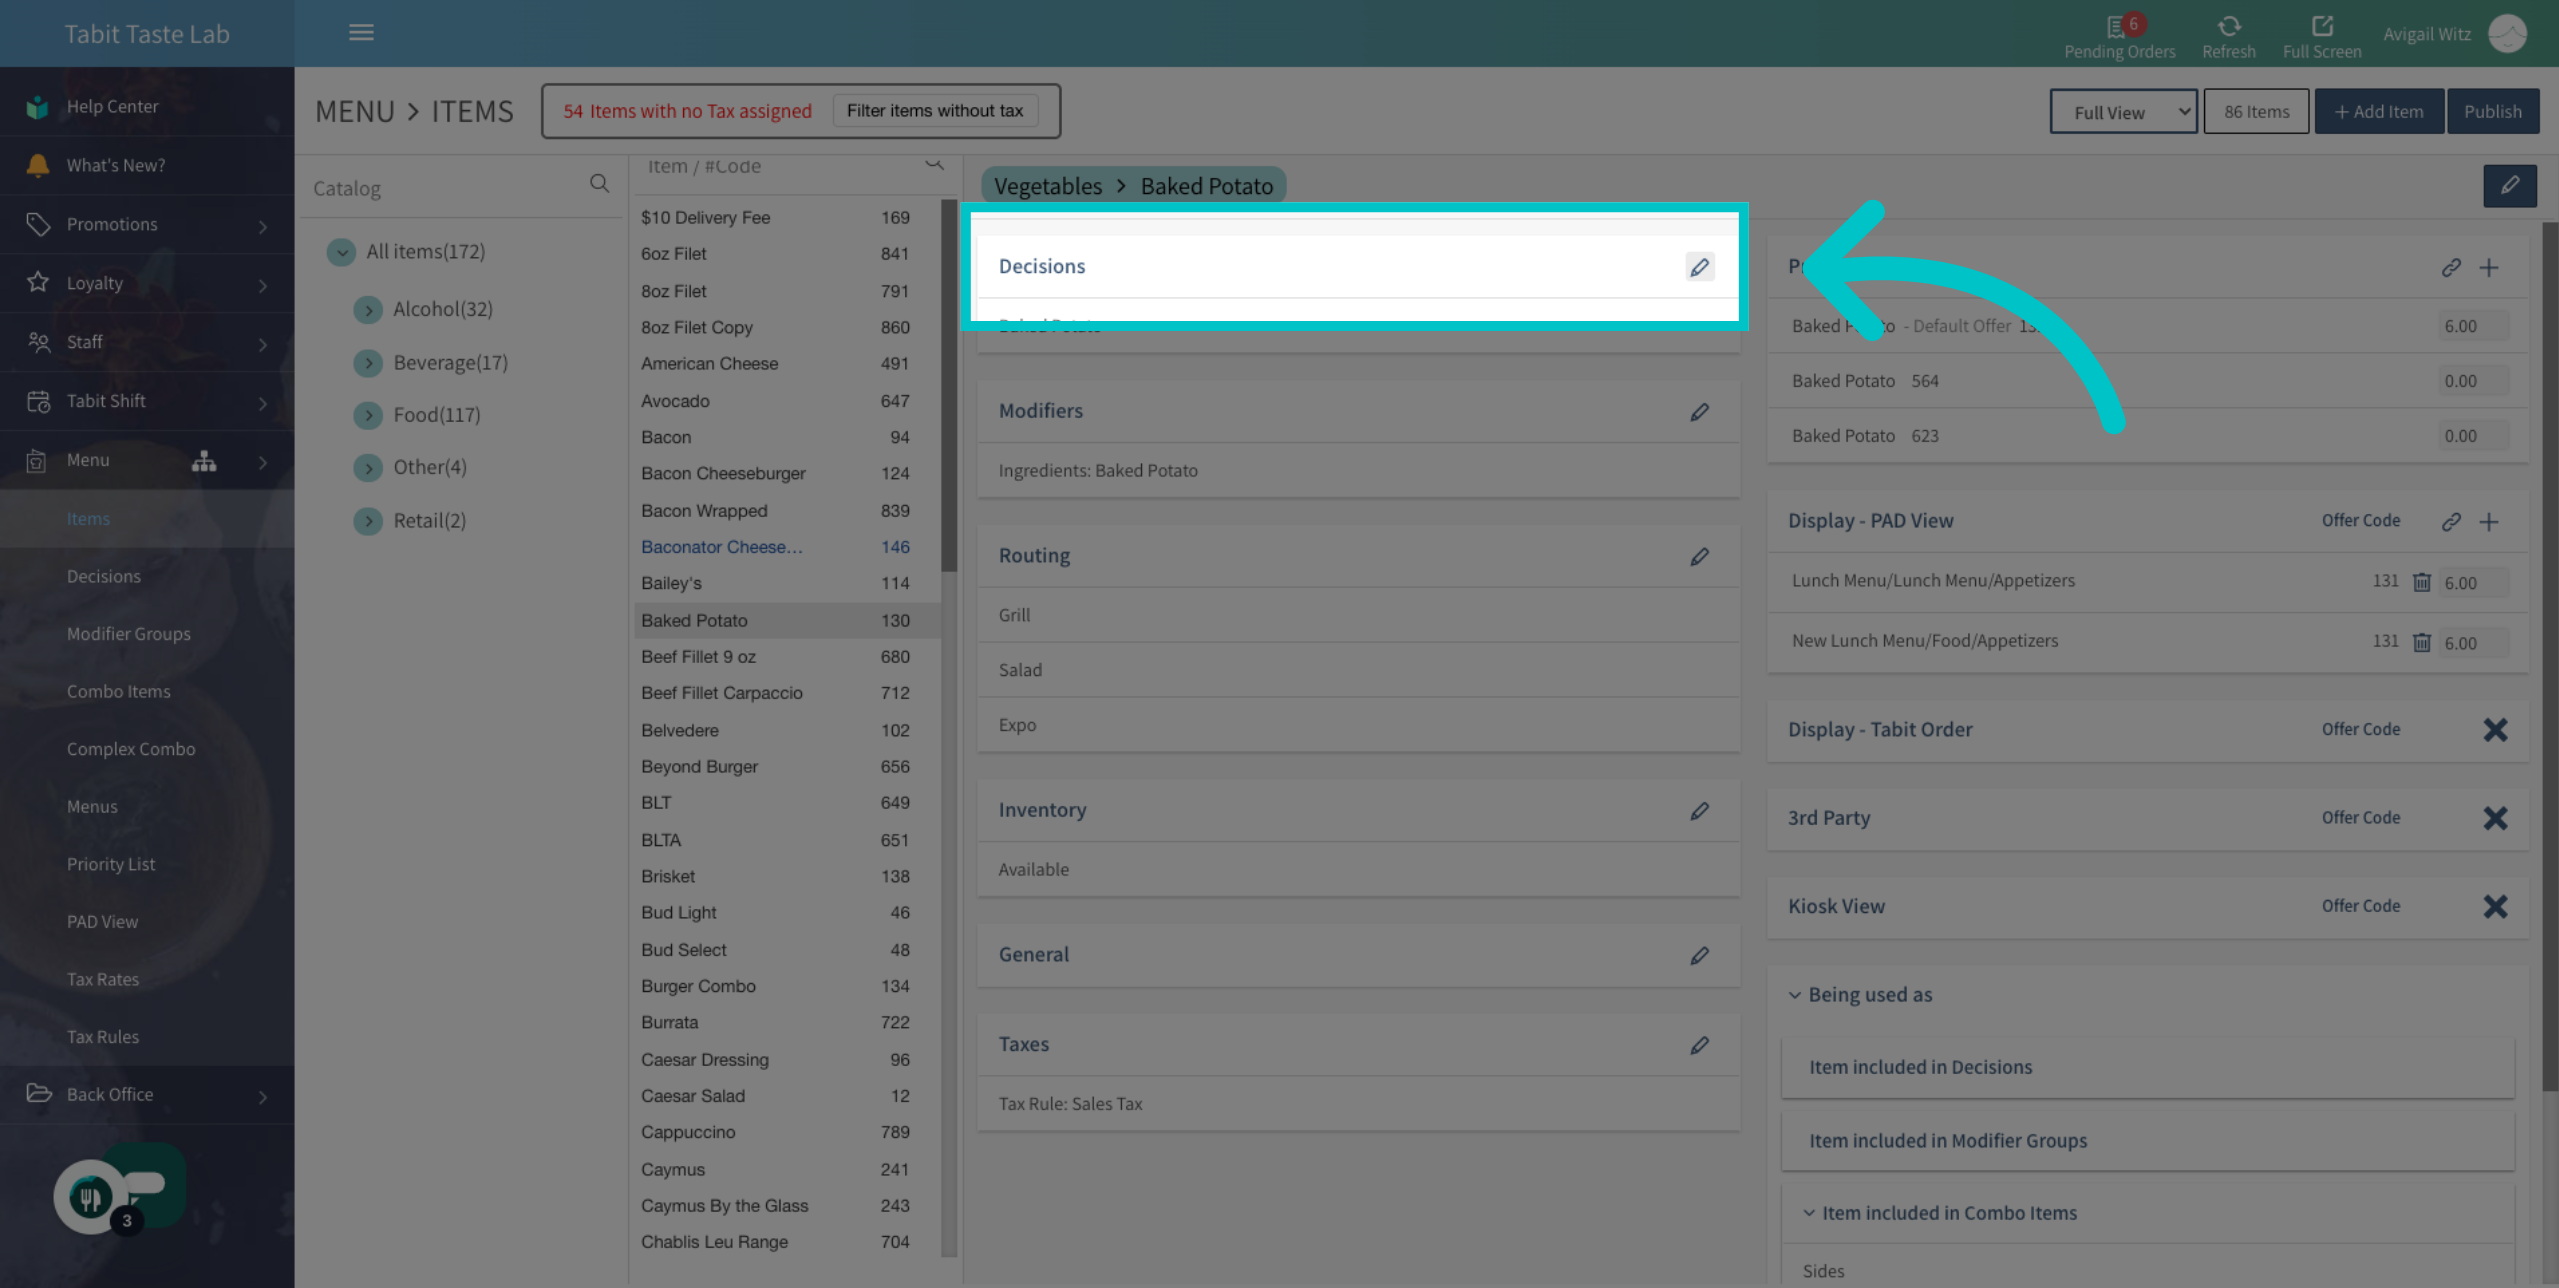
-
In this screen, you will be able to make various edits to the Decision Group:
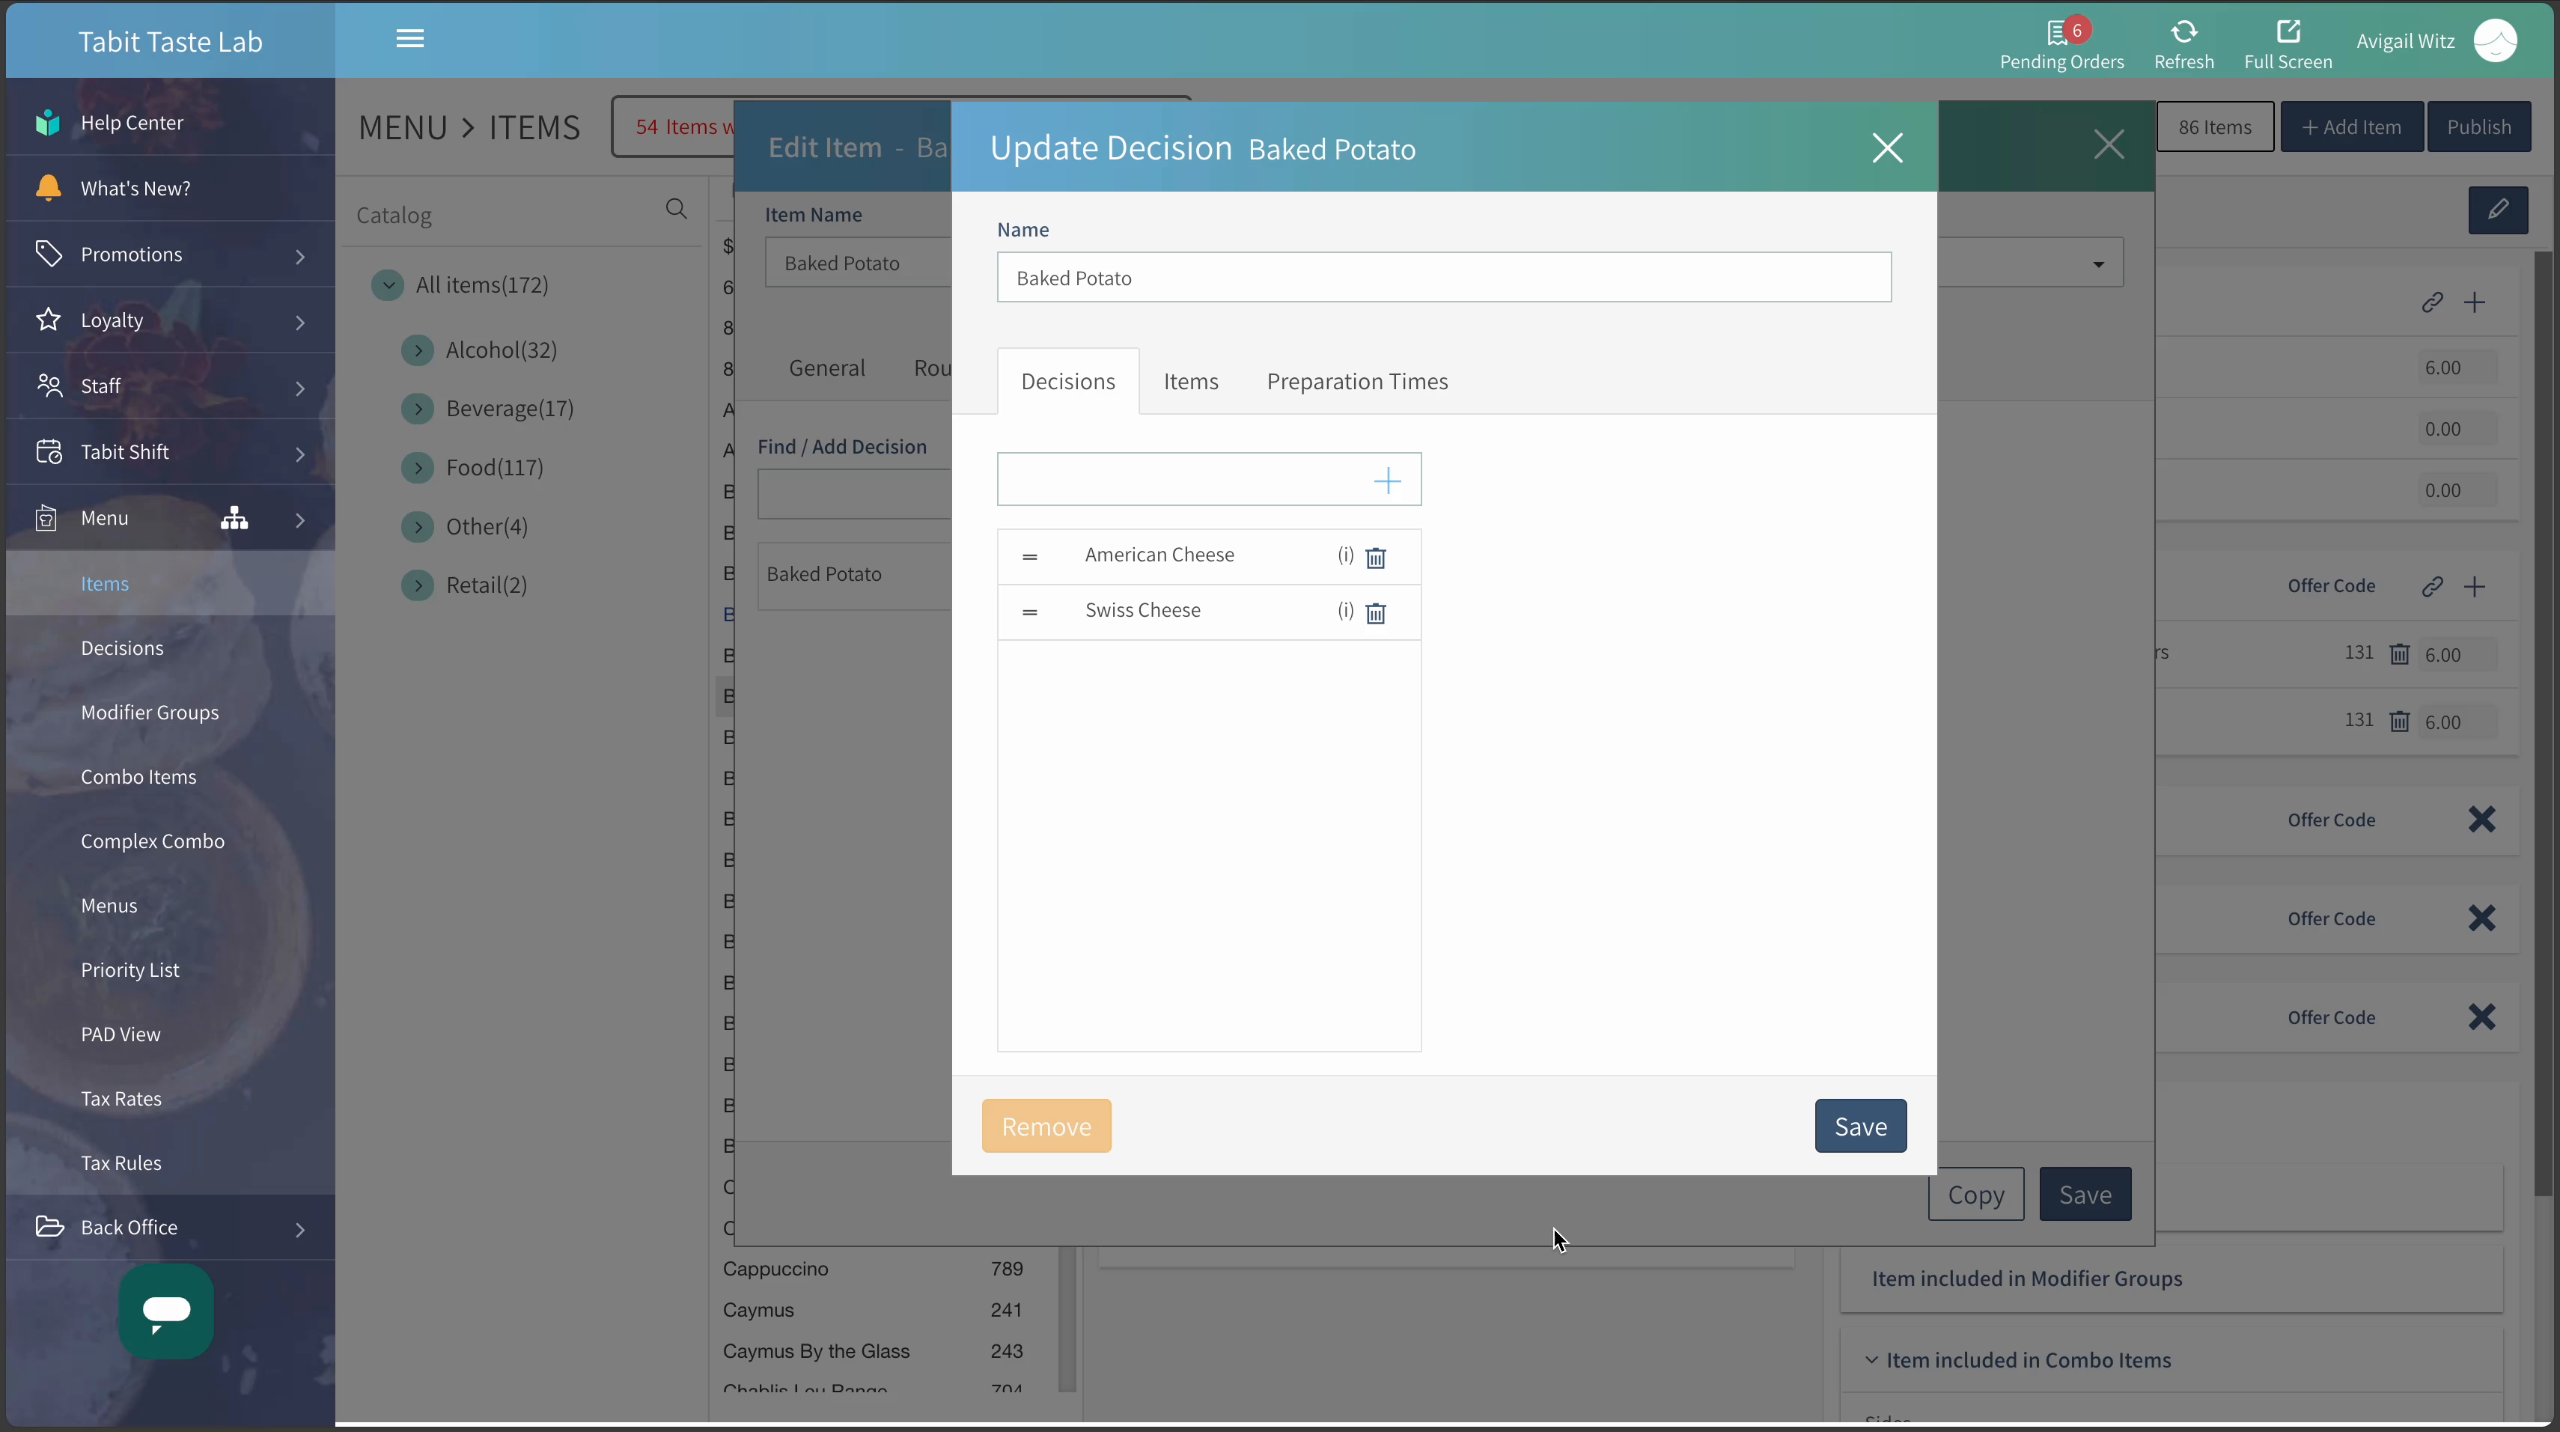
- To rearrange the group, select the two lines on the left and drag the items to where you'd like them to be
- Add or create a new decision
- Edit a Decision's name
- Edit a default or enforce choice in a Decision Group
- Remove a Decision Group from the item
-
Once all the changes are made, select Save
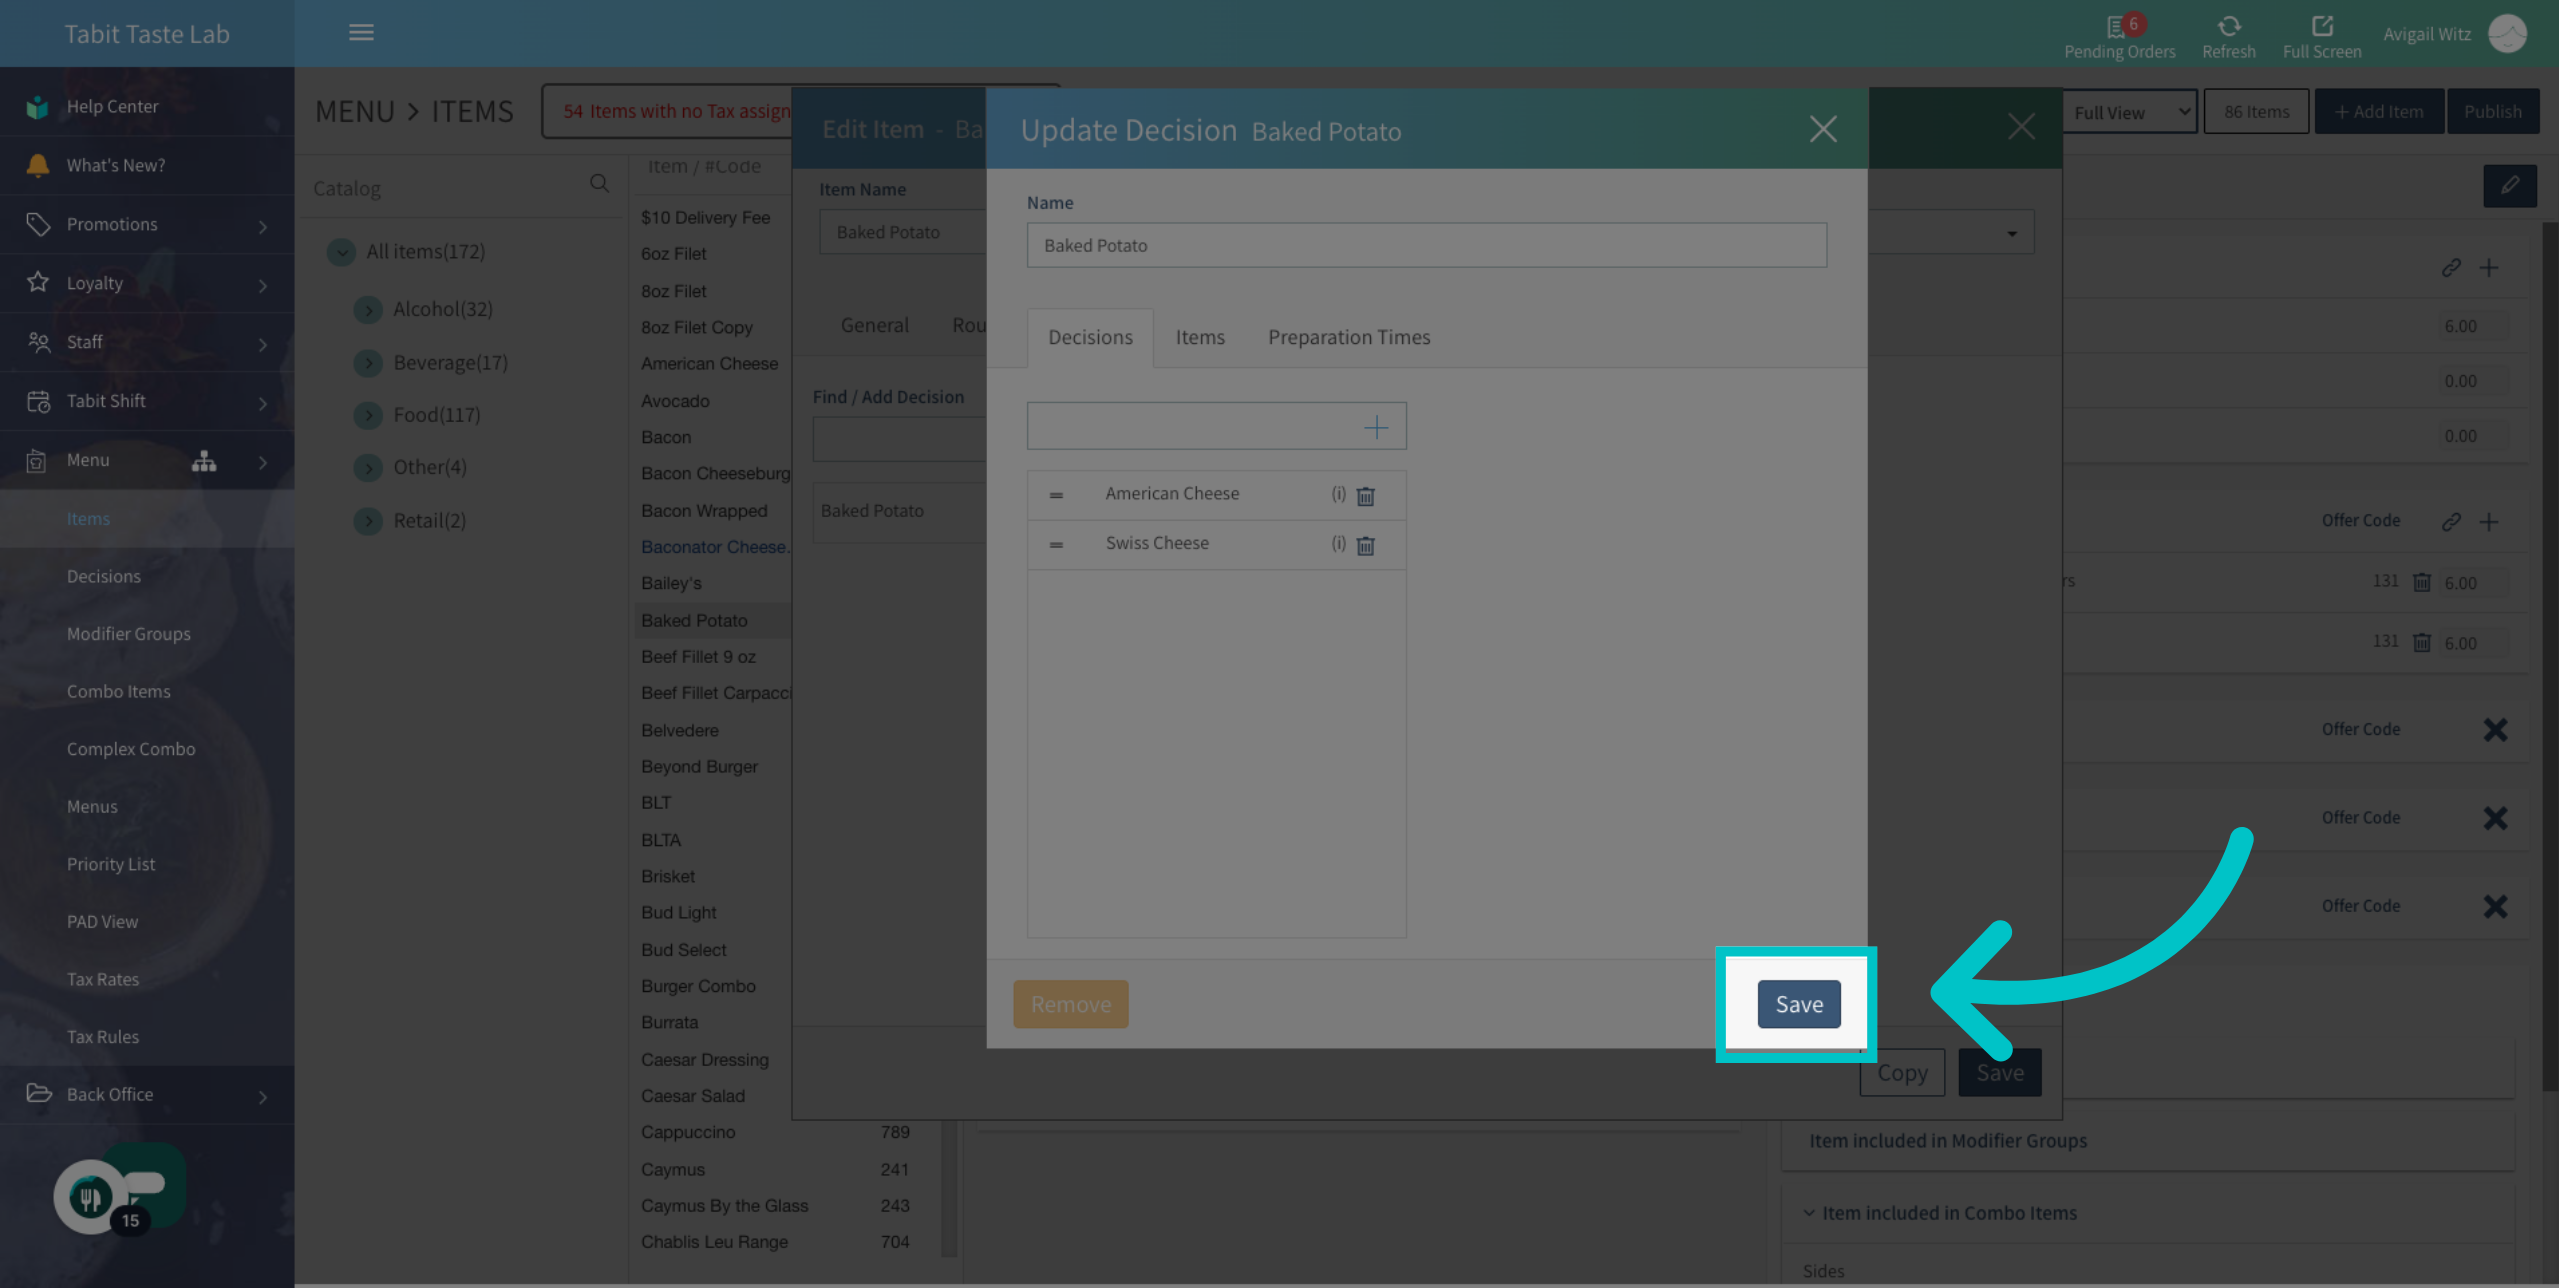
-
Don't forget to Publish to update the changes on all Tabit platforms
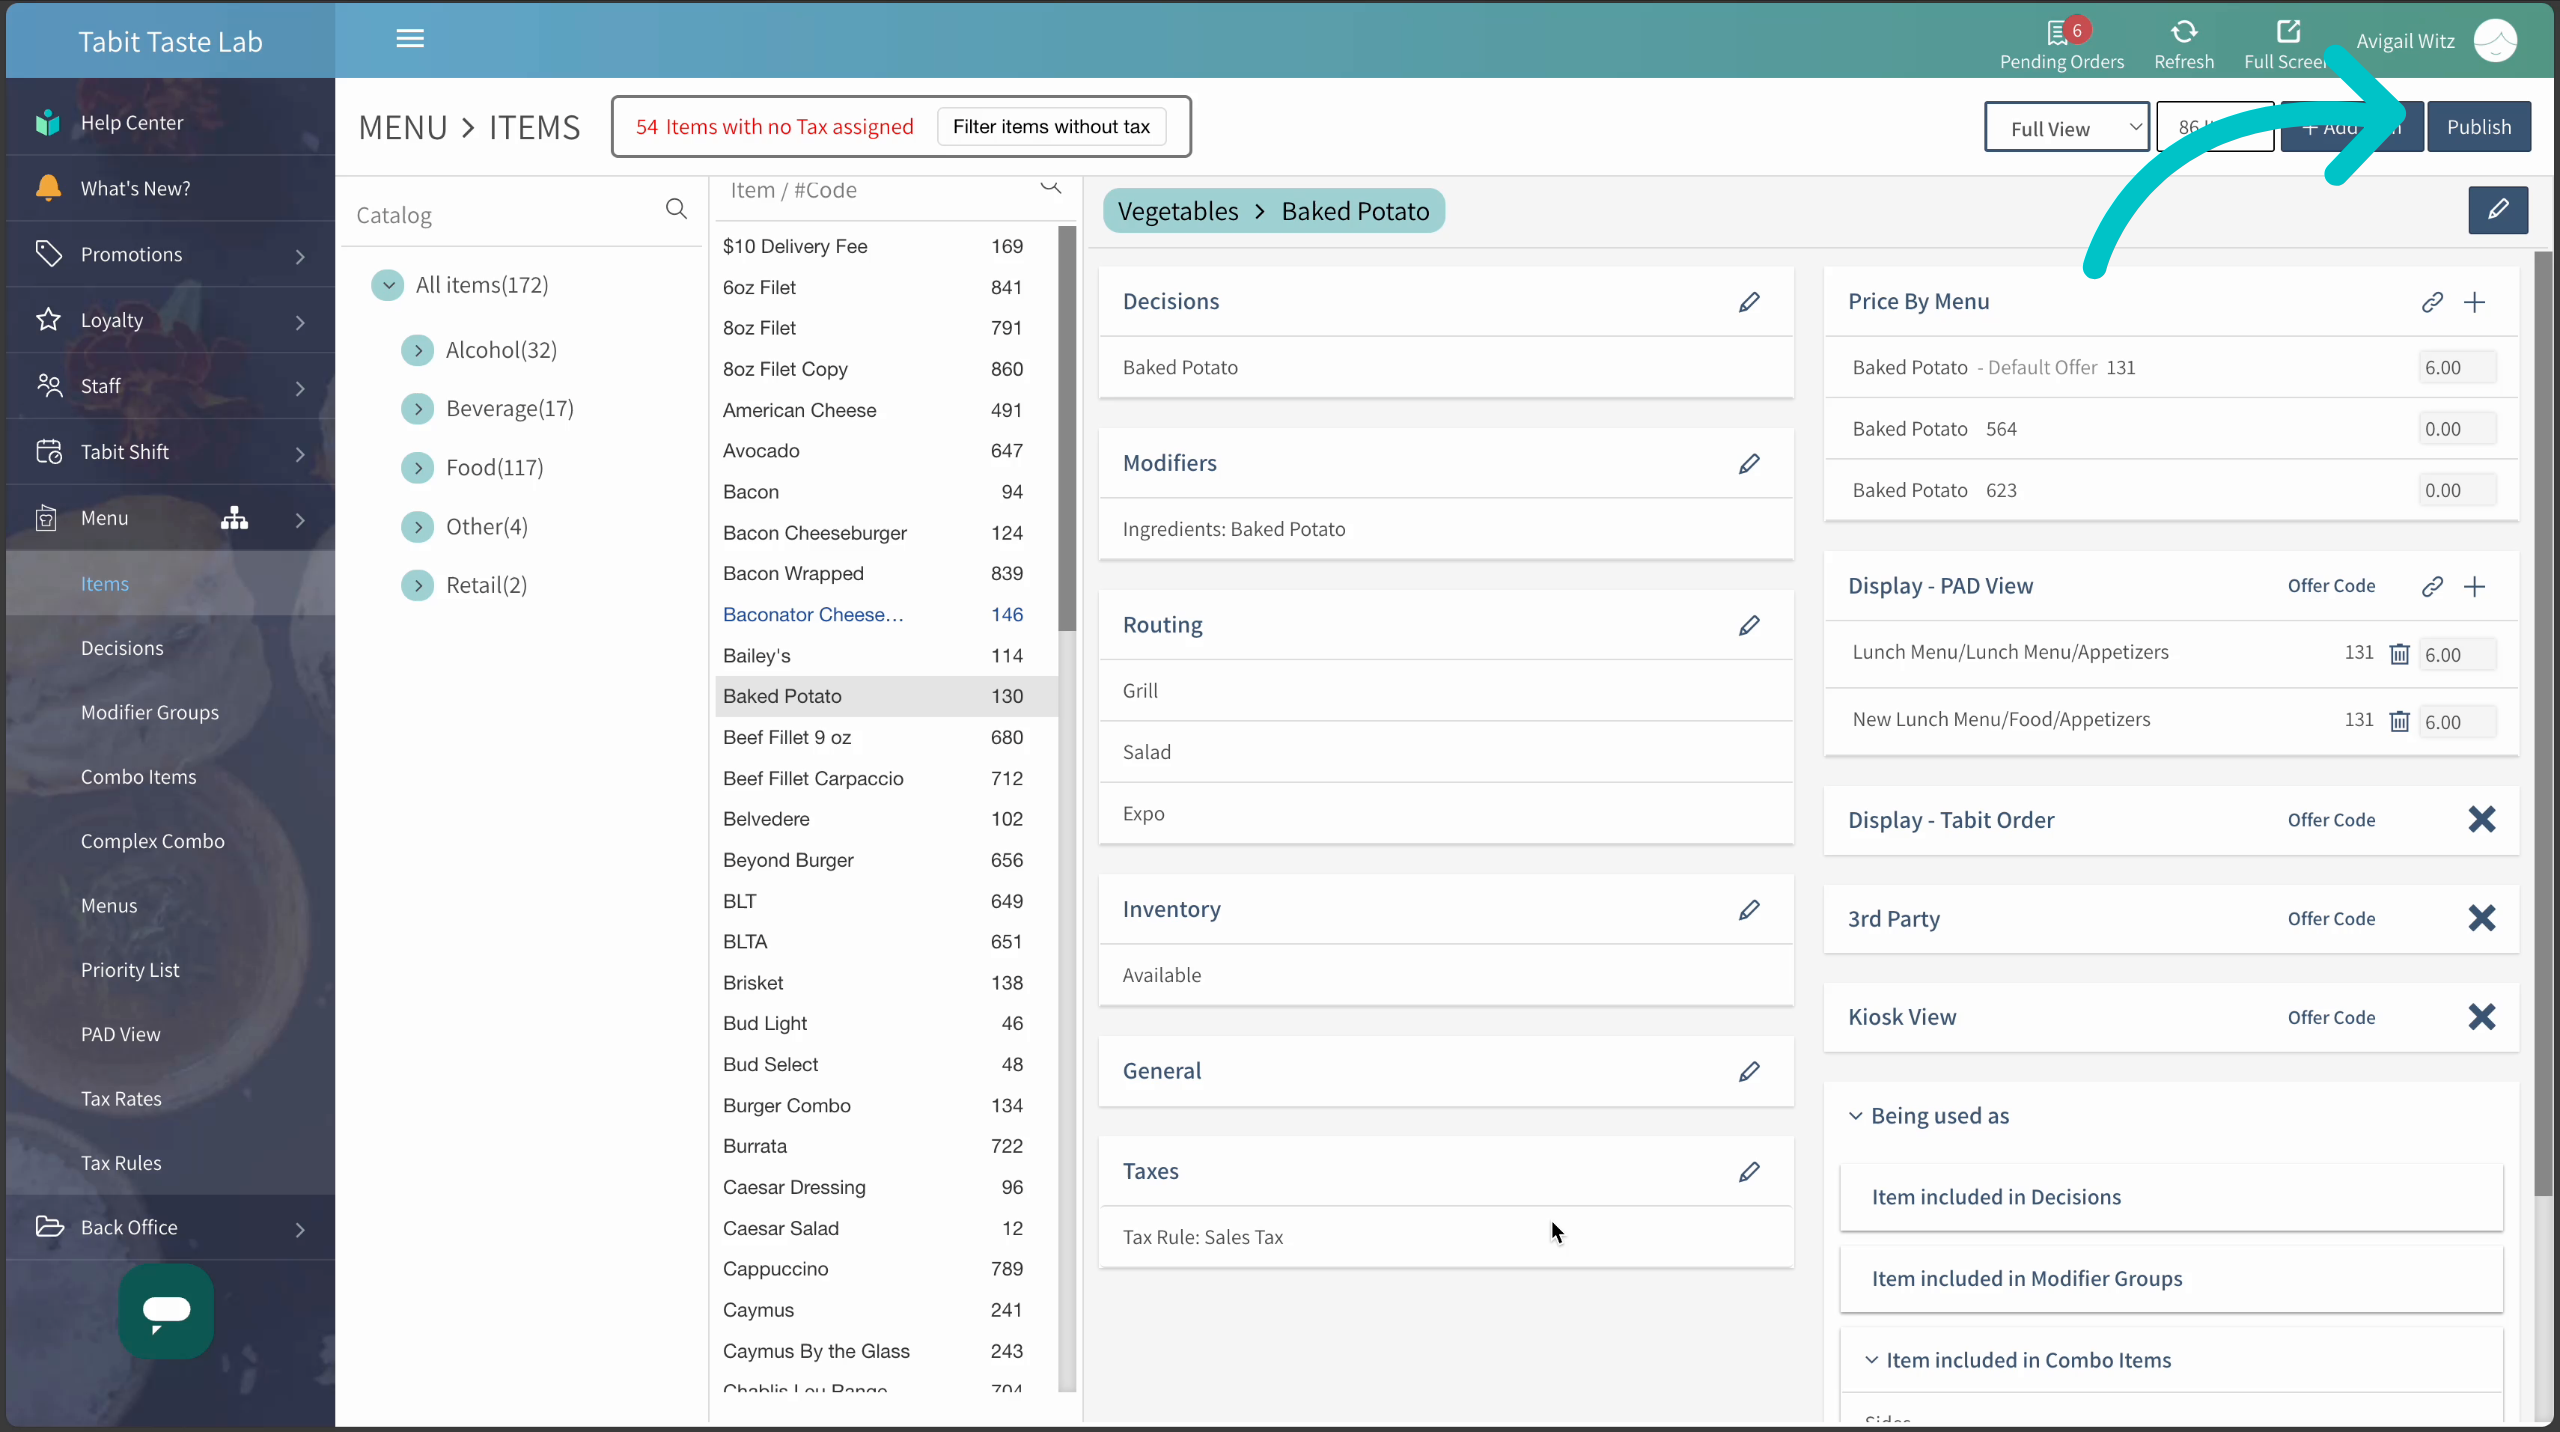
Through the Decision Catalog
-
In Tabit Office, go to Menu

-
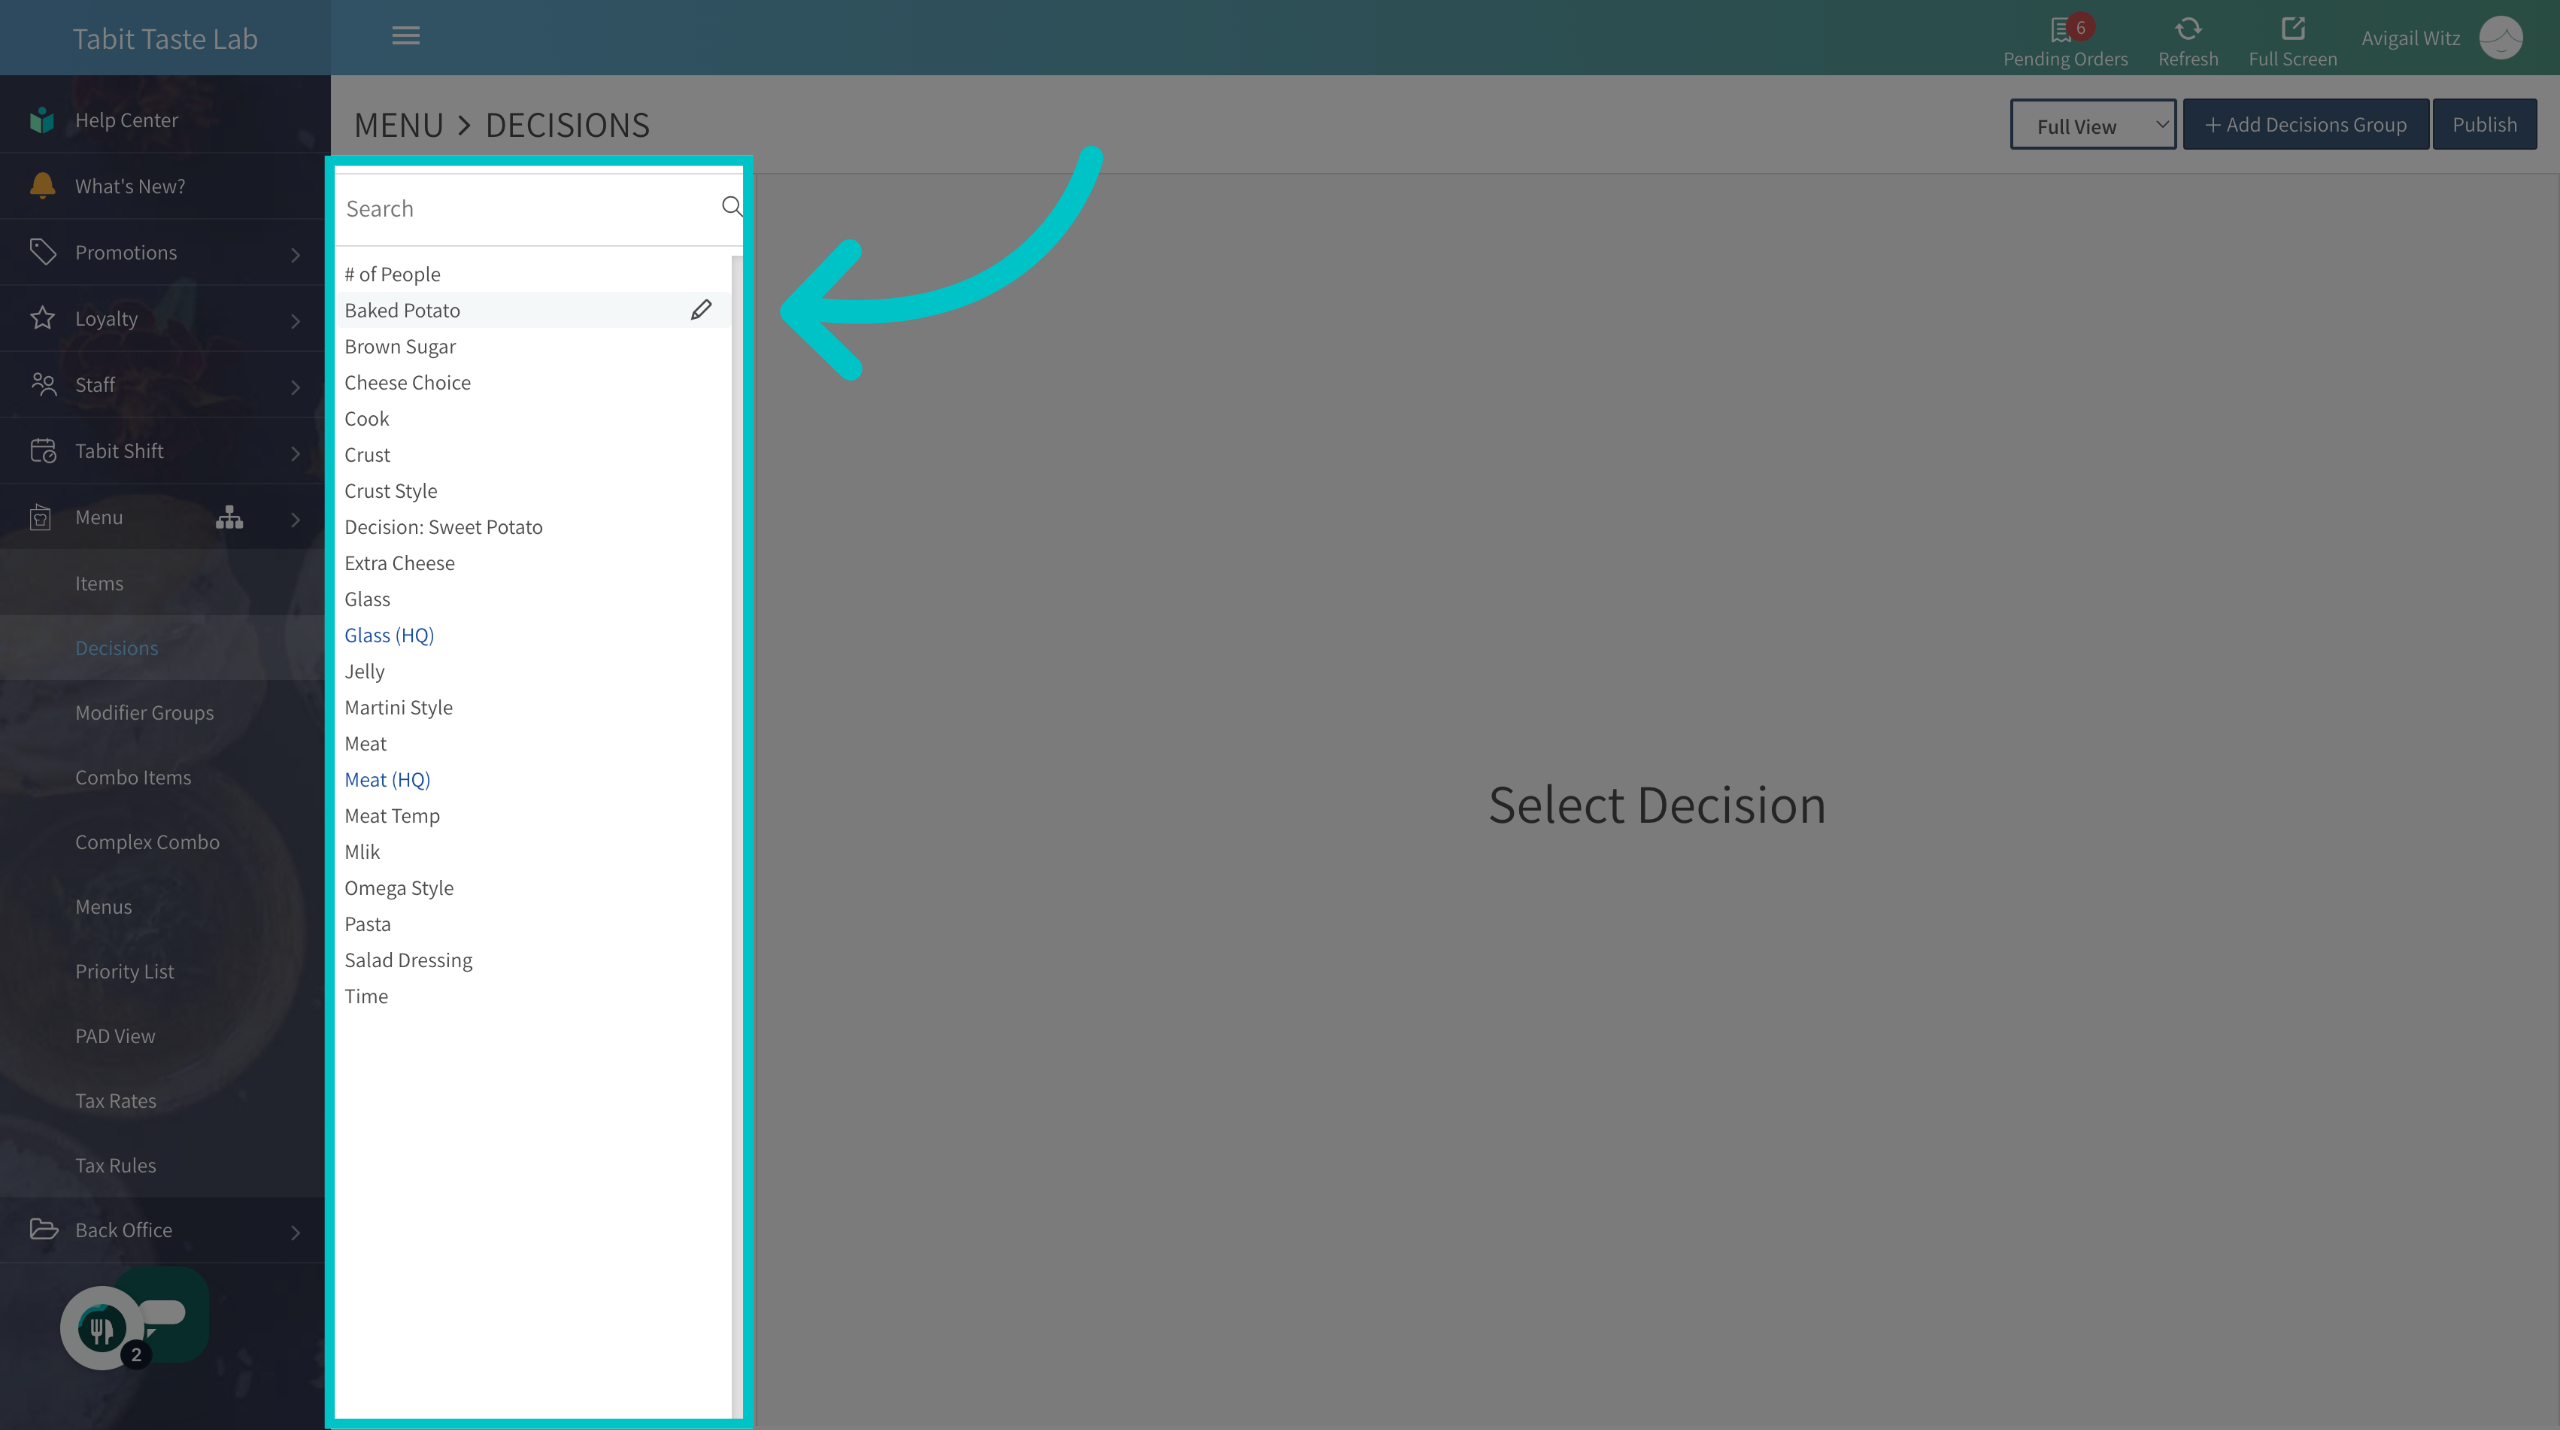
Navigate to the Decisions section

-
Locate the relevant Decision Group and select the edit icon
-
In this screen, you will be able to make various edits to the Decision Group:
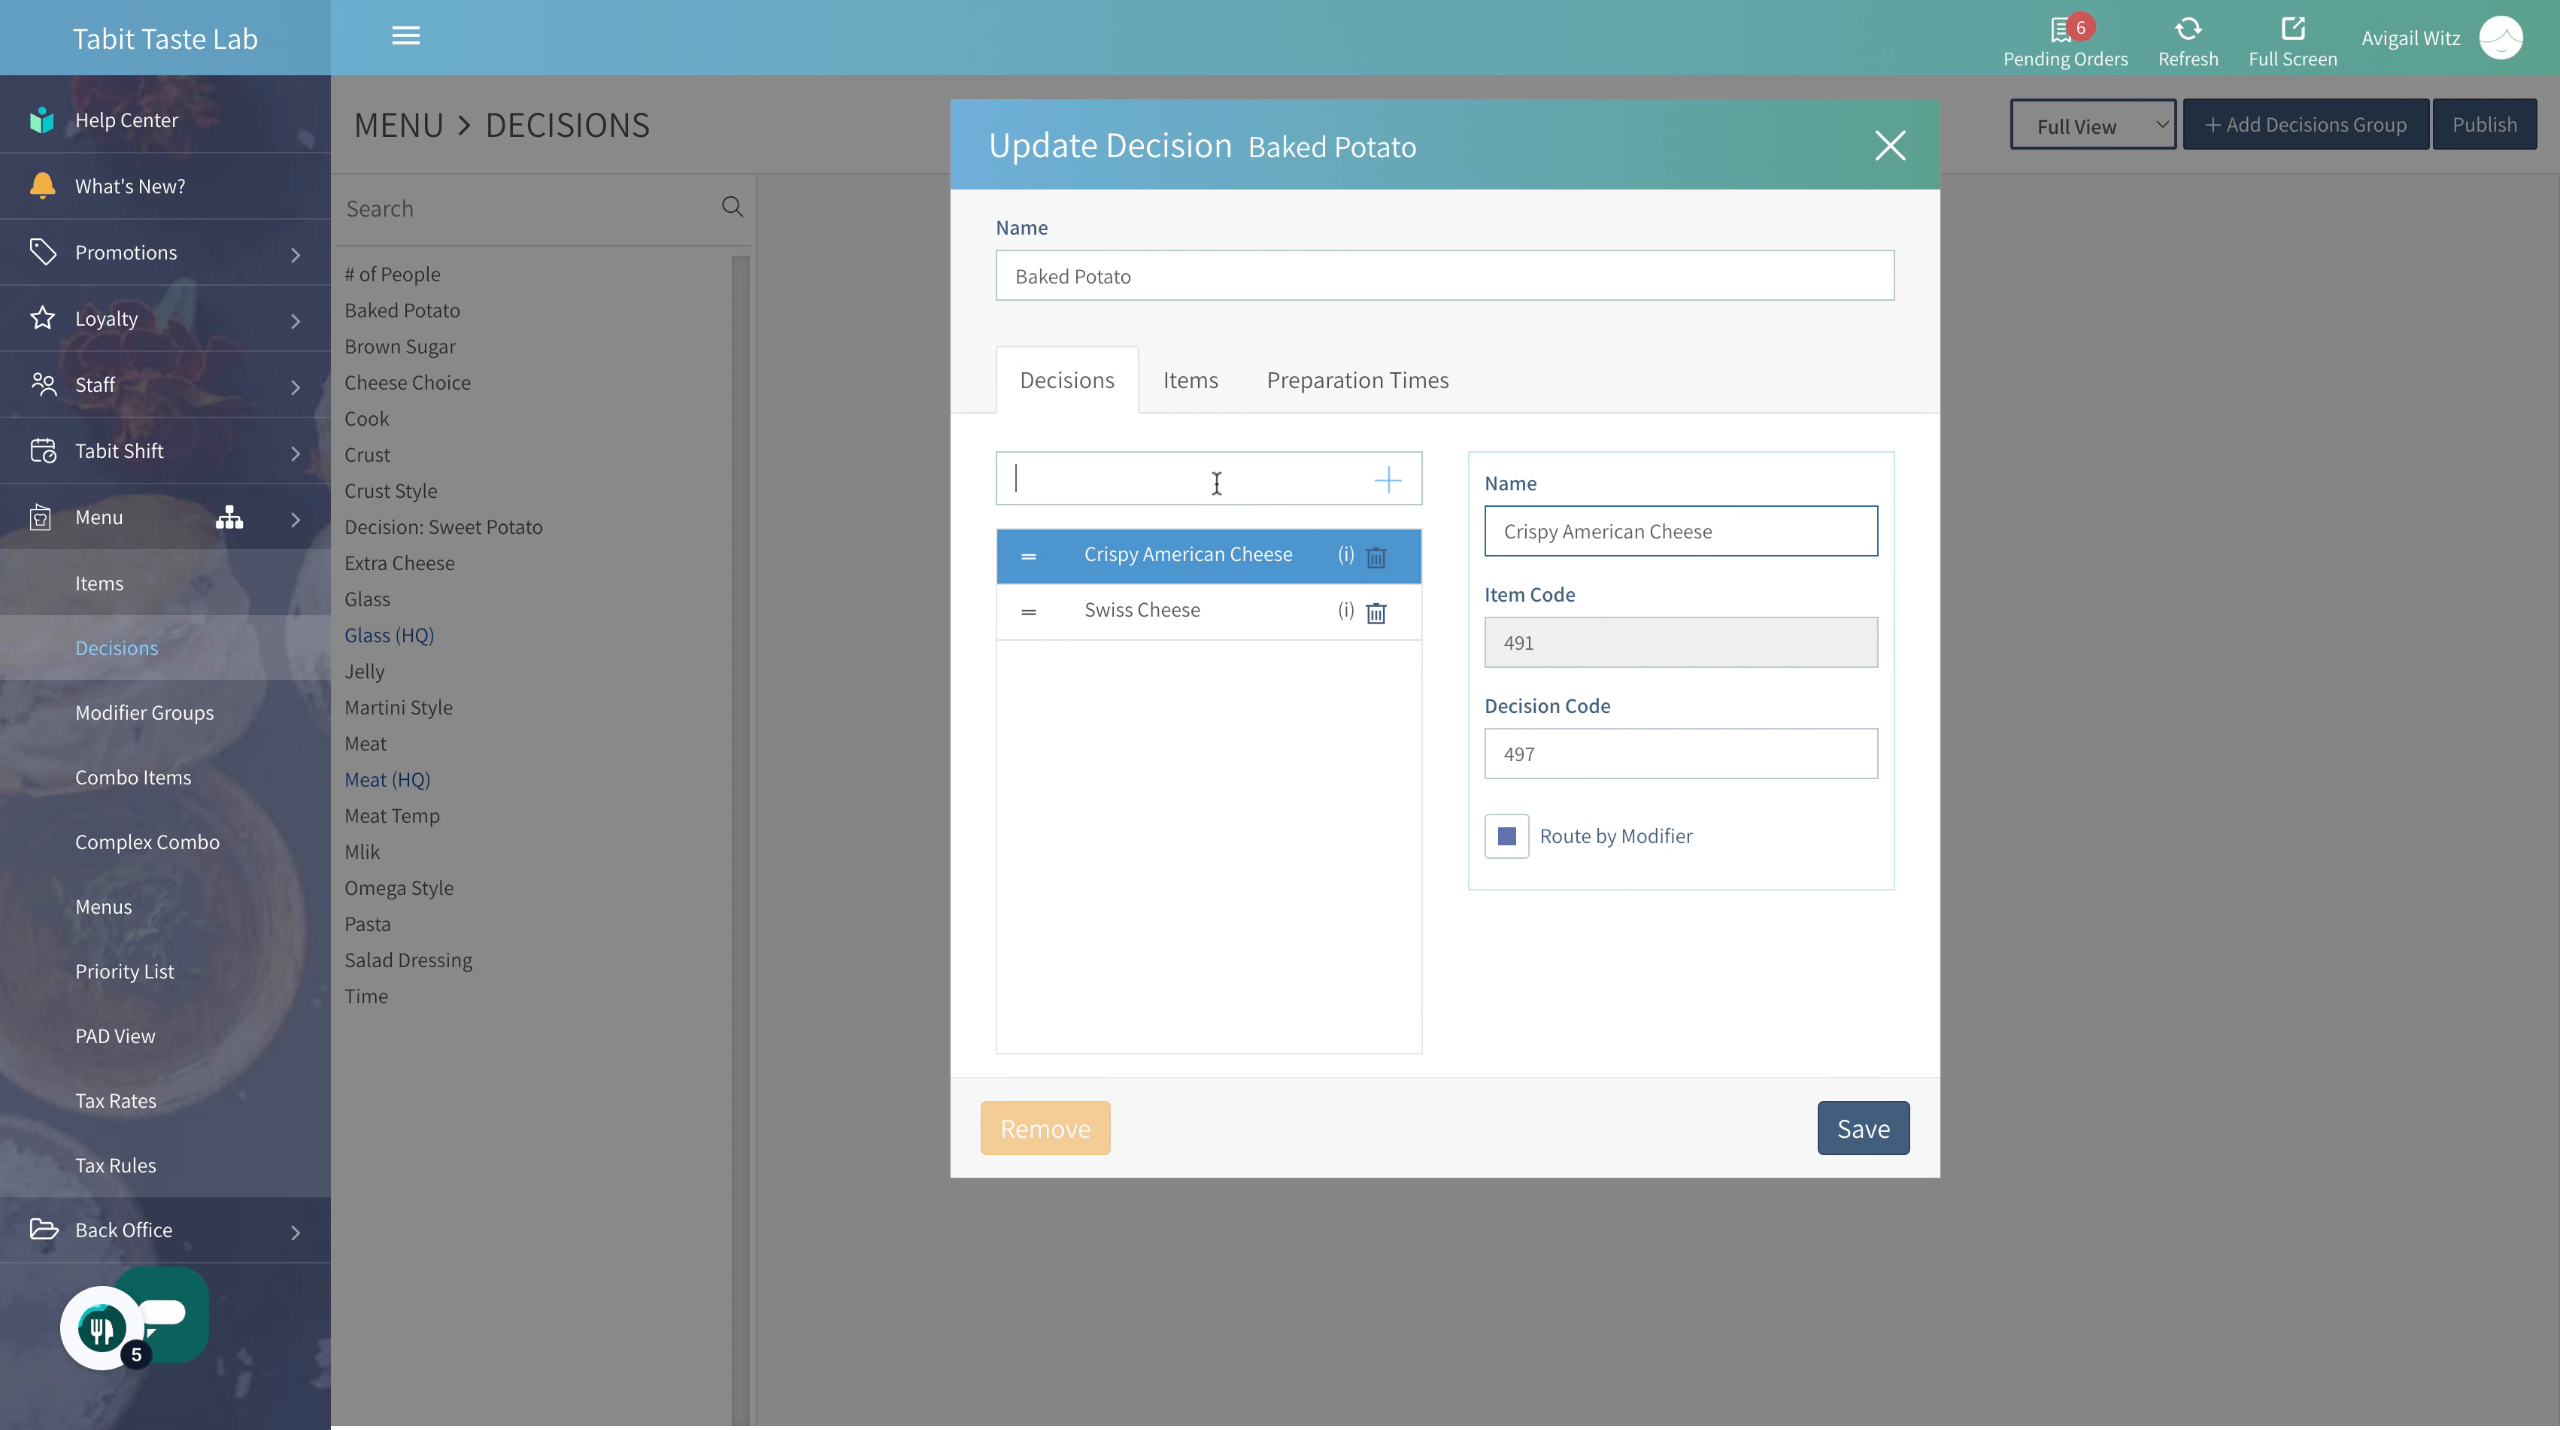
- To rearrange the group, select the two lines on the left and drag the items to where you'd like them to be
- Add or create a new decision
- Attach a Decisions Group to an item
- Edit a Decision's name
- Edit a default or enforce choice in a Decision Group
- Remove a Decision Group from the item
- Delete a Decision Group
-
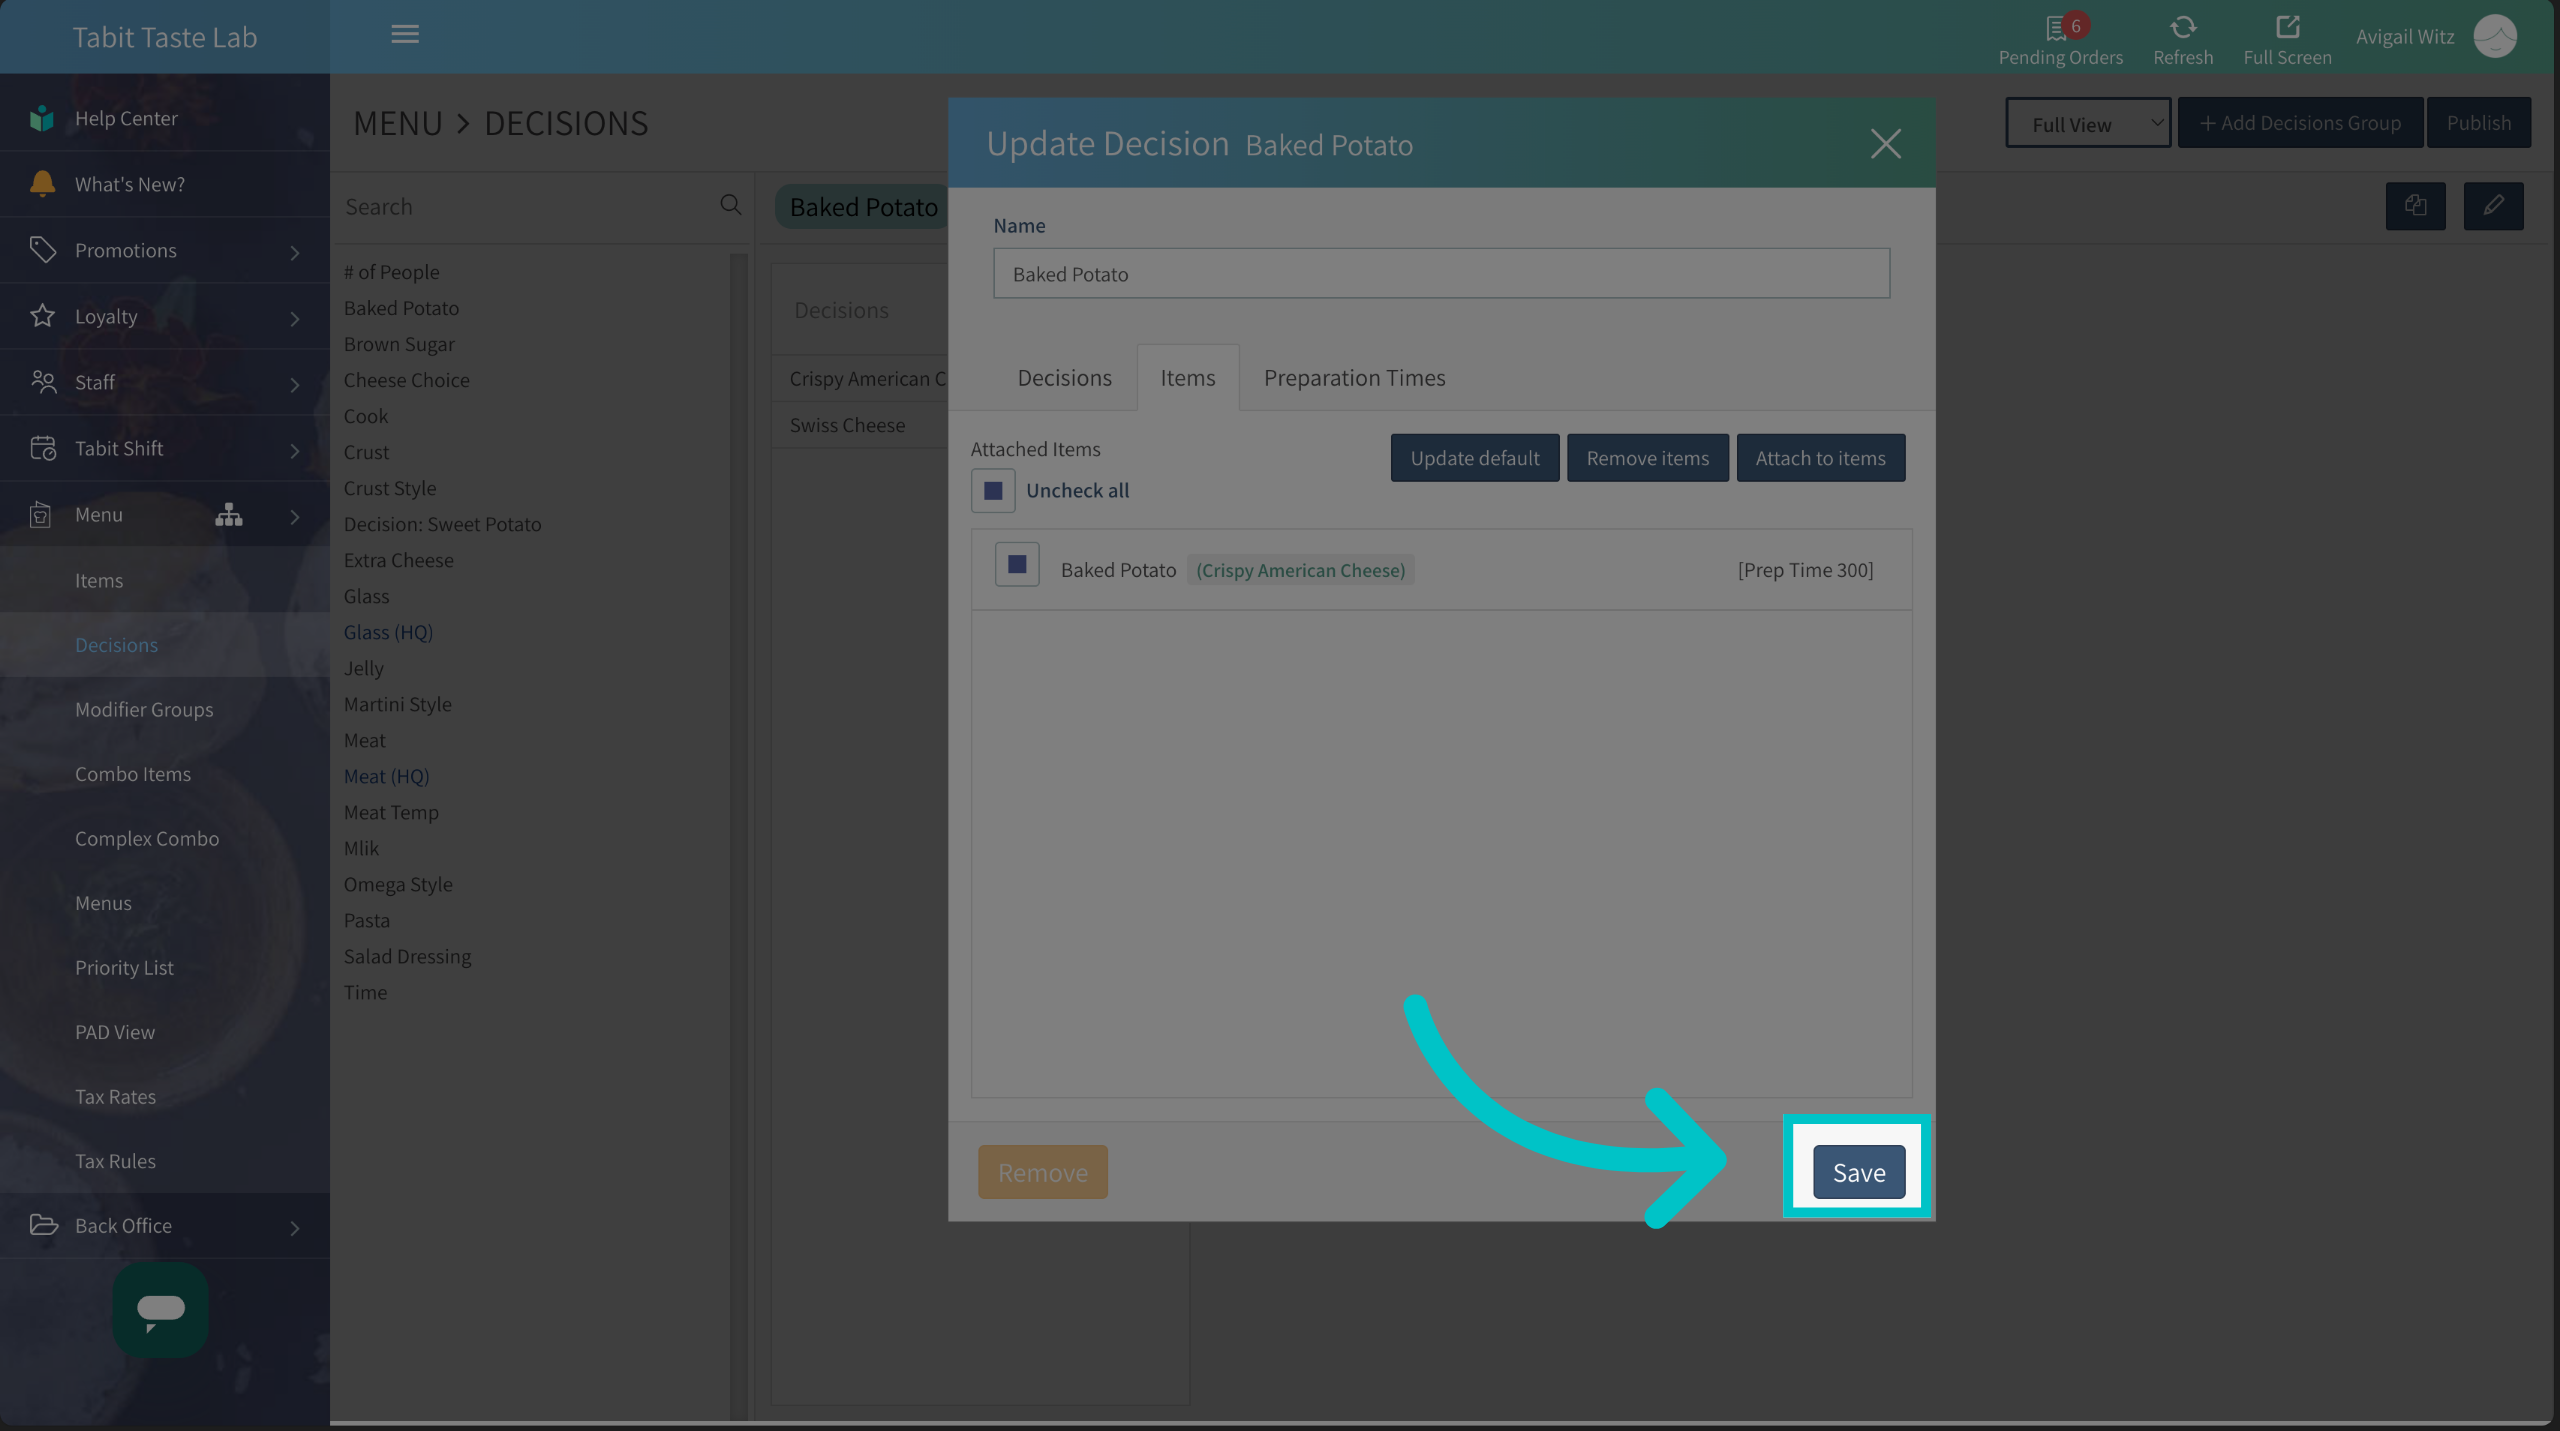
Once all the edits are made select Save
-
Don't forget to Publish to update the changes on all Tabit platforms