All employees must have a user account to access Tabit products and perform daily operations. Creating an employee profile ensures team members can sign in securely, access the tools they need, and appear correctly across reporting, guest checks, and payroll data.
This guide walks through the full process of adding a new employee in Tabit Office, from entering basic details to assigning profiles and permissions. It’s intended for employees who require access to Tabit Office and/or the PAD as part of their role. For employees who only need PAD access and do not require Tabit Office access, a user can either be created in Tabit Office or directly on the PAD instead.
Follow the steps below to learn how to add a new employee in Tabit Office:
-
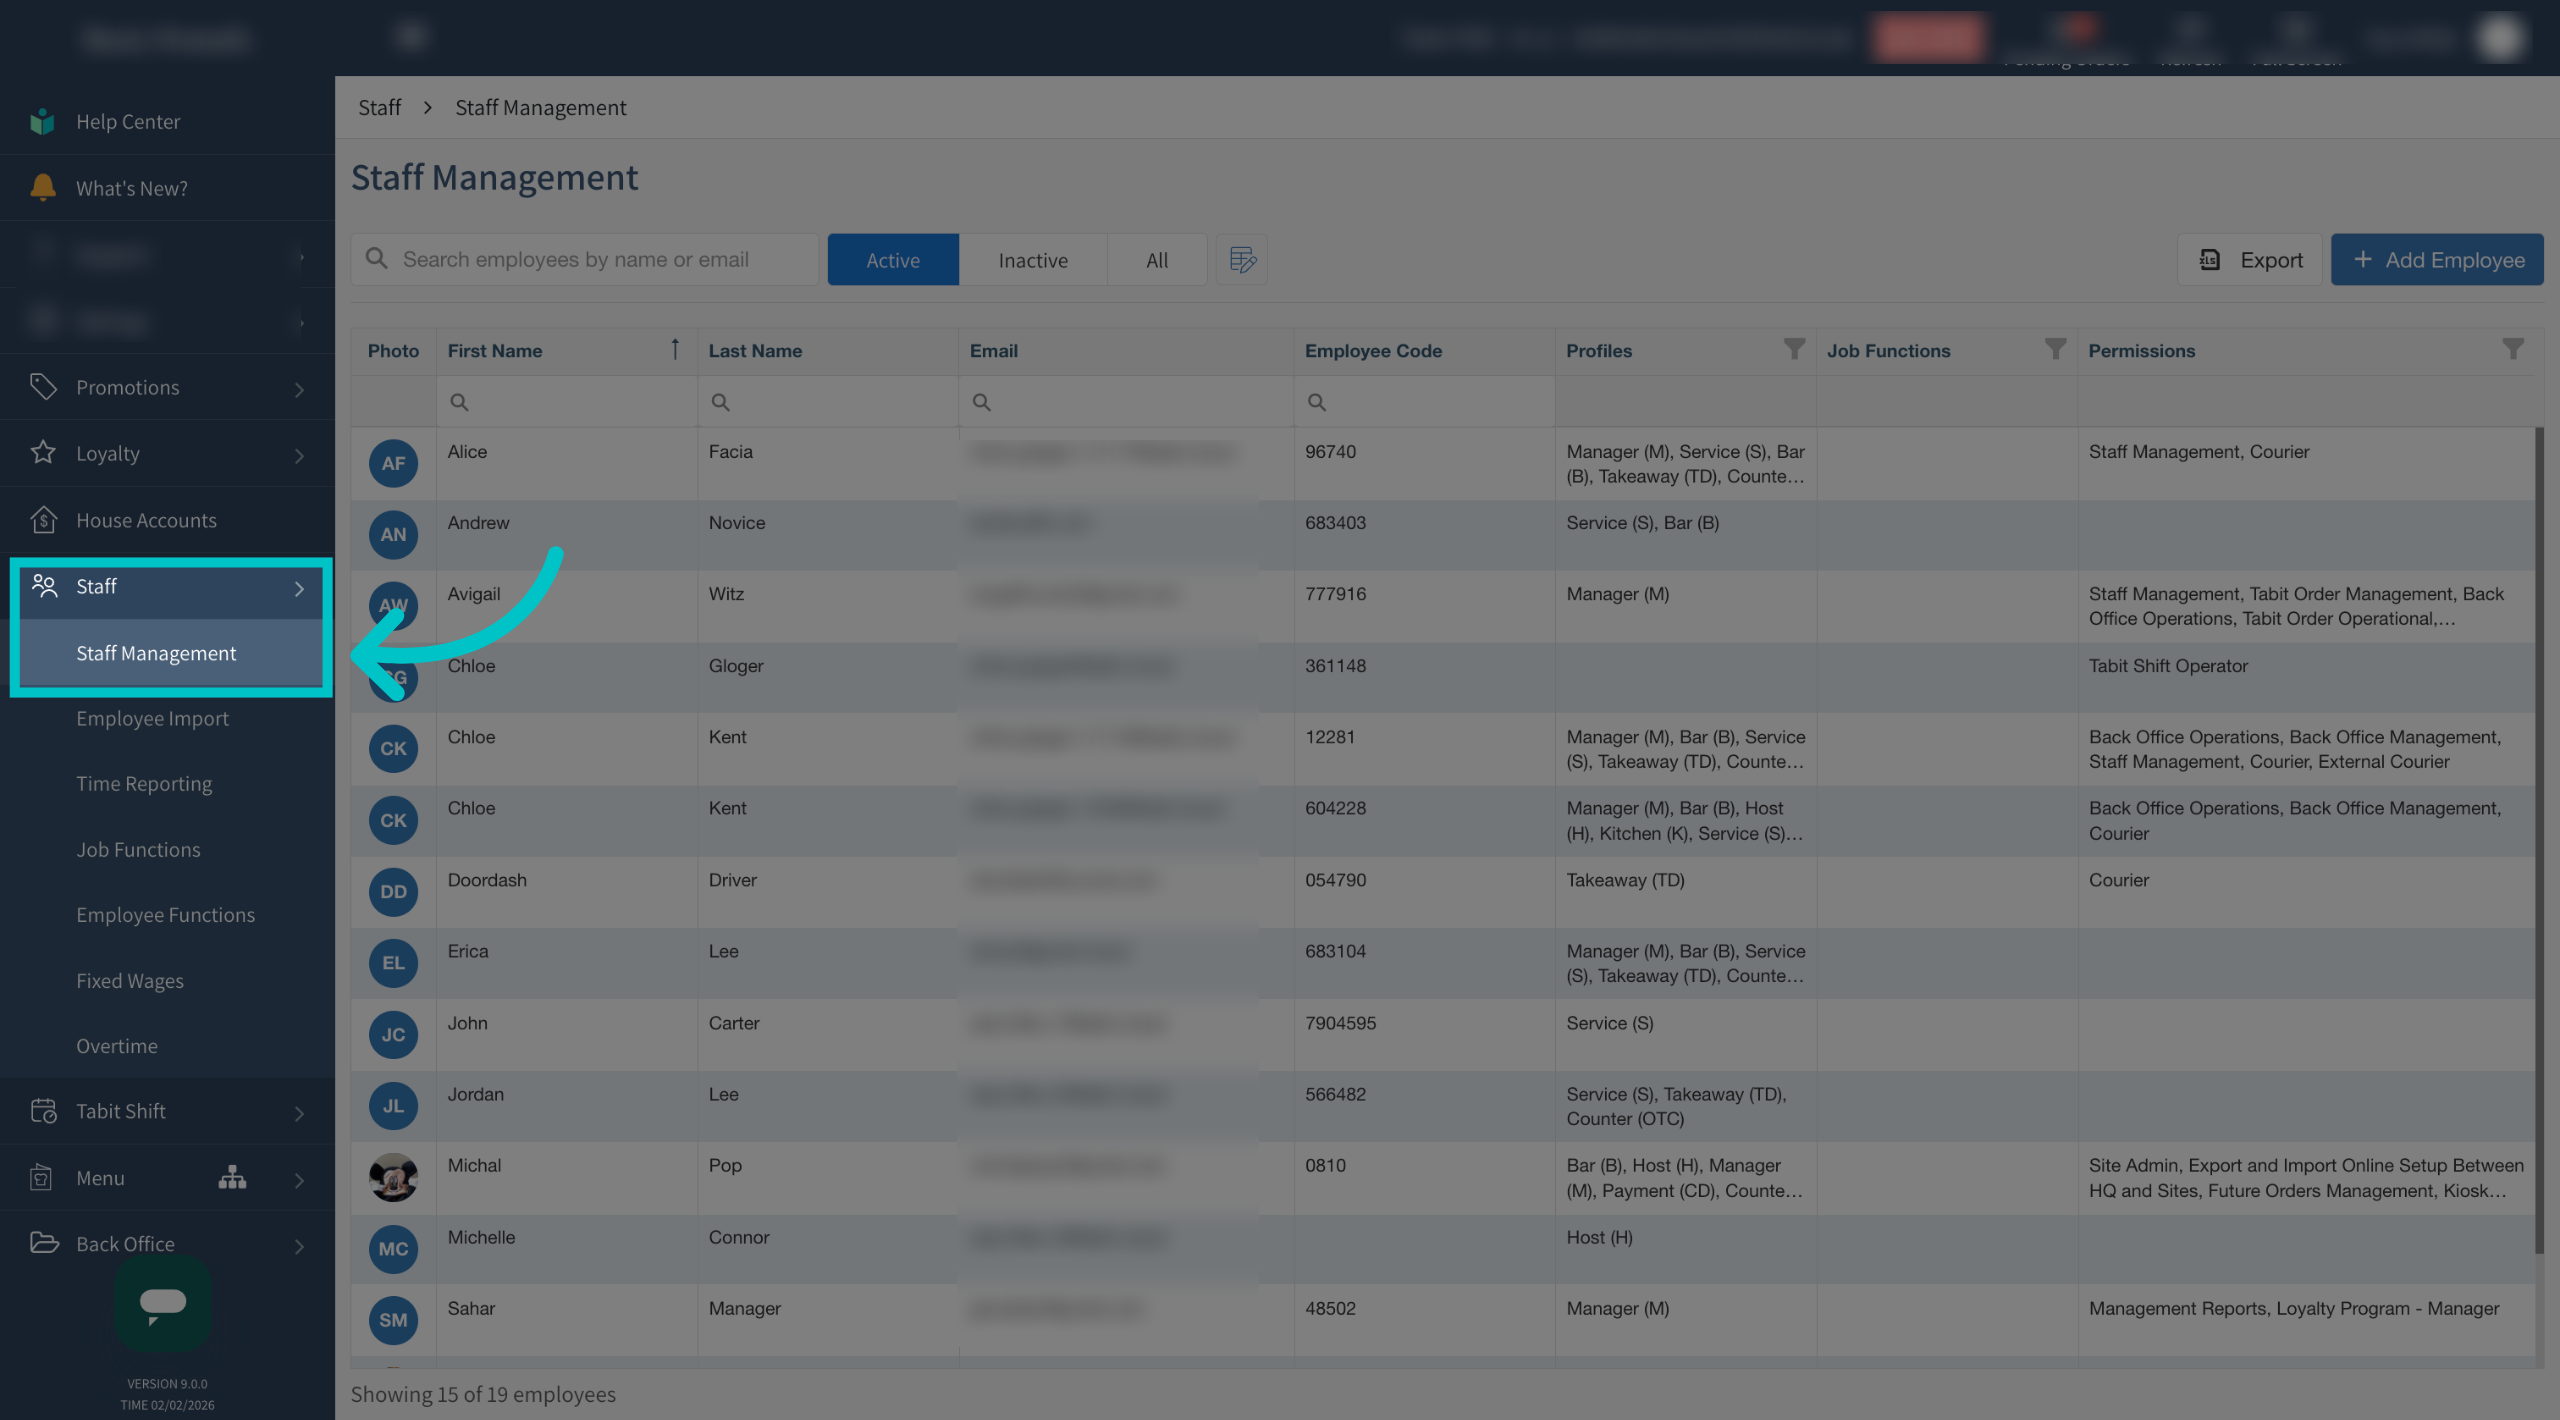
In Tabit Office, go to Staff > Staff Management
-
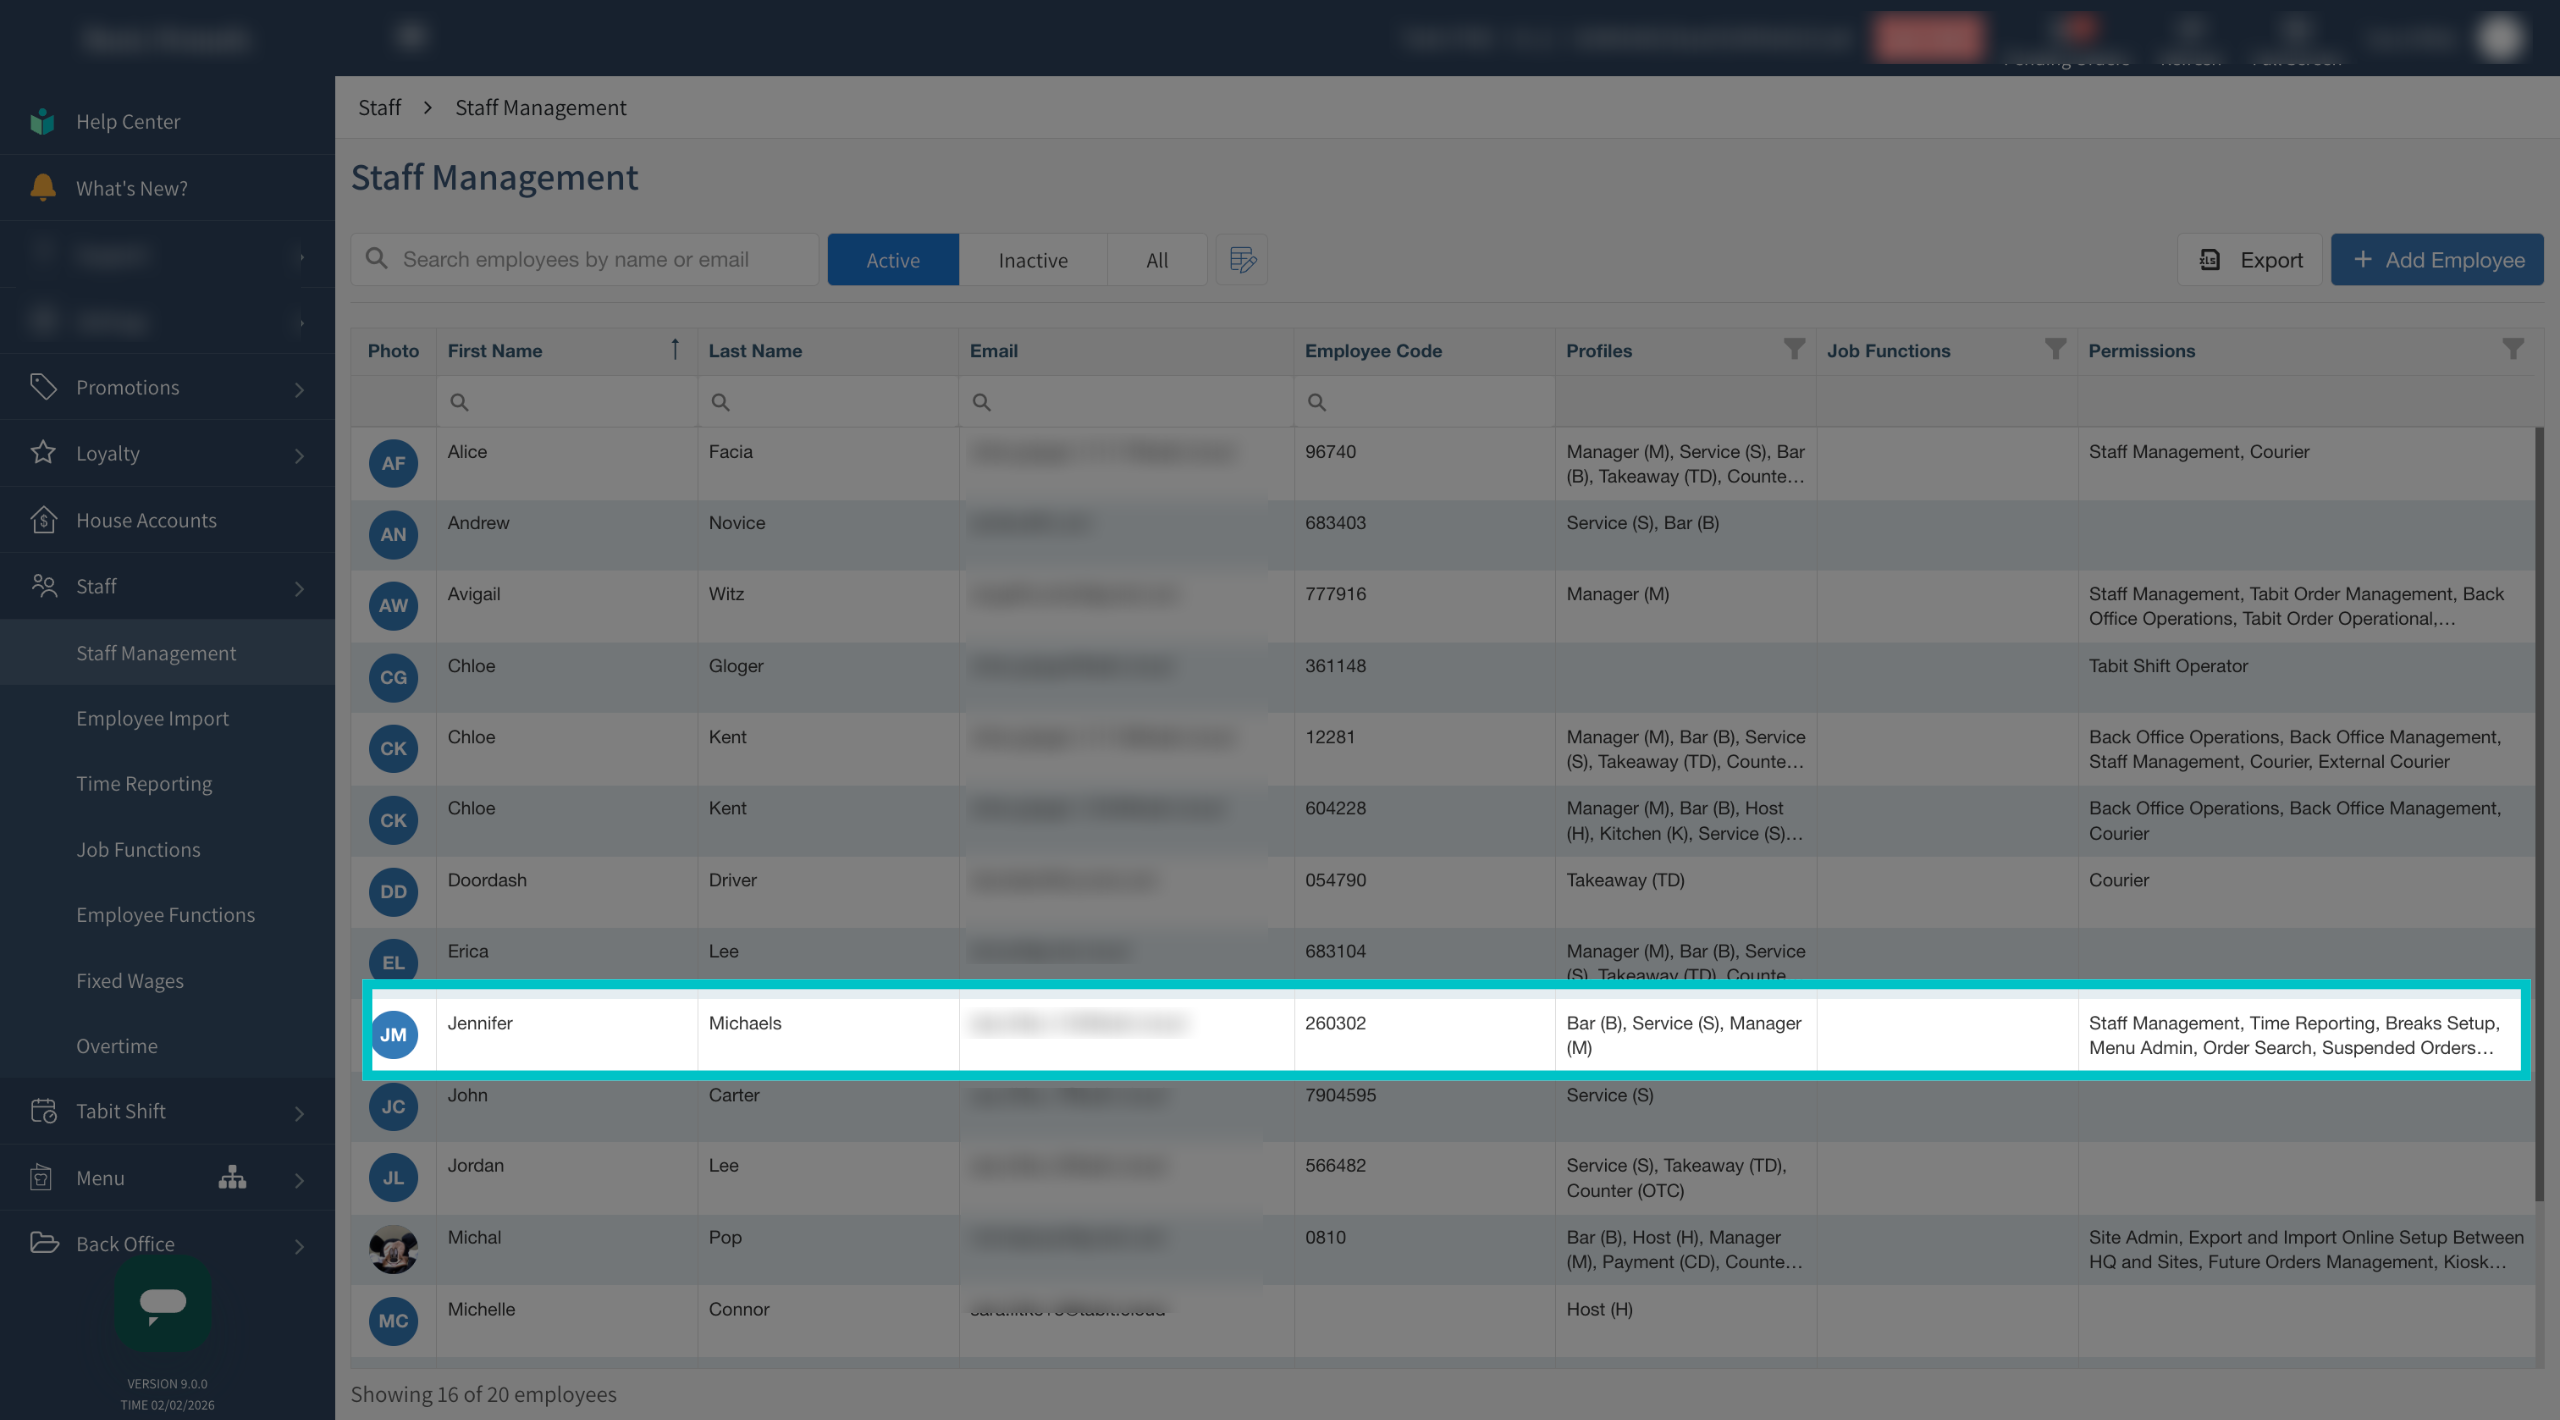
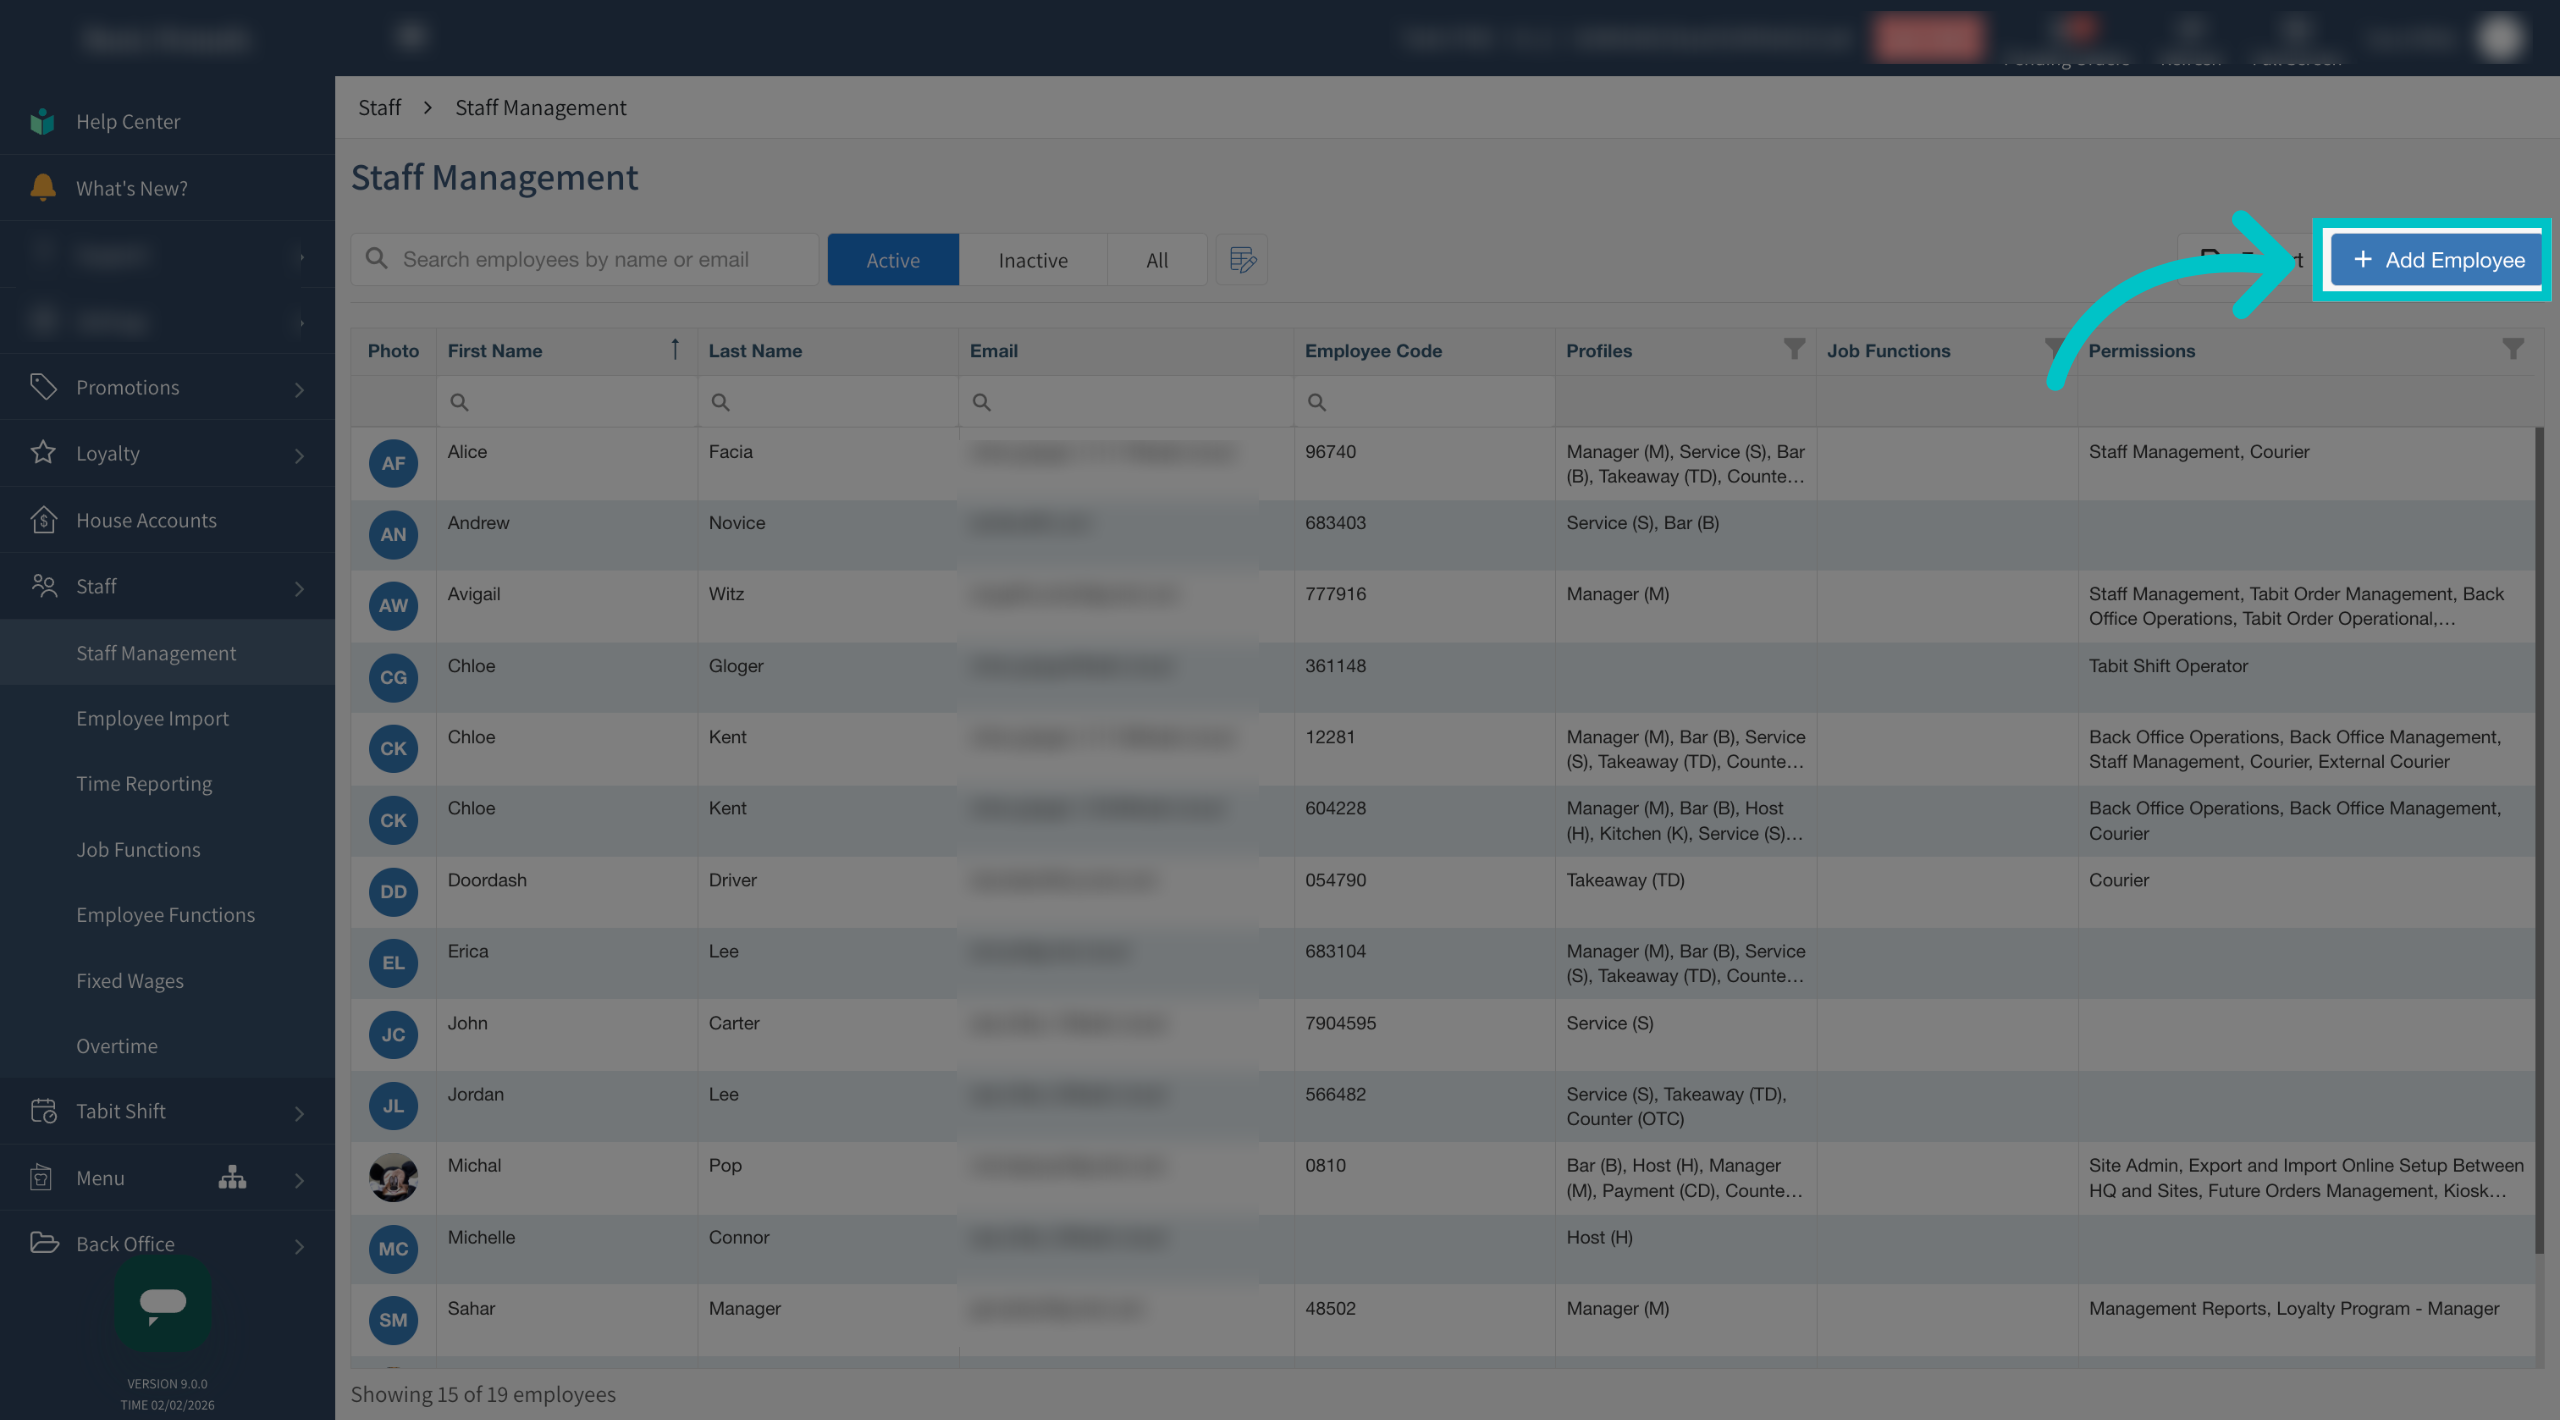
Here you'll find a list of all existing employees. Select +Add employee in the top right to create a new user
-
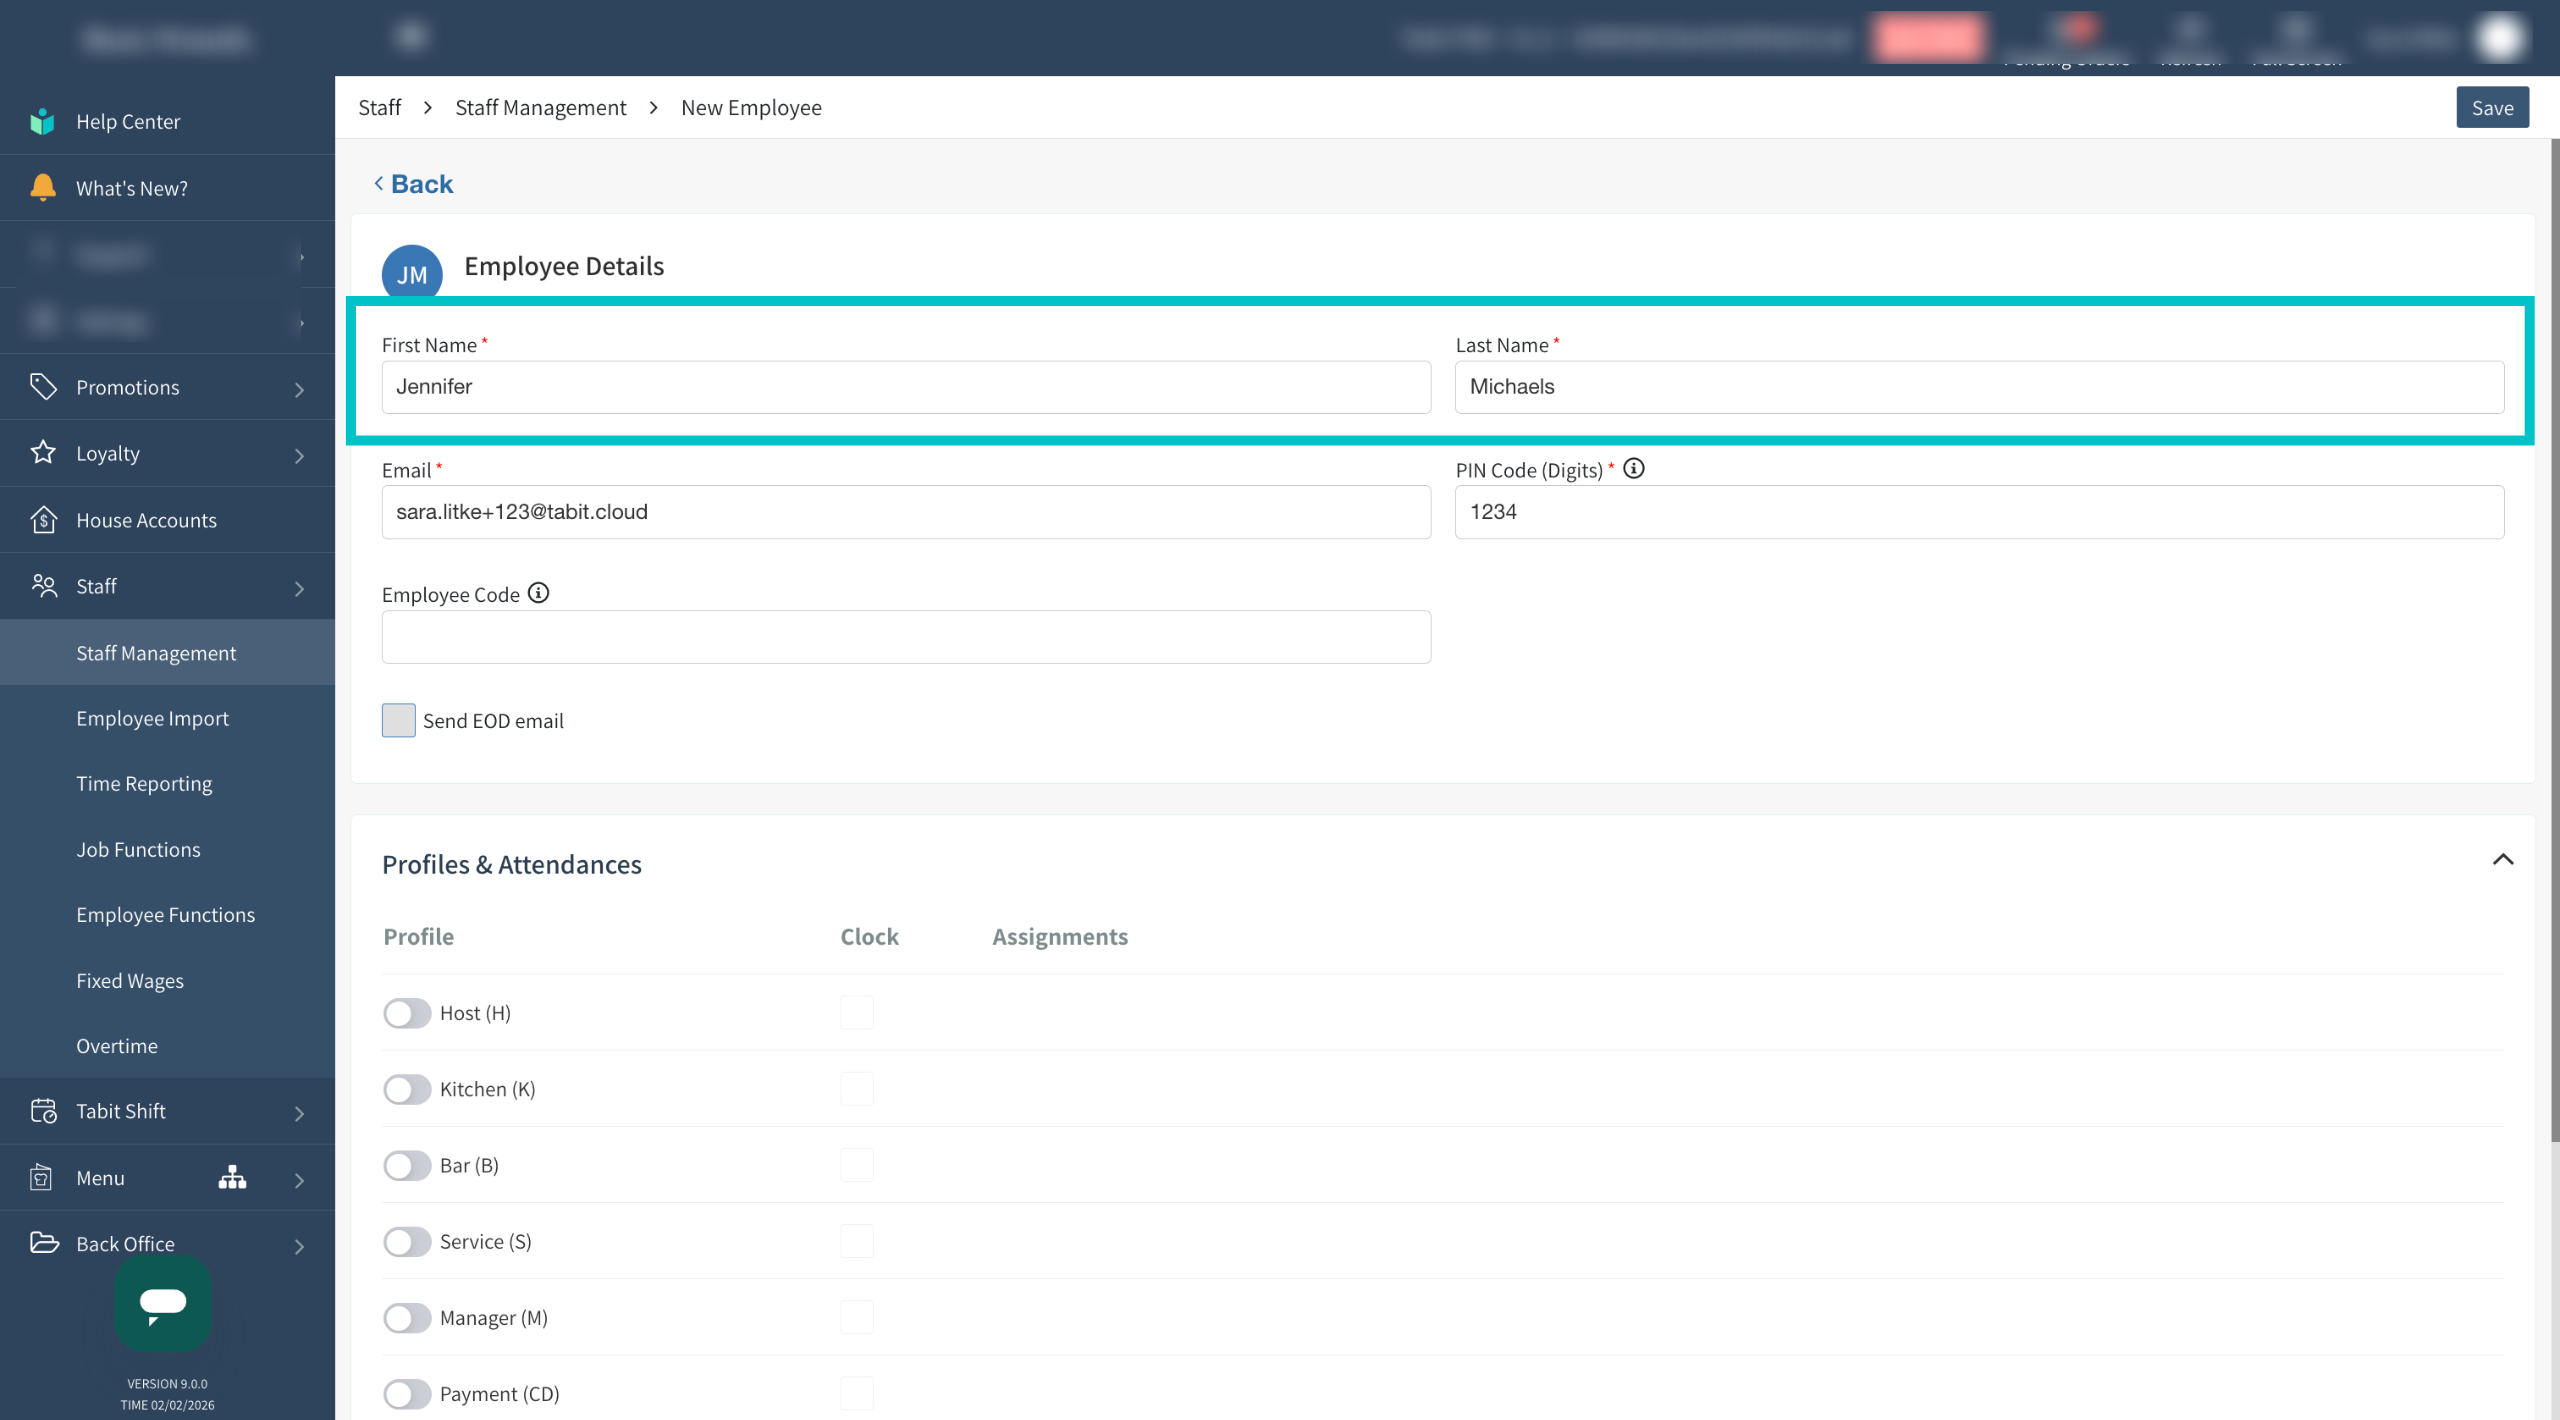
Enter the employee's details, including their first and last name. This name will appear on all reporting and guest checks
-
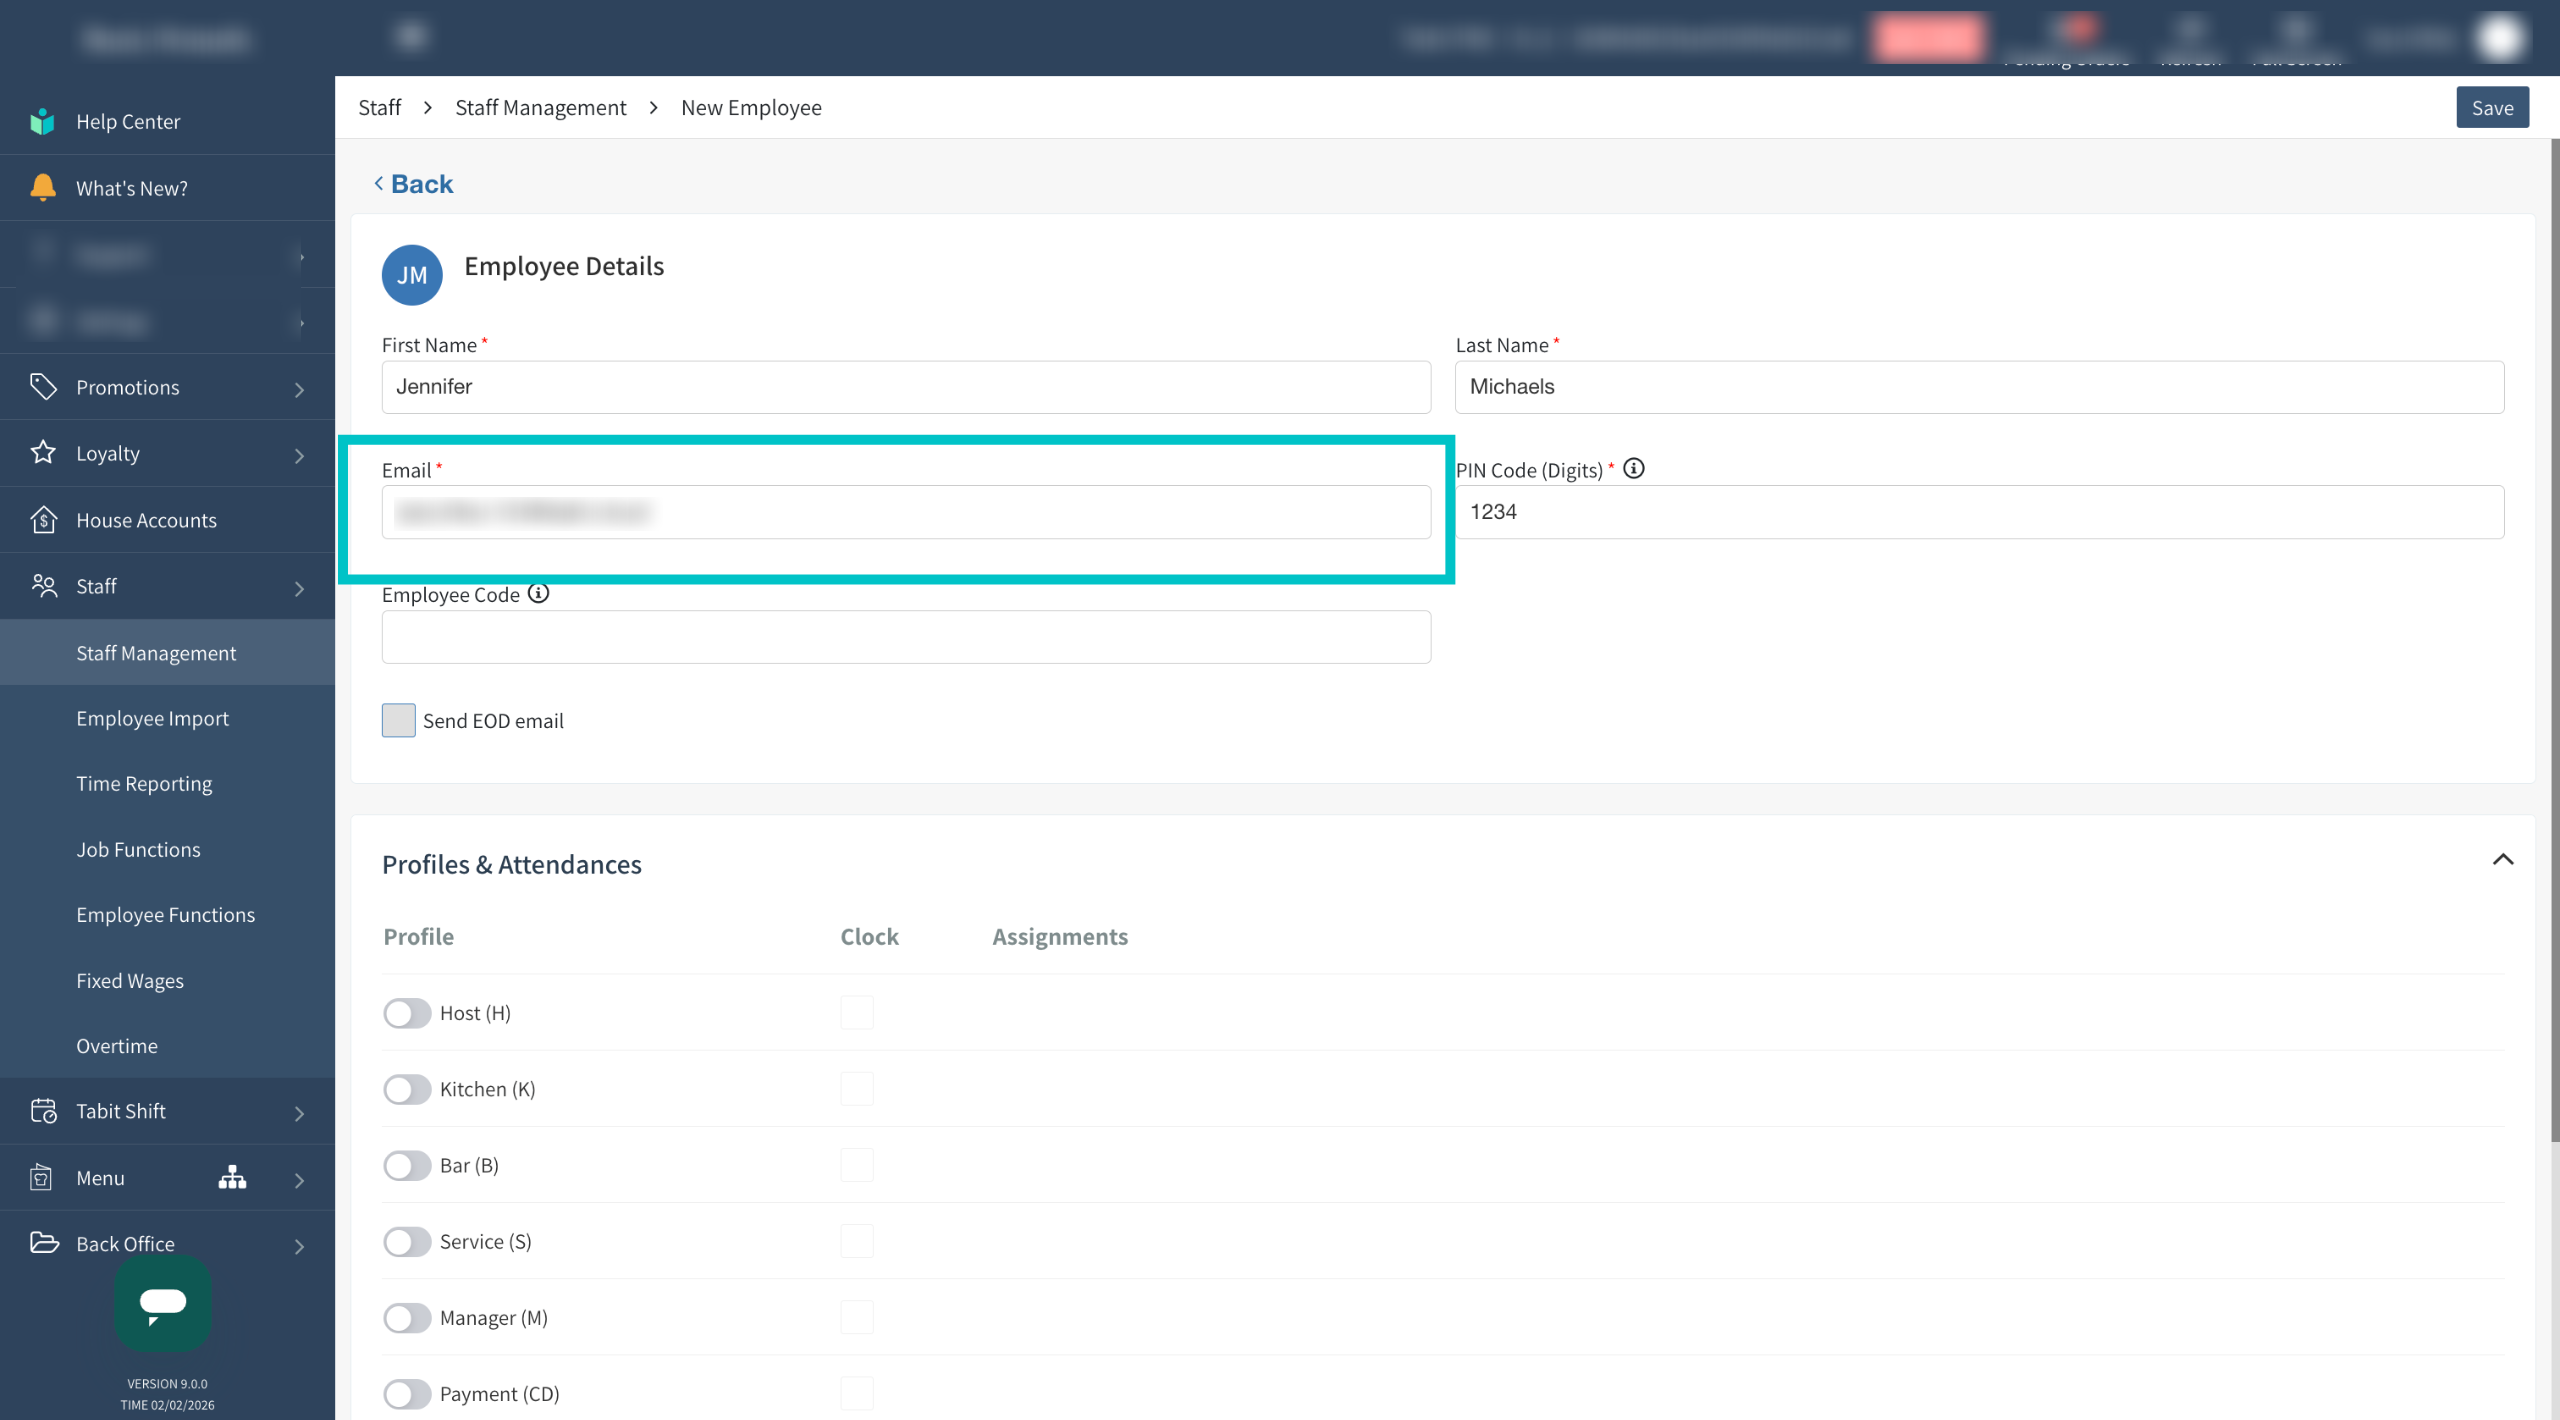
Enter their email
Every employee must have a unique email which cannot be changed once the user is created
-
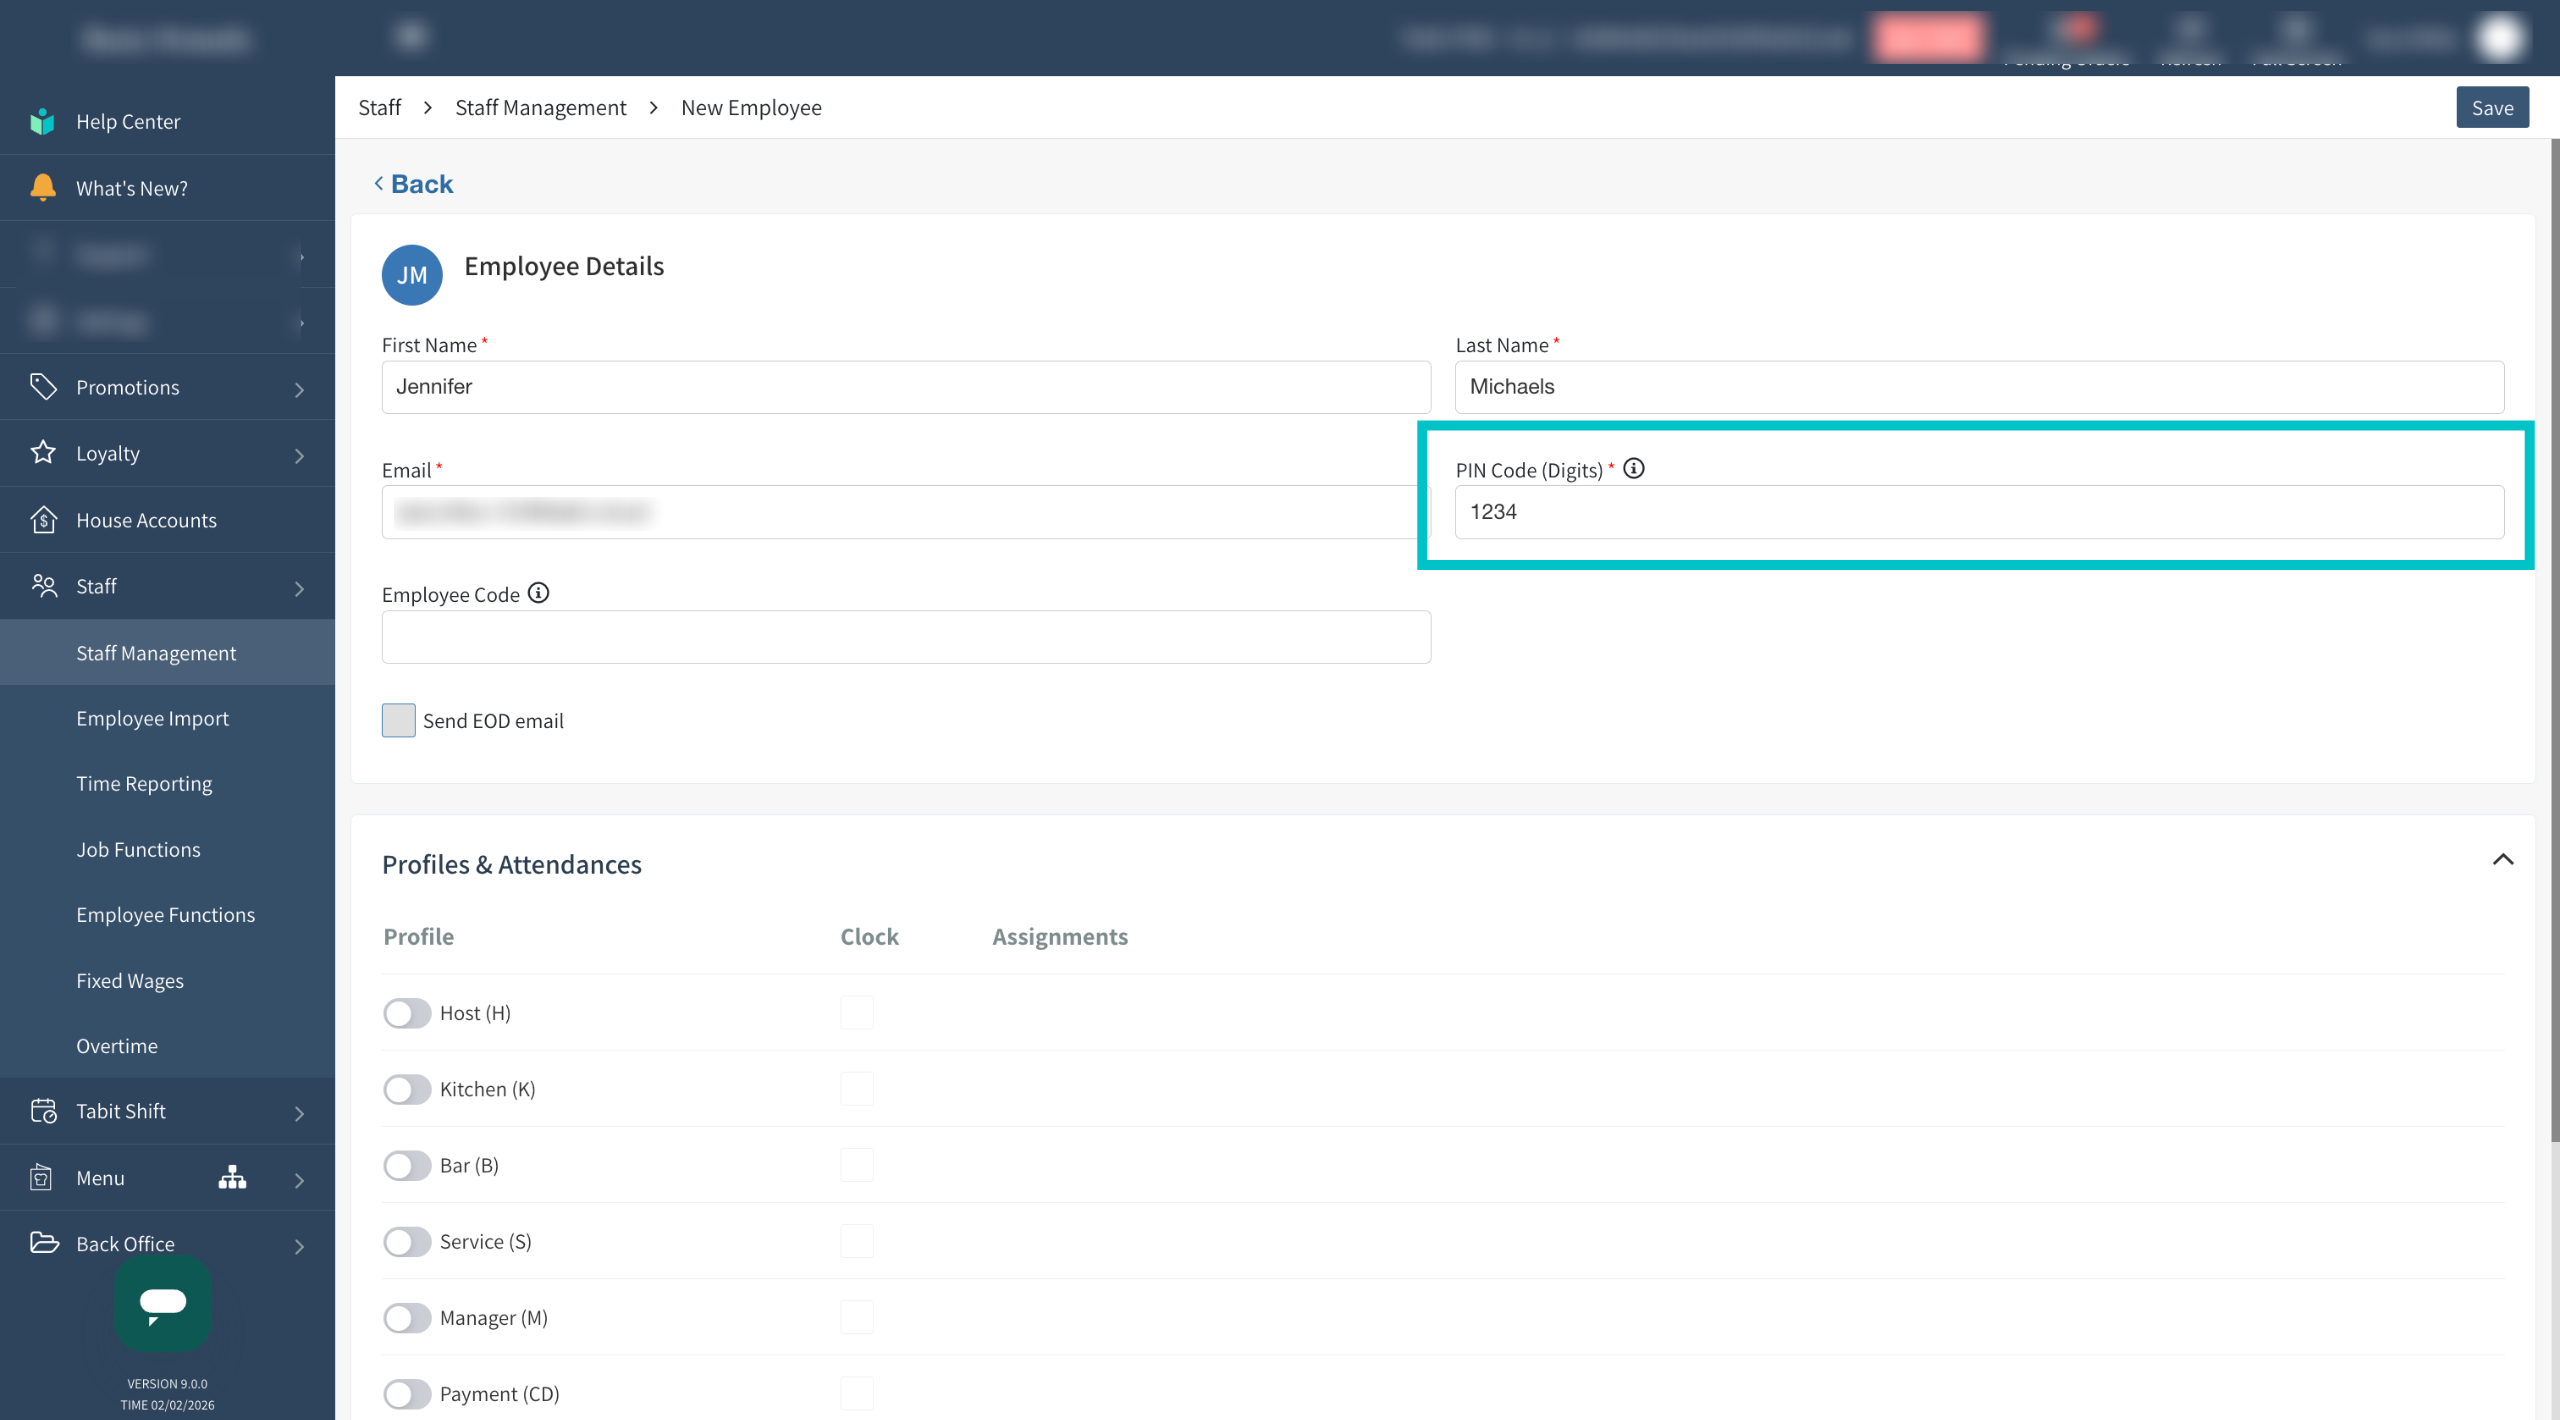
Create the four digit PIN code the employee will use to sign in on the PAD
-
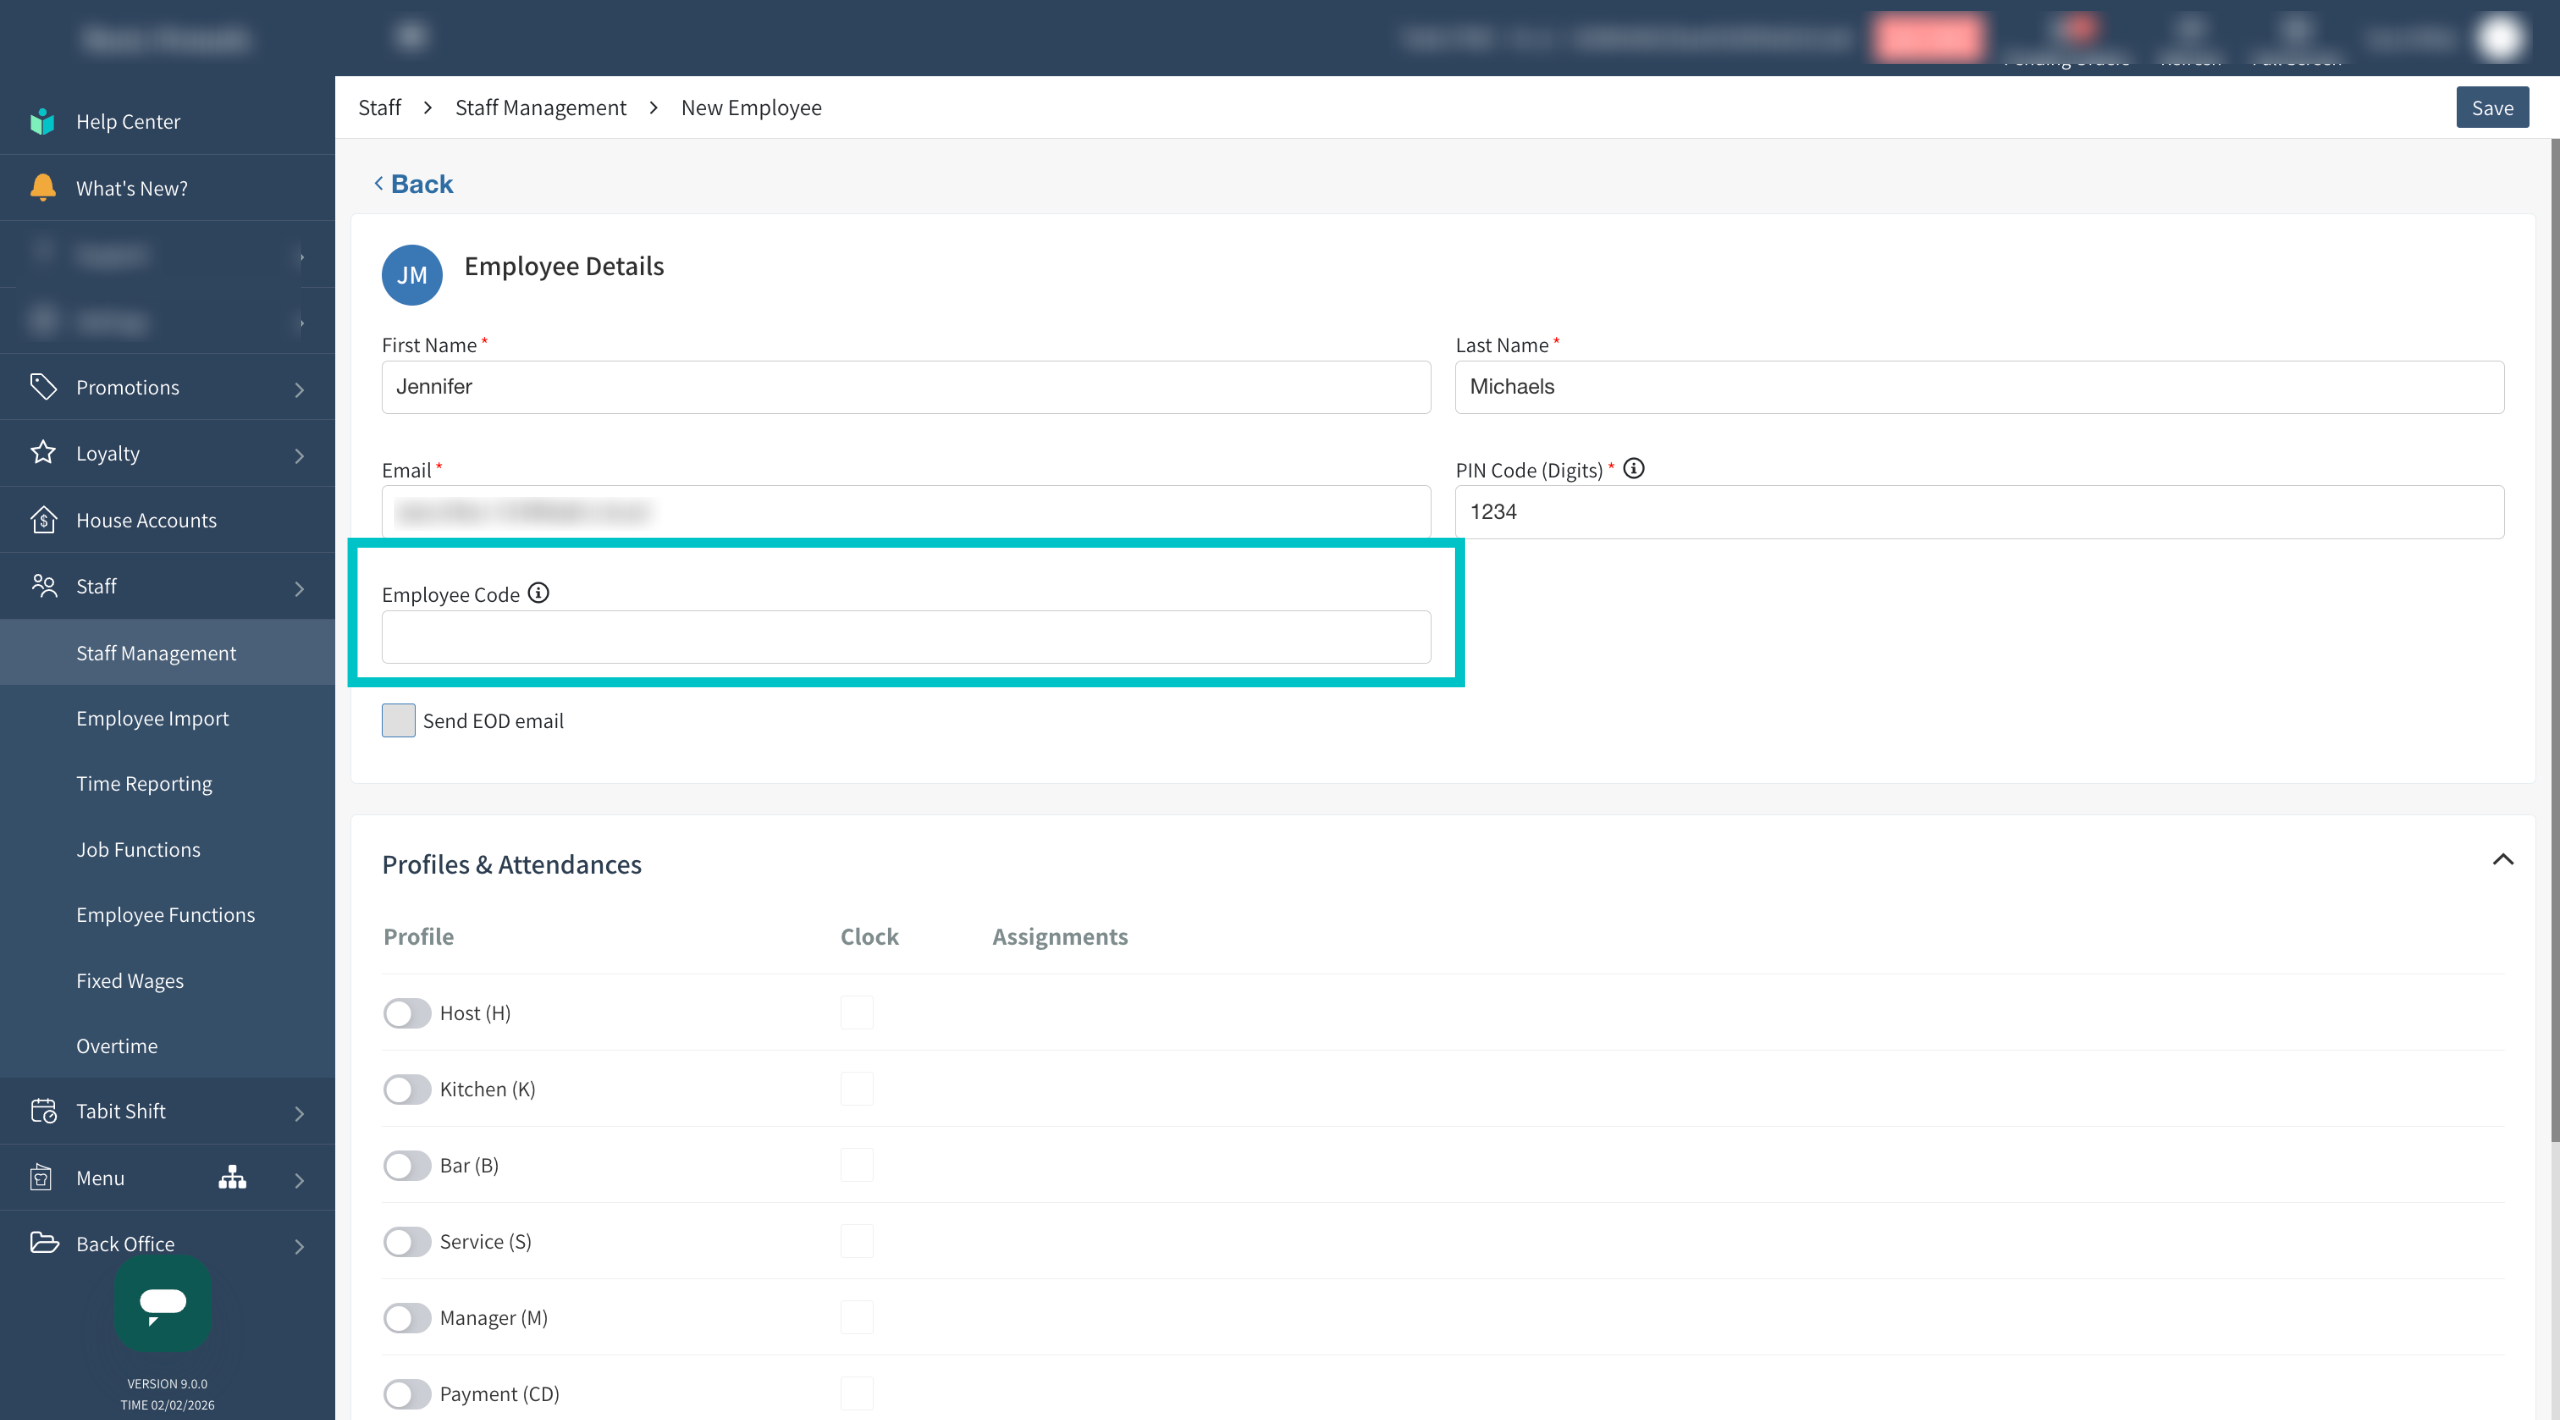
If desired, you can enter an employee code, which will be used in all time reporting. If left blank it will automatically generate one
Copy the employee code assigned to them in Payroll
-
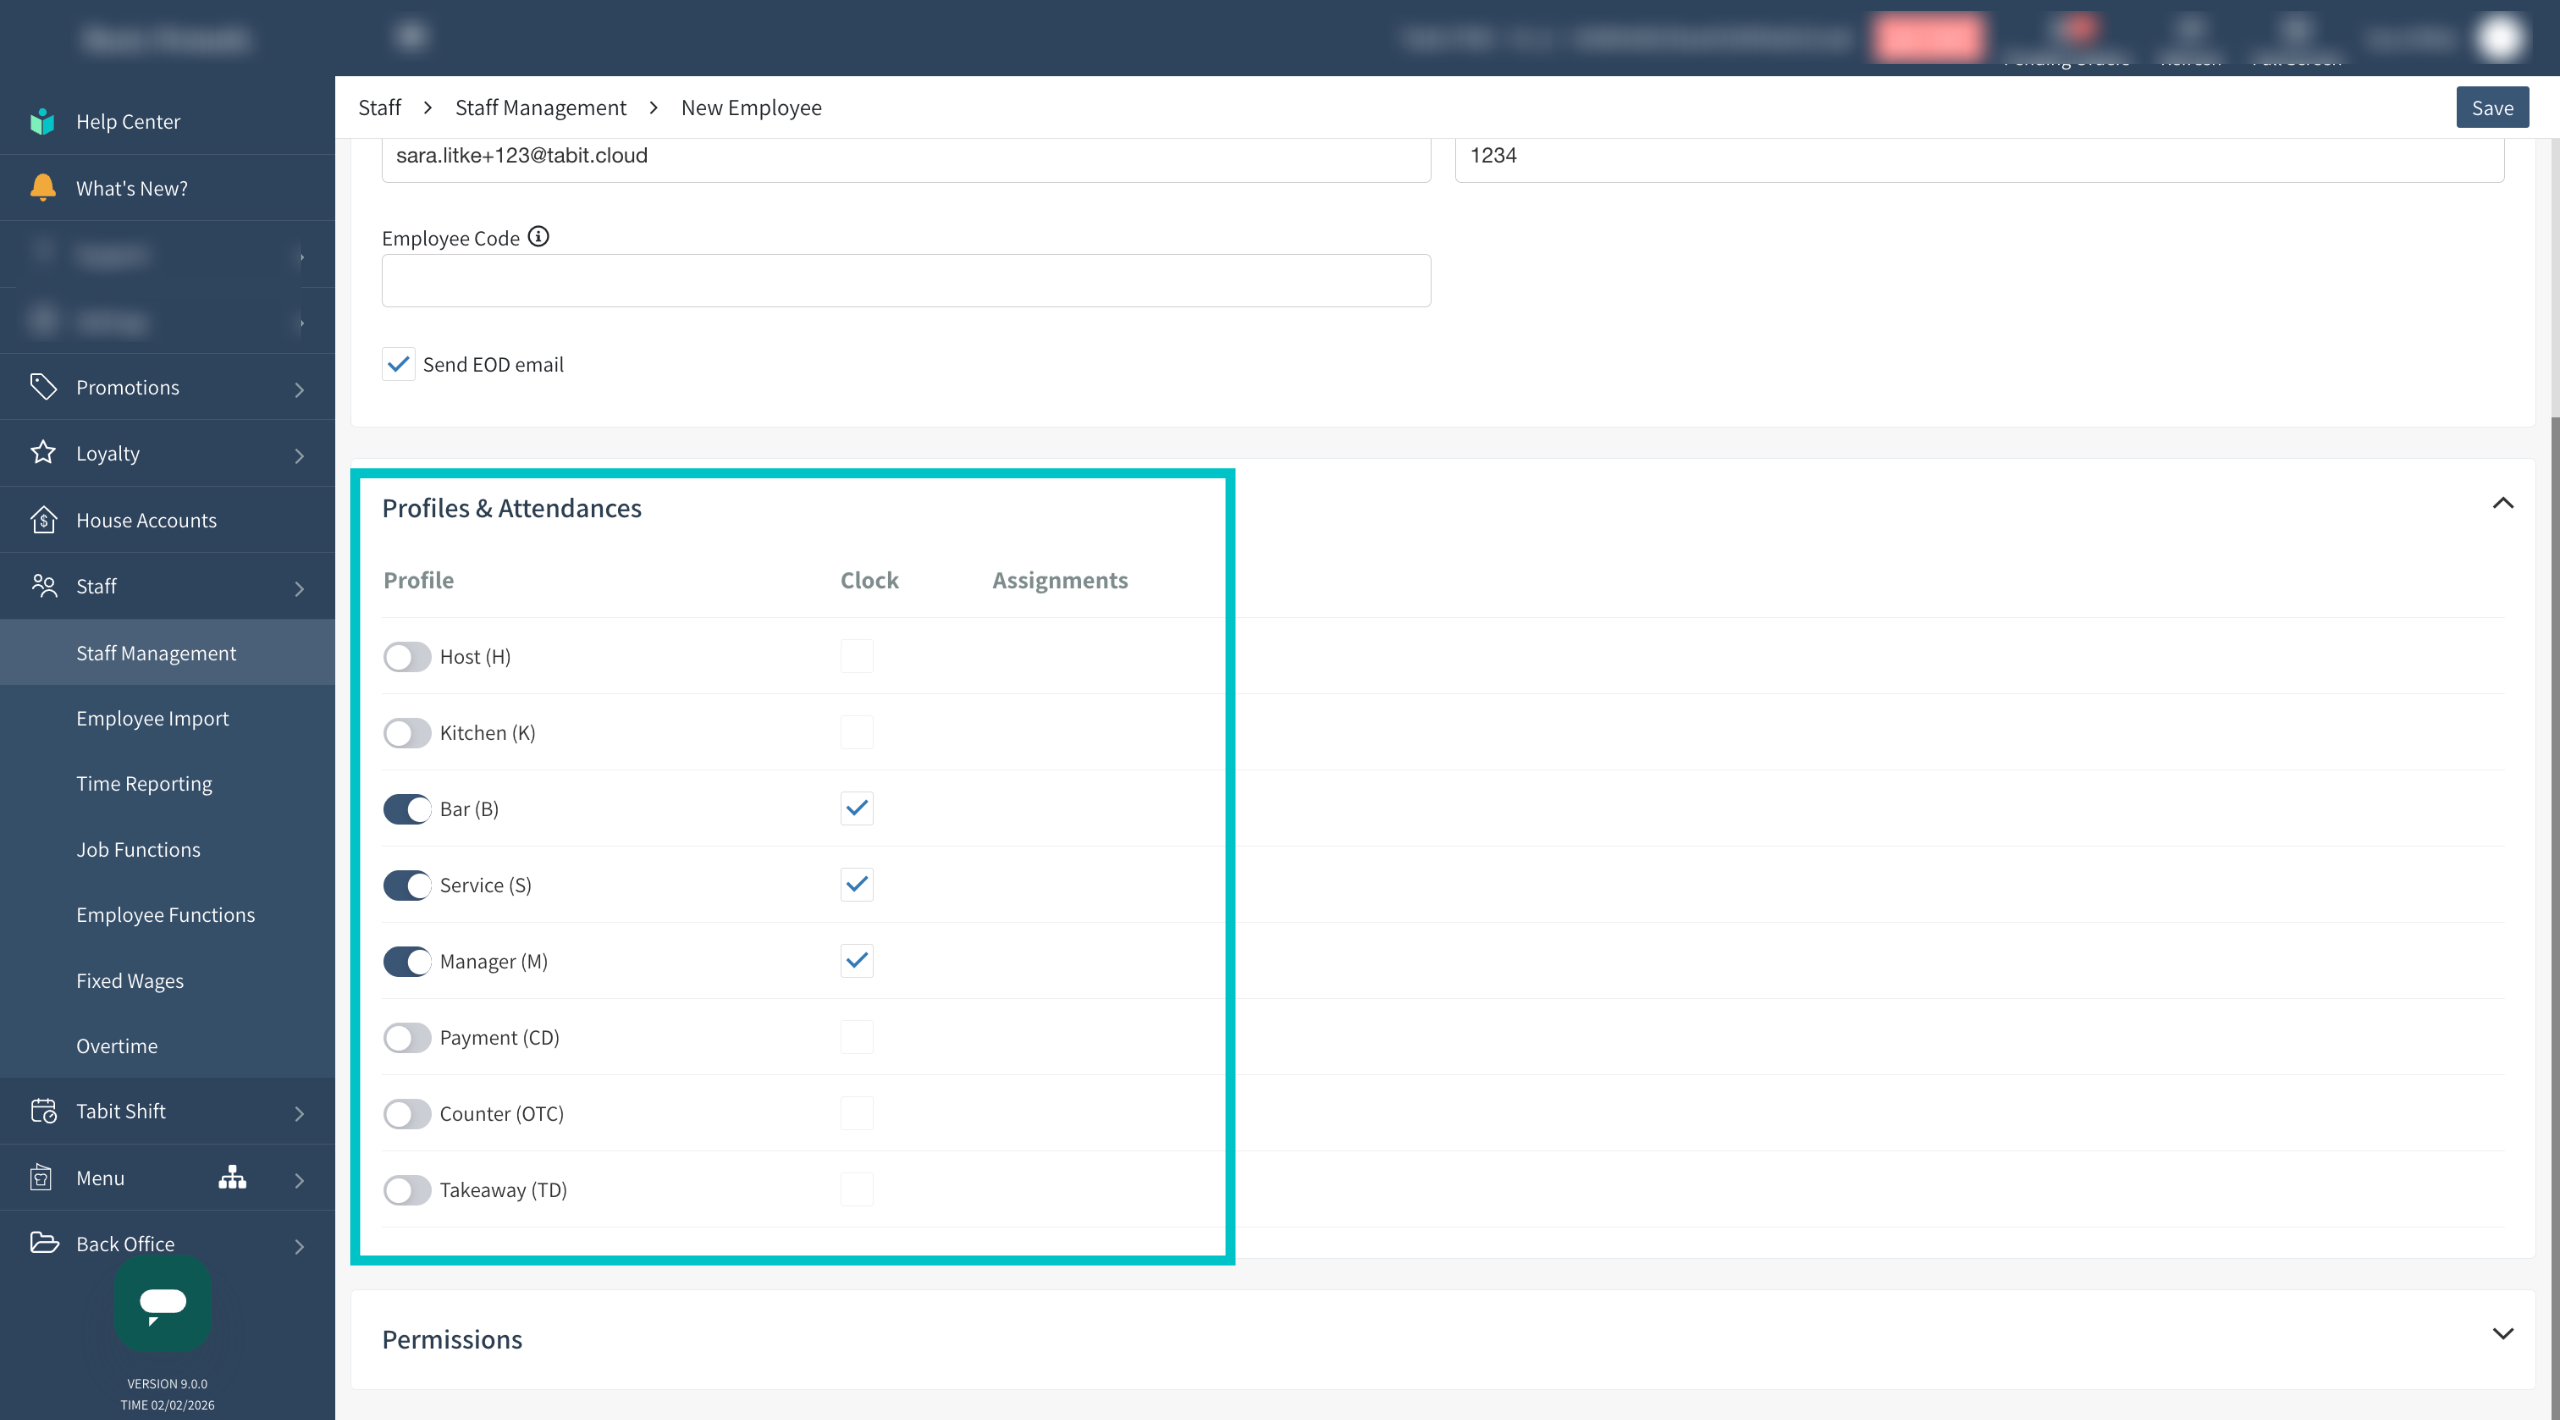
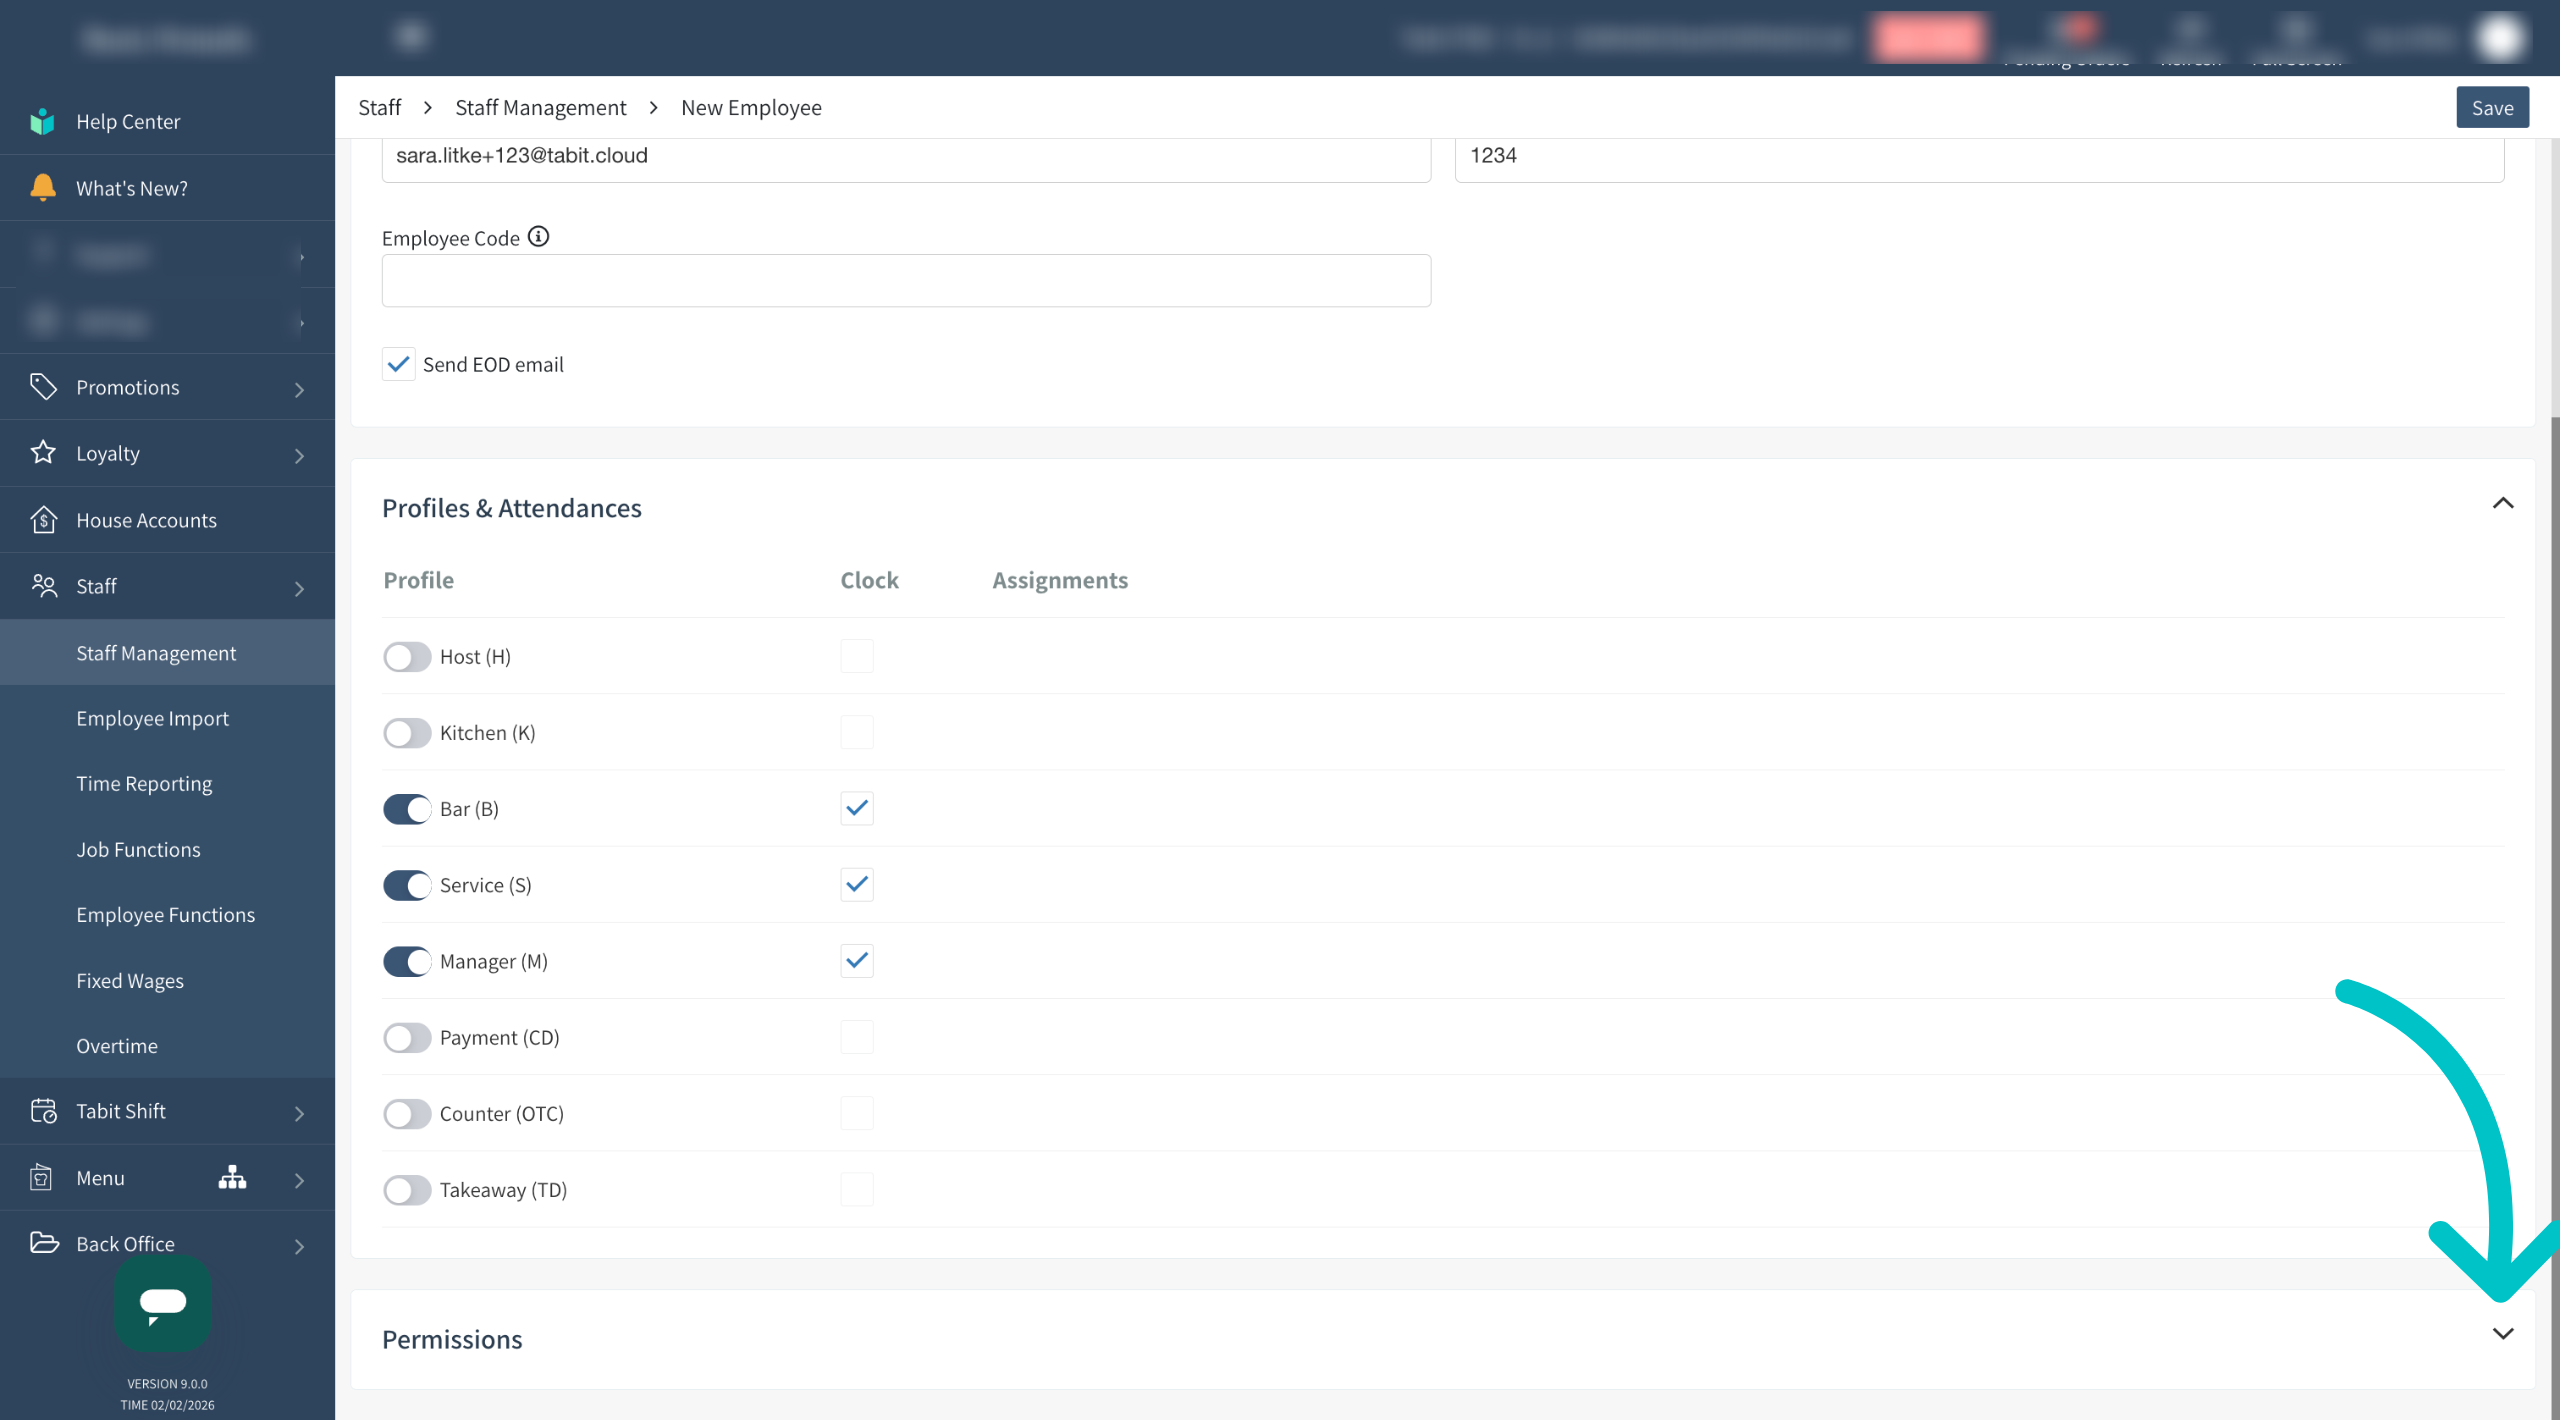
Determine whether the employee should receive the EOD email

-
Select which profiles should be assigned to the employee. The clock in/out functionality for each profile can be turned off or on here if needed. In no profiles are assigned, the user won't have access to the PAD
Bartenders will also need to have payment (CD) role assigned to them for quick functionality to their assigned cash drawer
-
Select the arrow to the right of Permissions to open the permissions dropdown
Permissions are more relevant for manager users and will affect what the user has access to in Tabit Office. For more information, visit our full description of employee permissions article
-
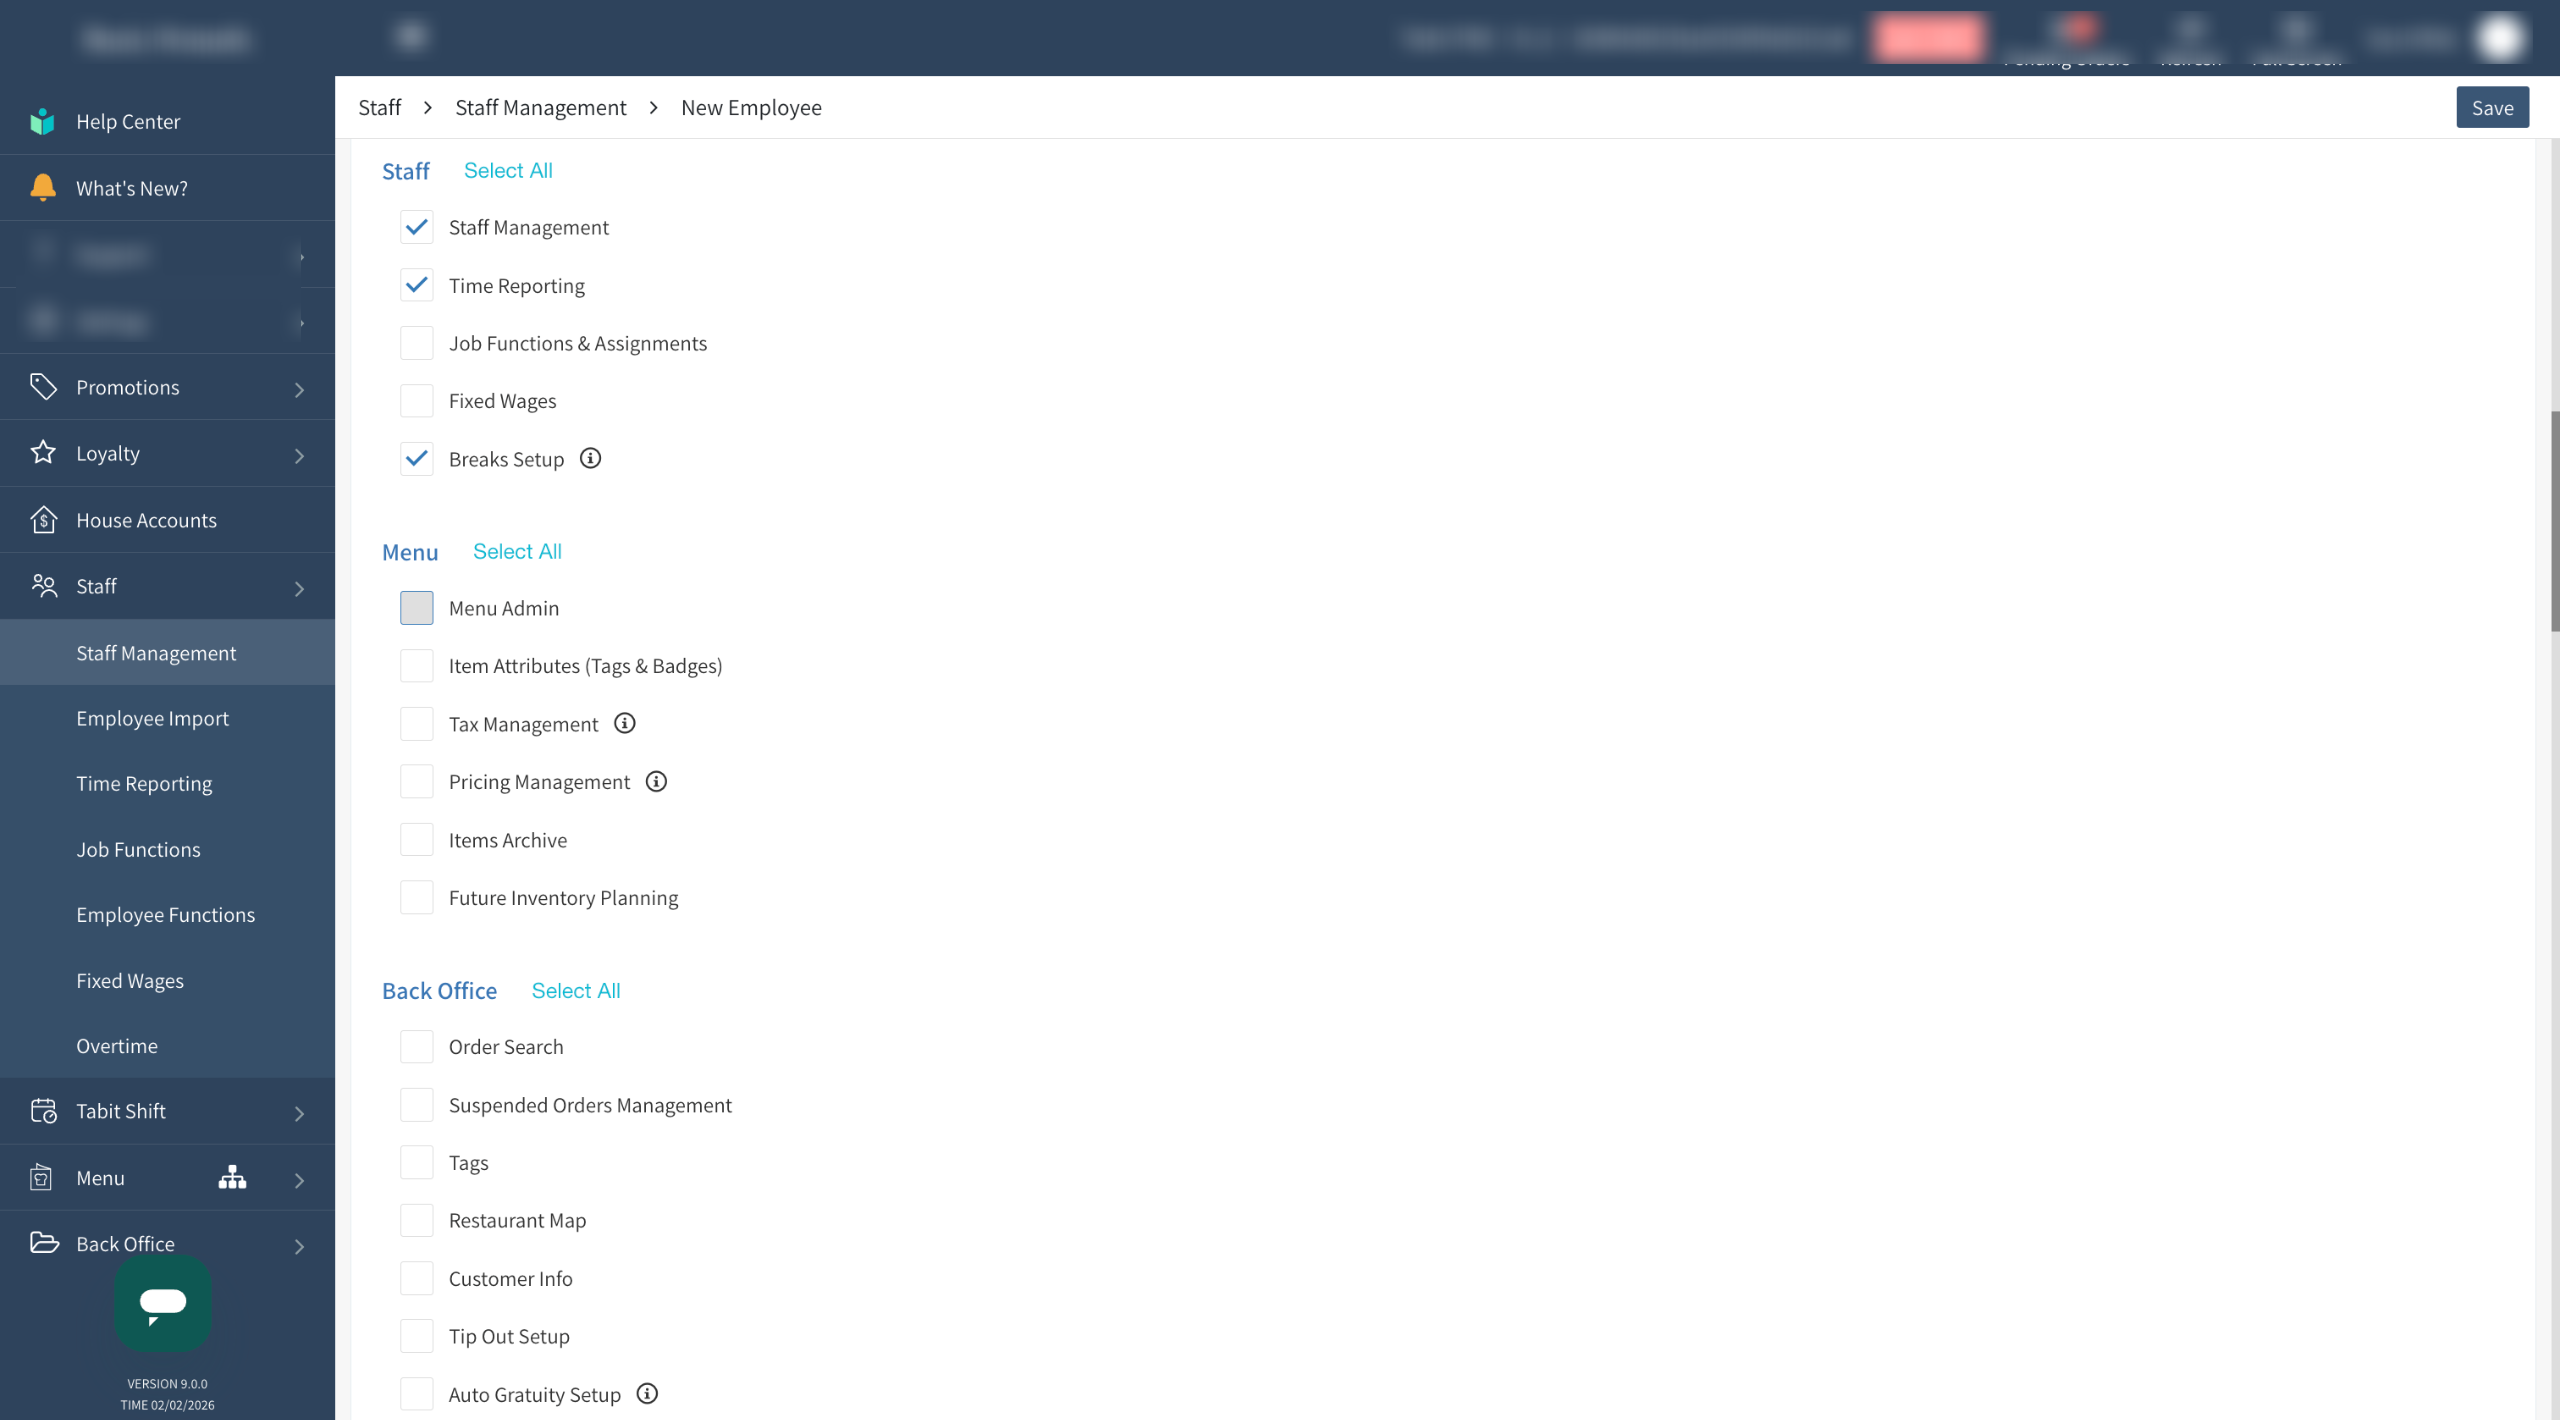
Assign any relevant permissions the employee should have
These permissions can give access to sensitive information and product settings. Please be cautious when granting them
-
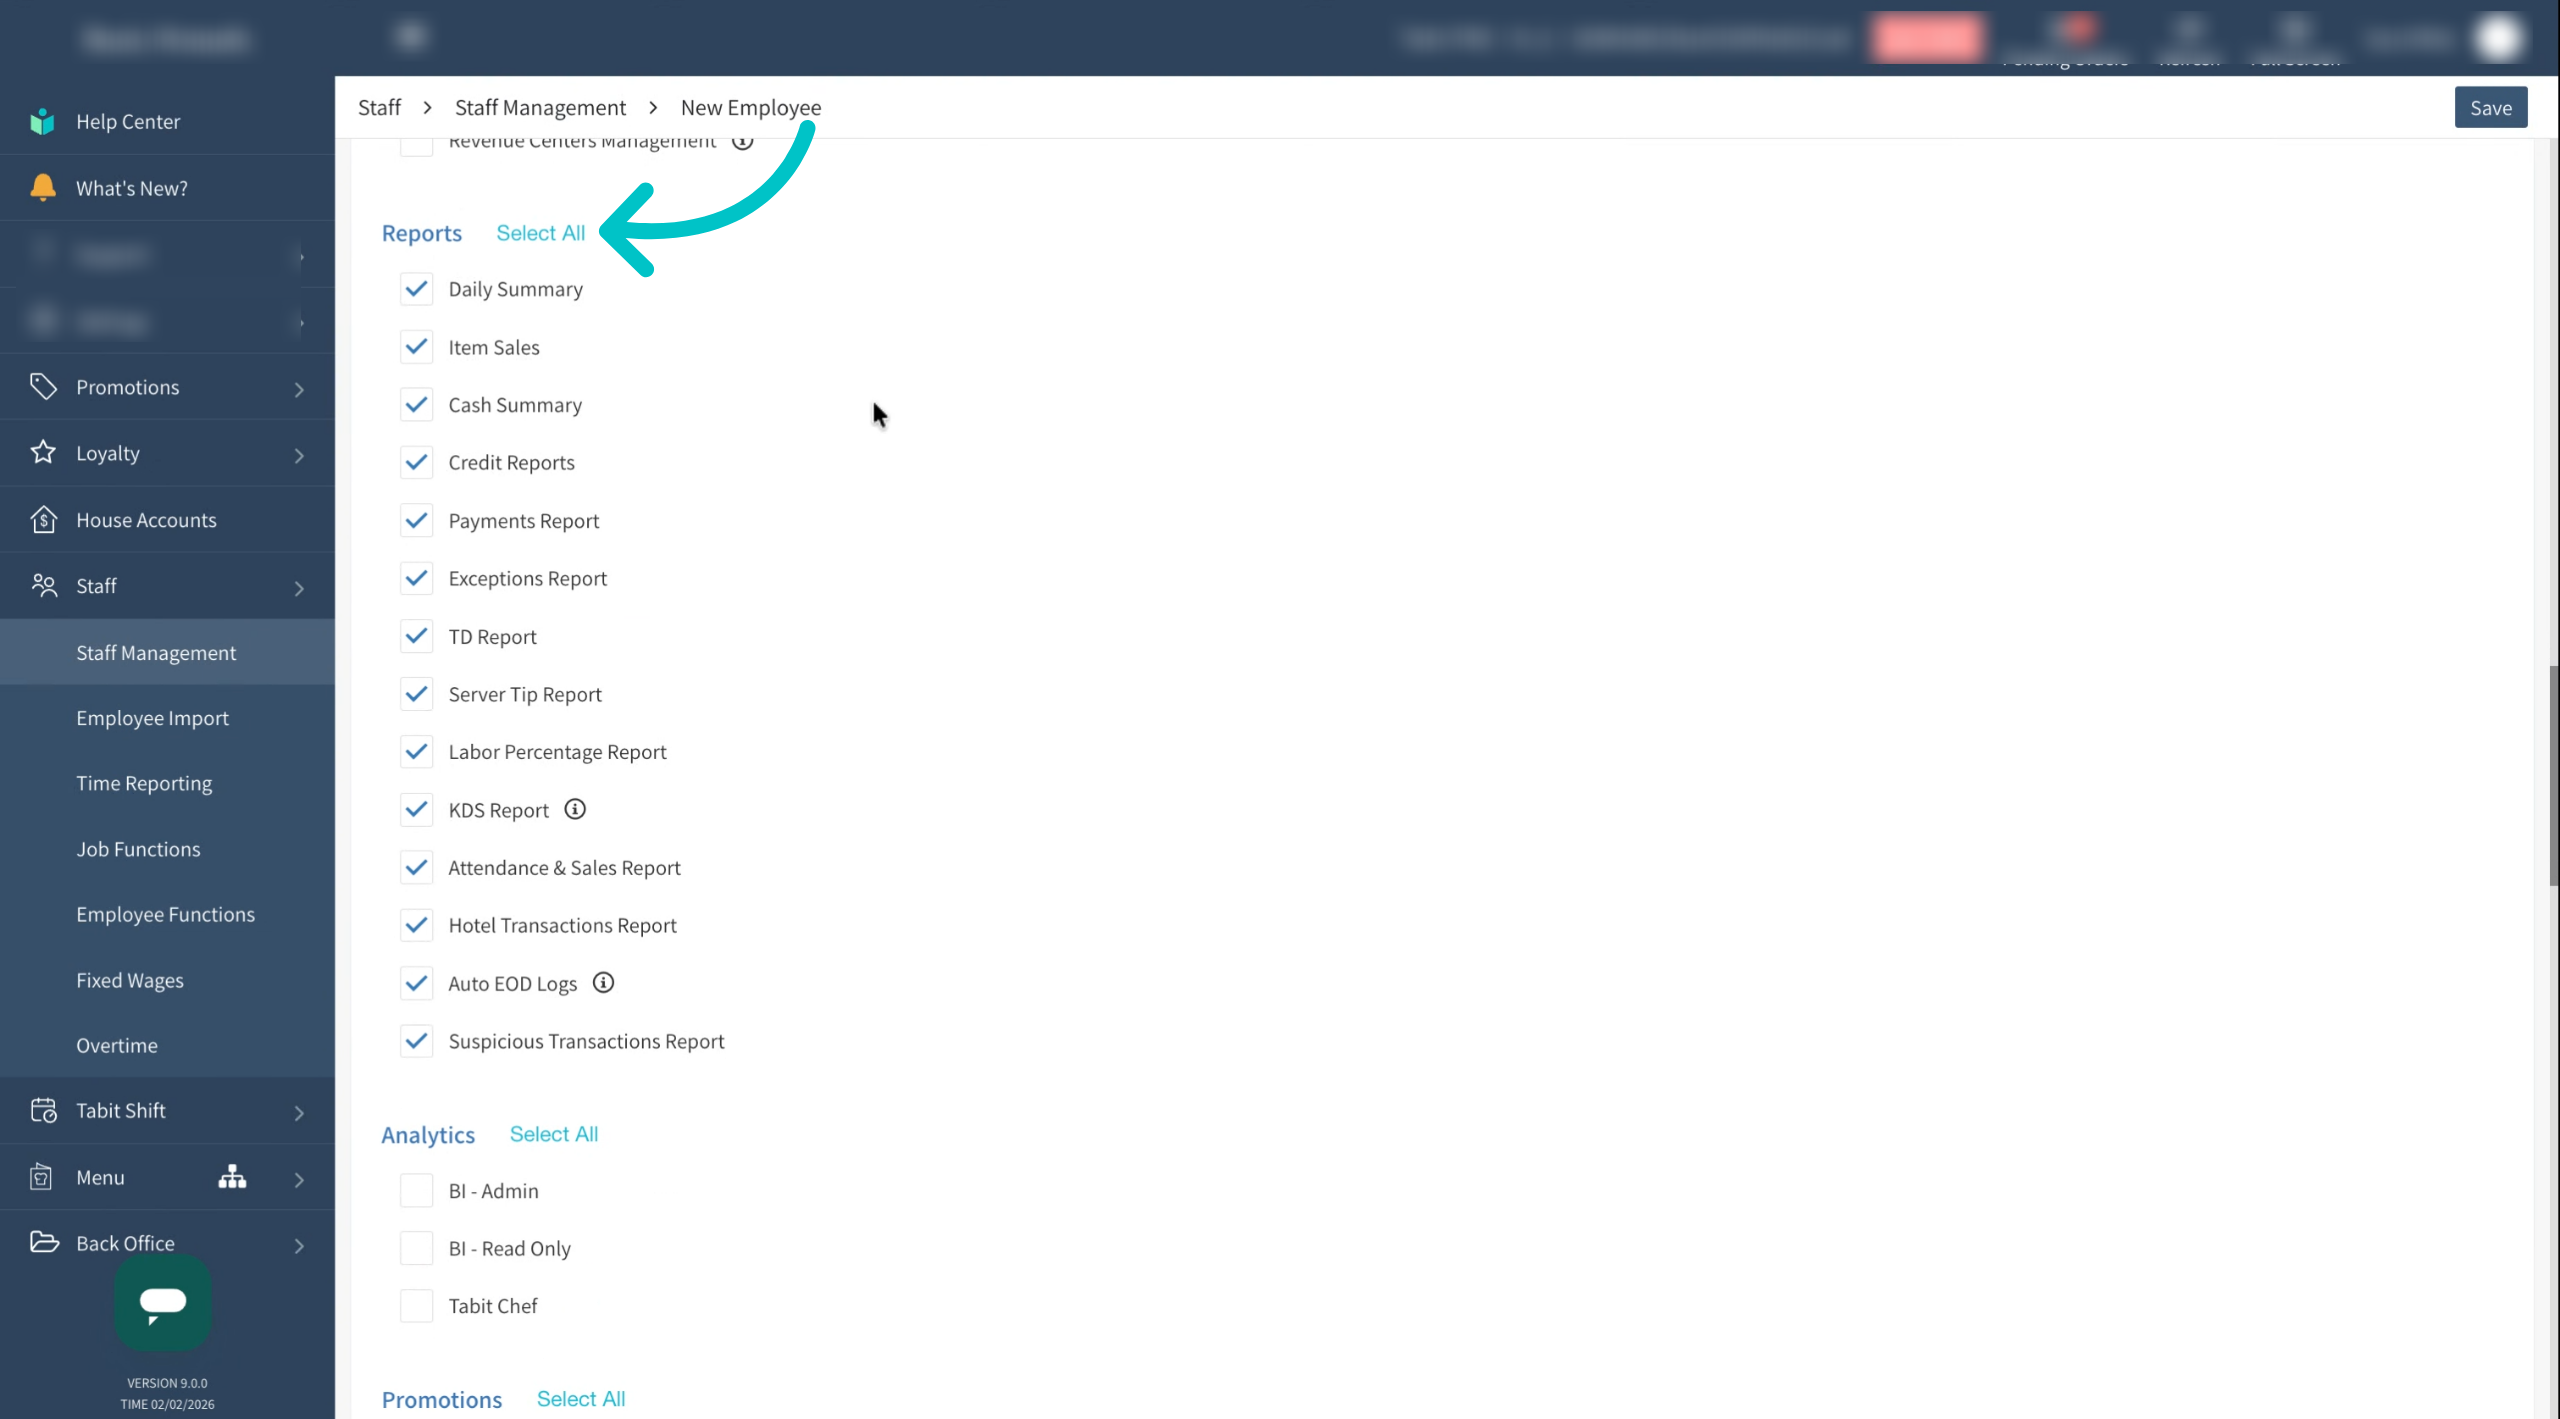
To bulk assign all permissions in a section, select Select All
-
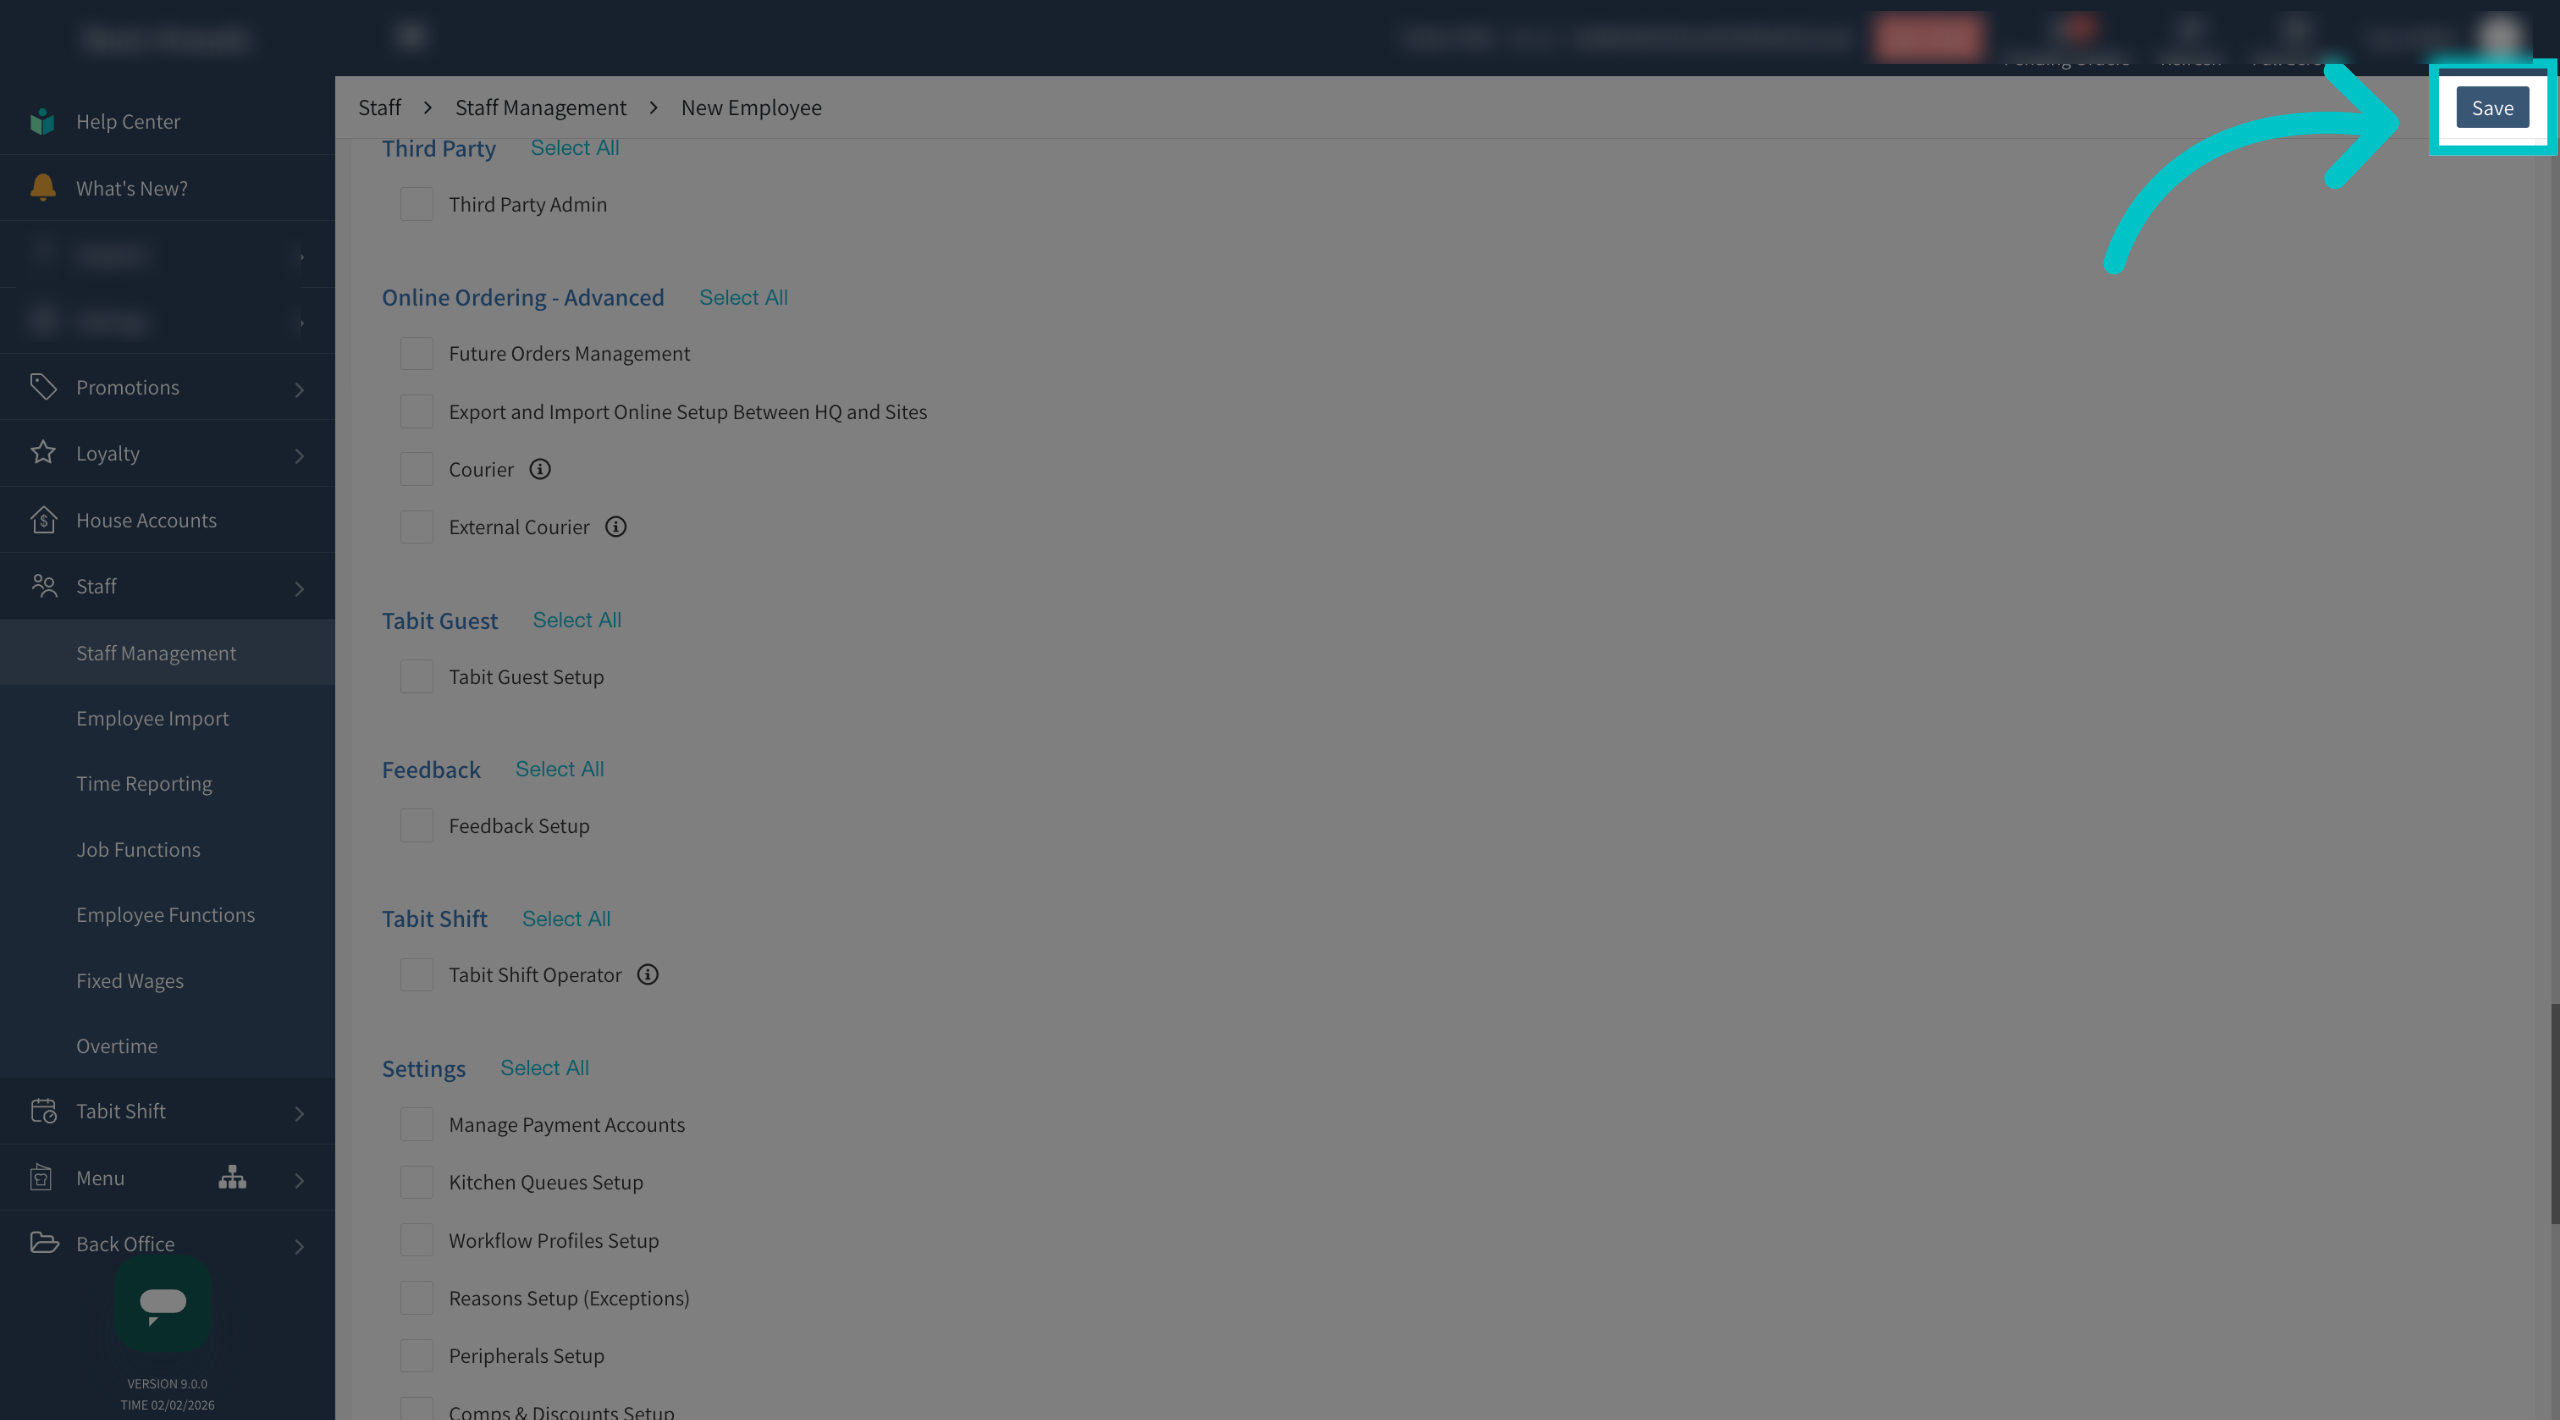
Once all relevant permissions have been assigned, select Save in the top right corner of the screen
-
Now the new employee's user is ready to go and they should receive in email inviting them to create a profile and update their photo