Modifier Group placing controls whether a modifier is automatically included with an item or offered as an optional selection. It also affects how modifiers appear during the order flow and whether they are printed on kitchen tickets or shown in Tabit Kitchen (kitchen display system, KDS).
You can define the placing behavior when creating or editing modifier groups or directly from the item setup.
Updating placing when editing a modifier group
- In Tabit Office, go to Menu Modifier Groups

- Locate the modifier group you want to update placement for, and select the pencil icon to edit it

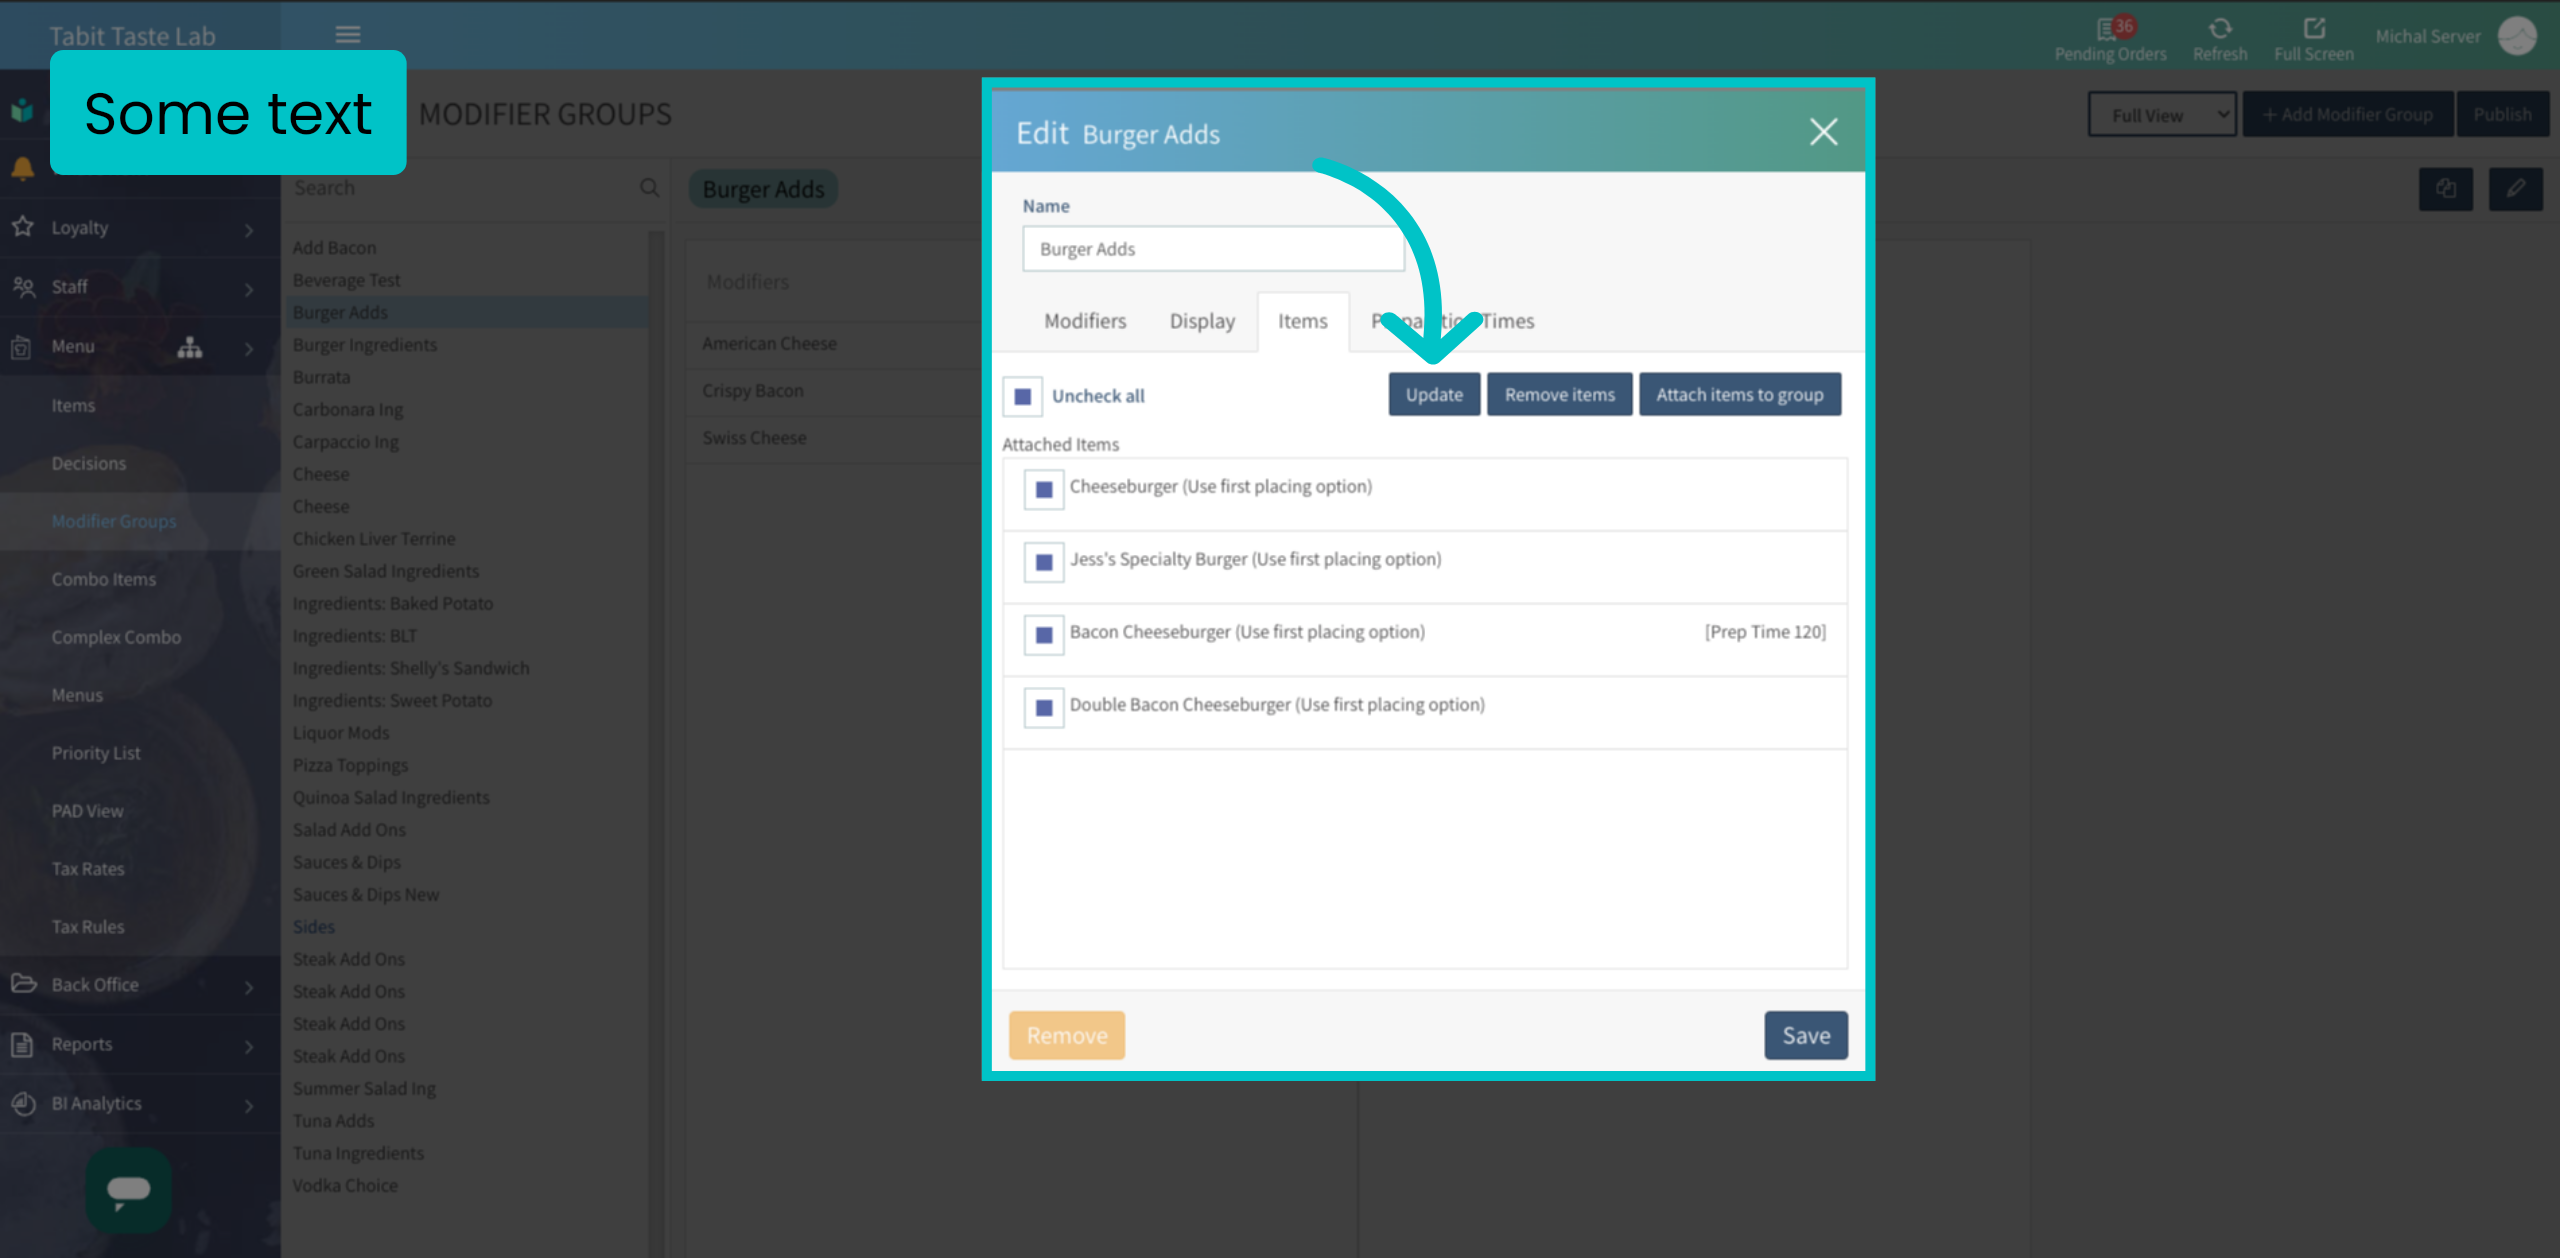
- Go to the Items tab

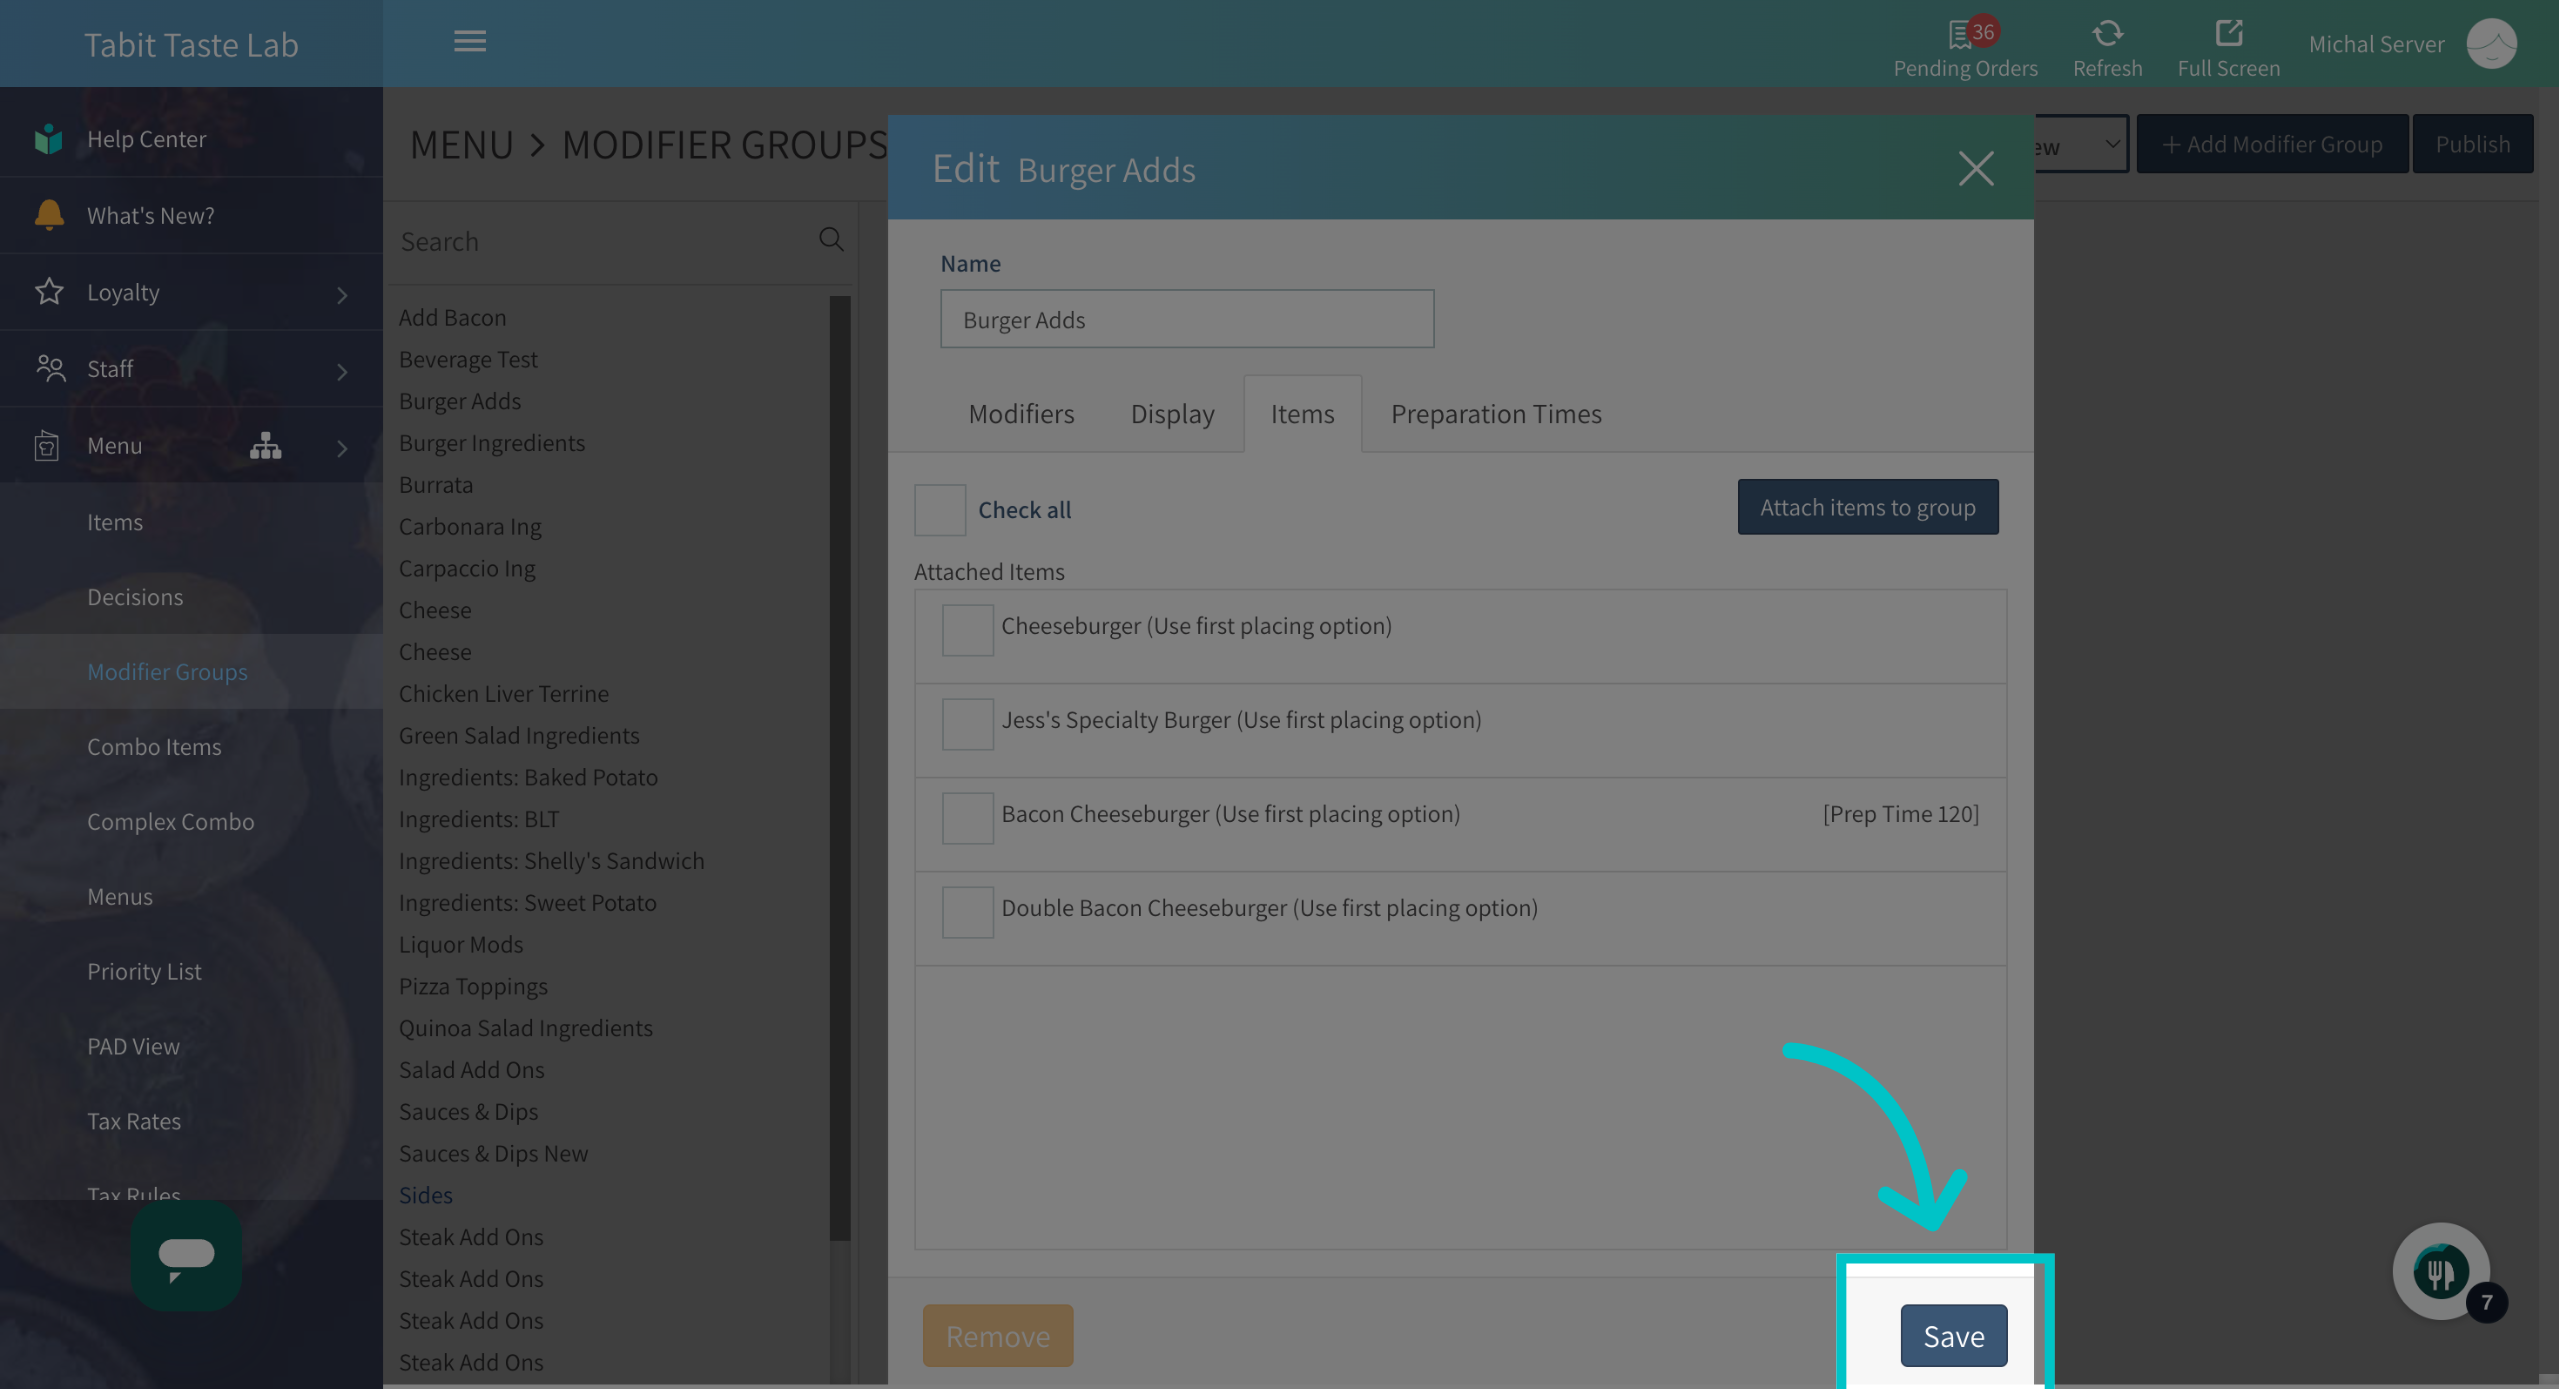
- Check the relevant items and select Update
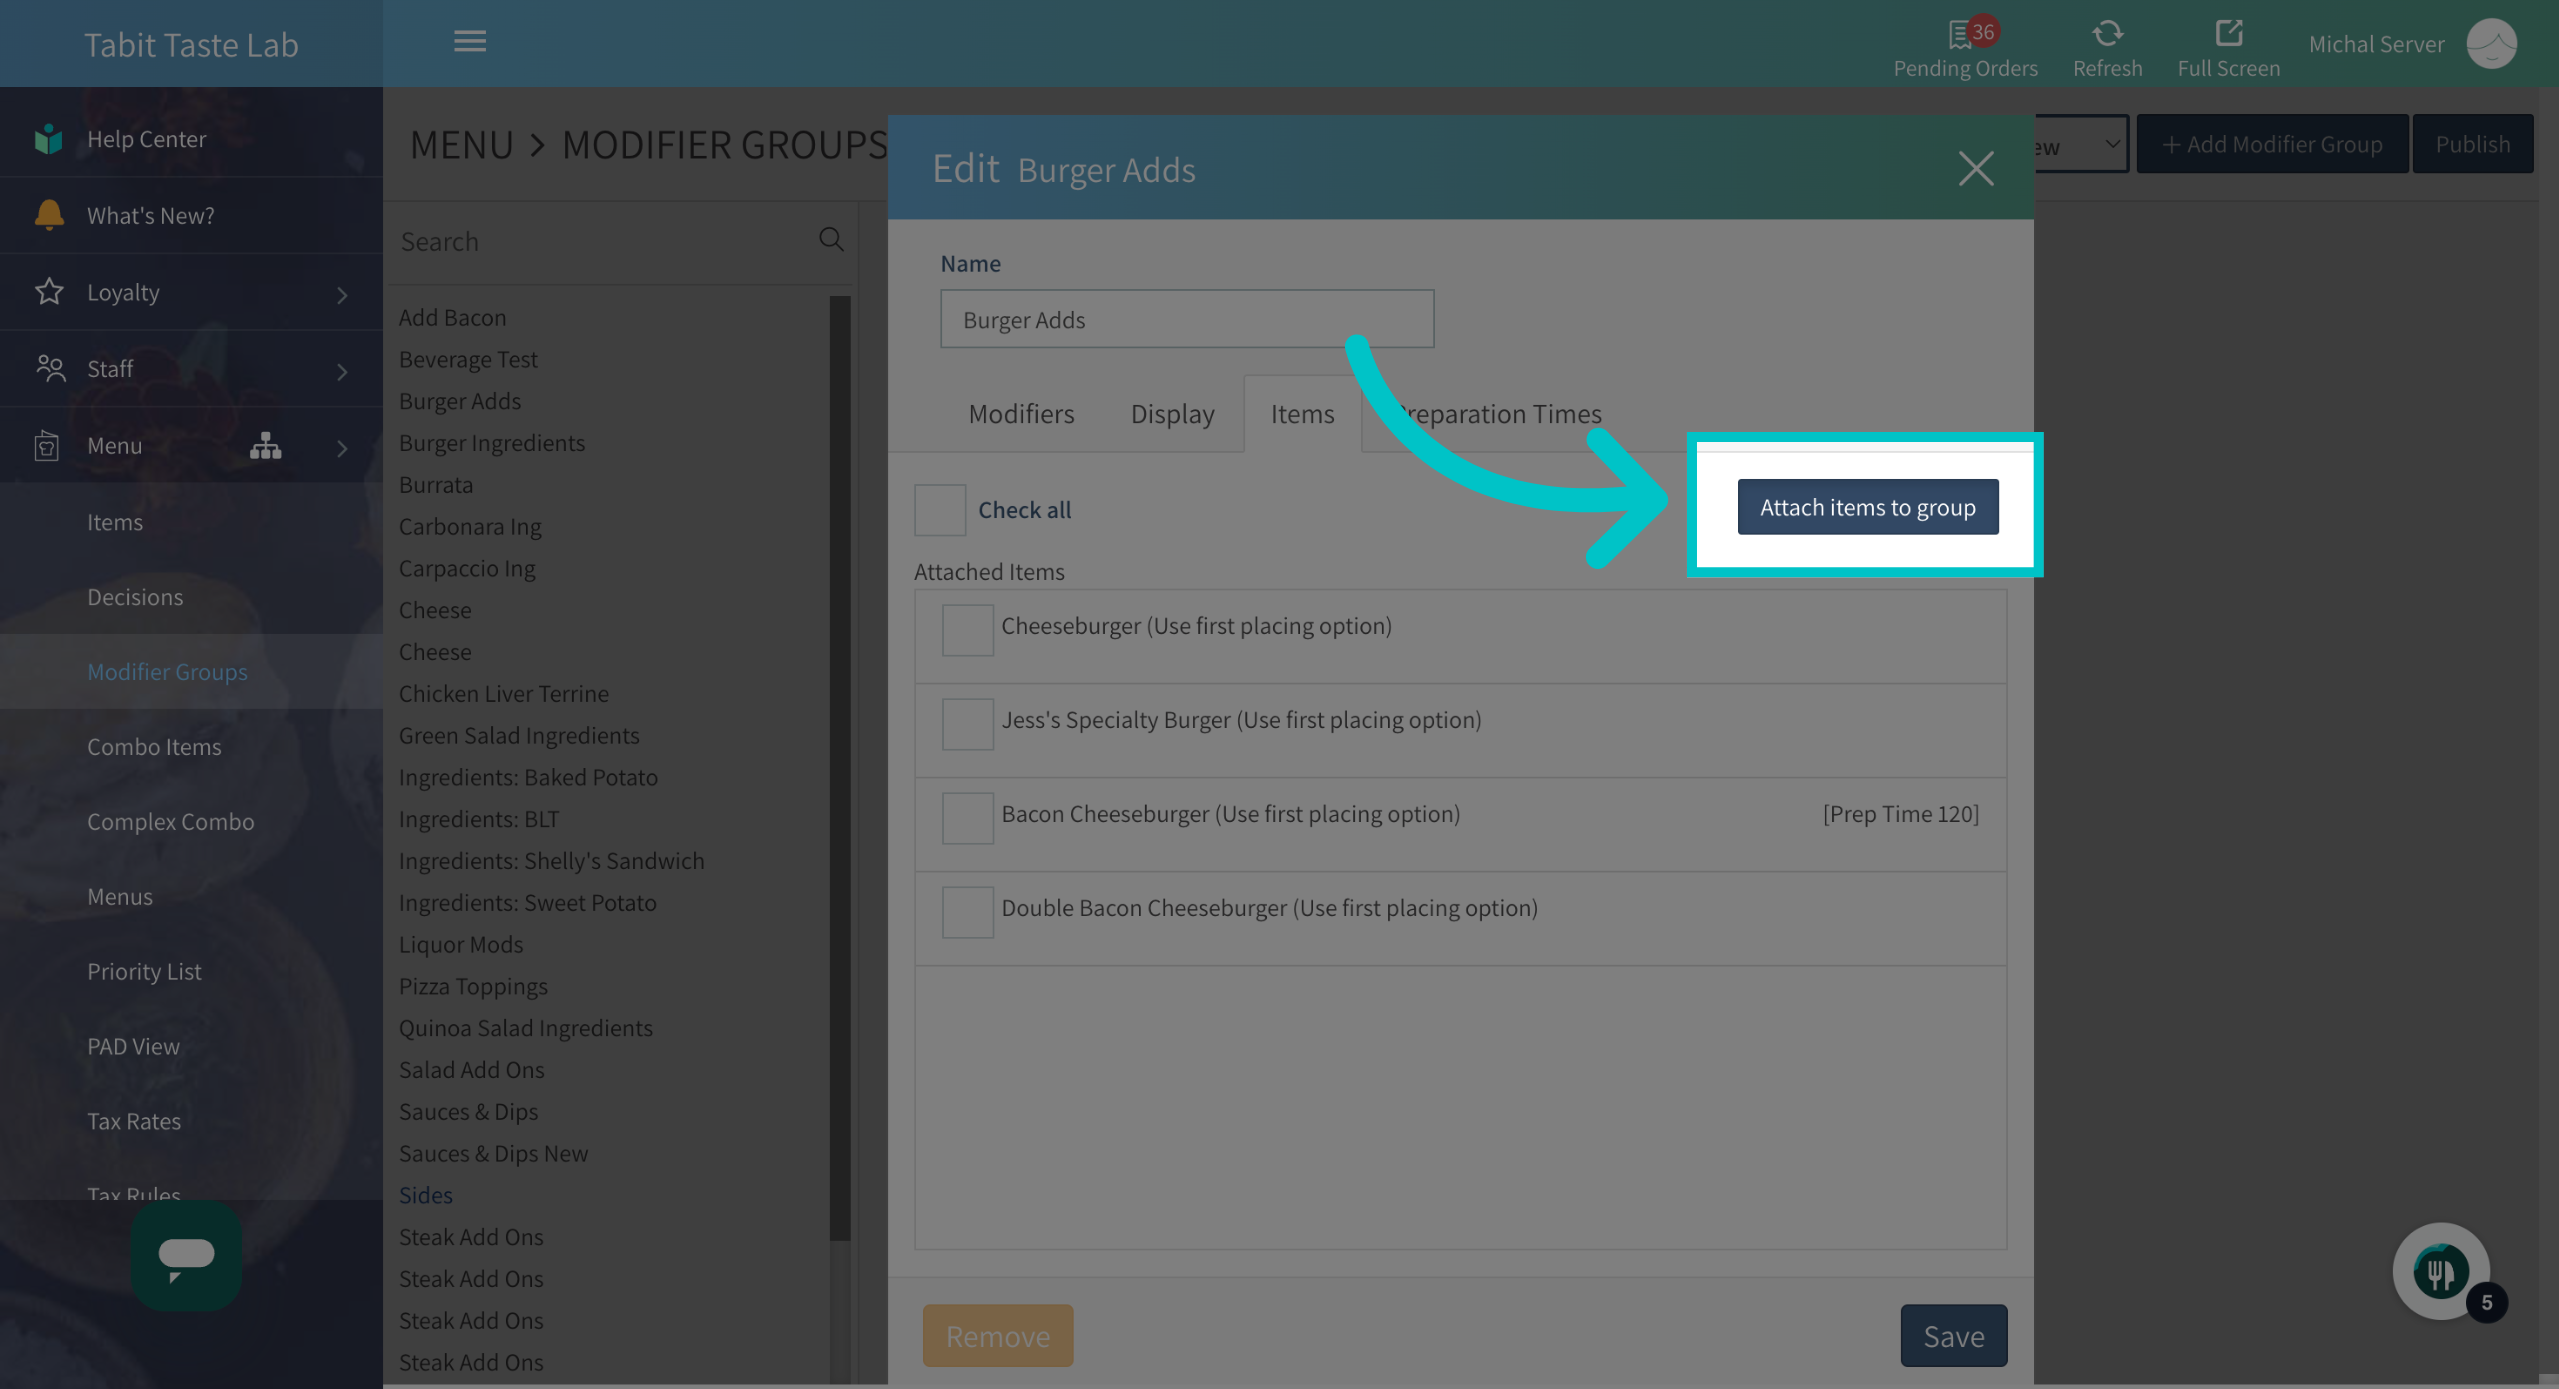
- If you're creating a new modifier group, select Attach items to group
-
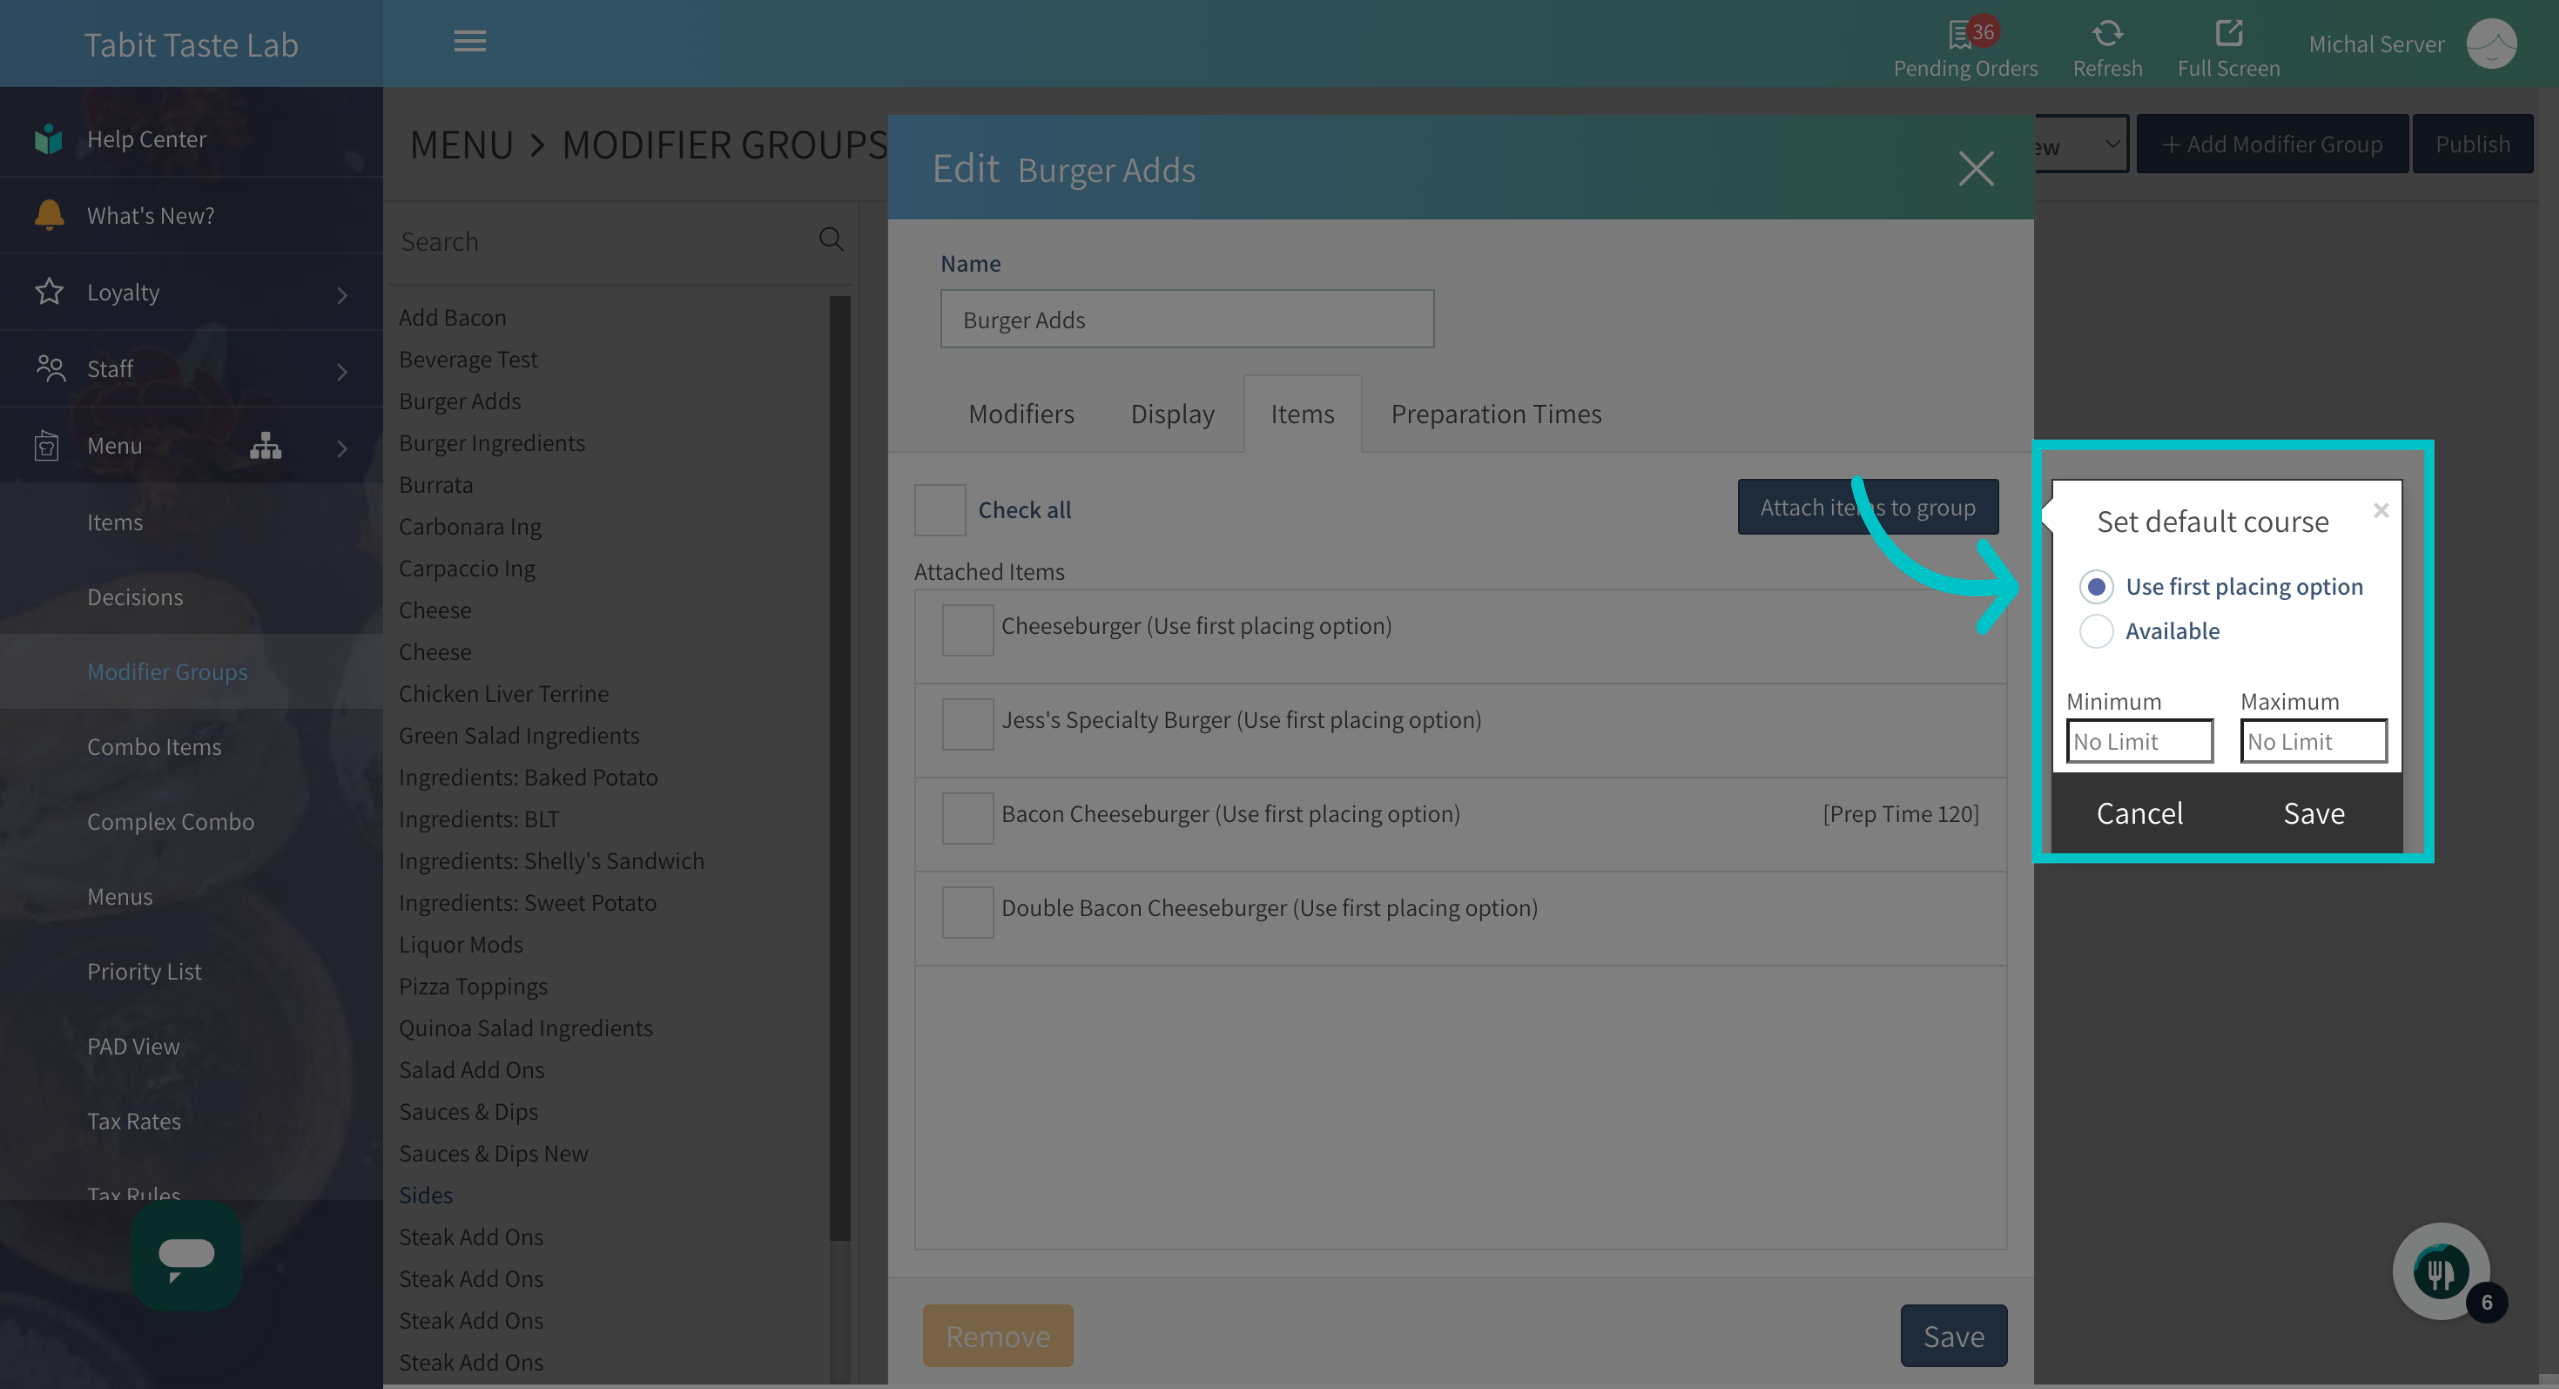
In the popup window, select one of the placing options:
- Use first placing option – modifiers will be attached to the item by default
- Available – modifiers will be optional
- Set minimum and maximum values to determine how many optional modifiers must or can be selected
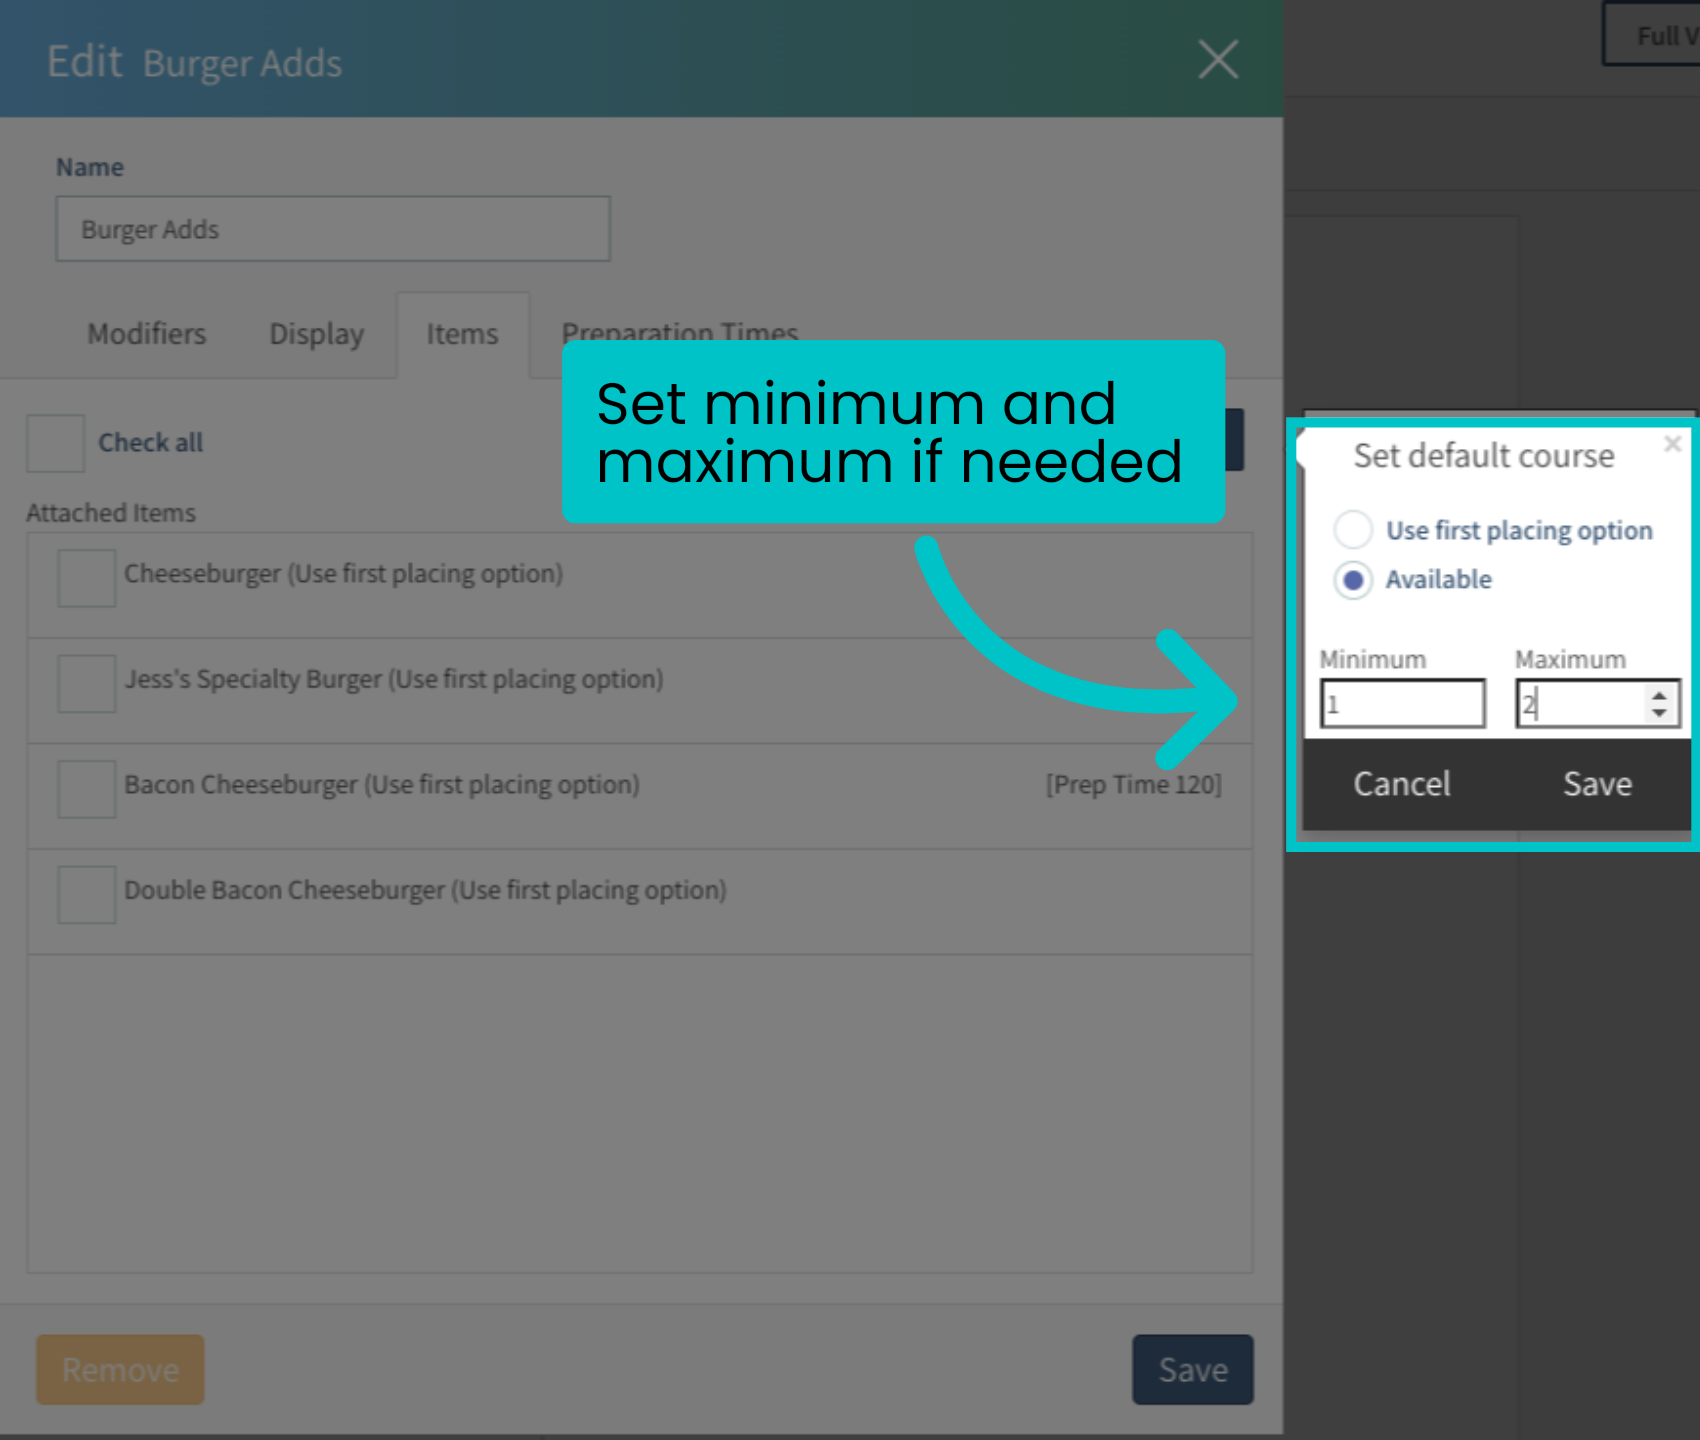
- Save your selections

- Then save all changes to confirm
Directly from the item settings
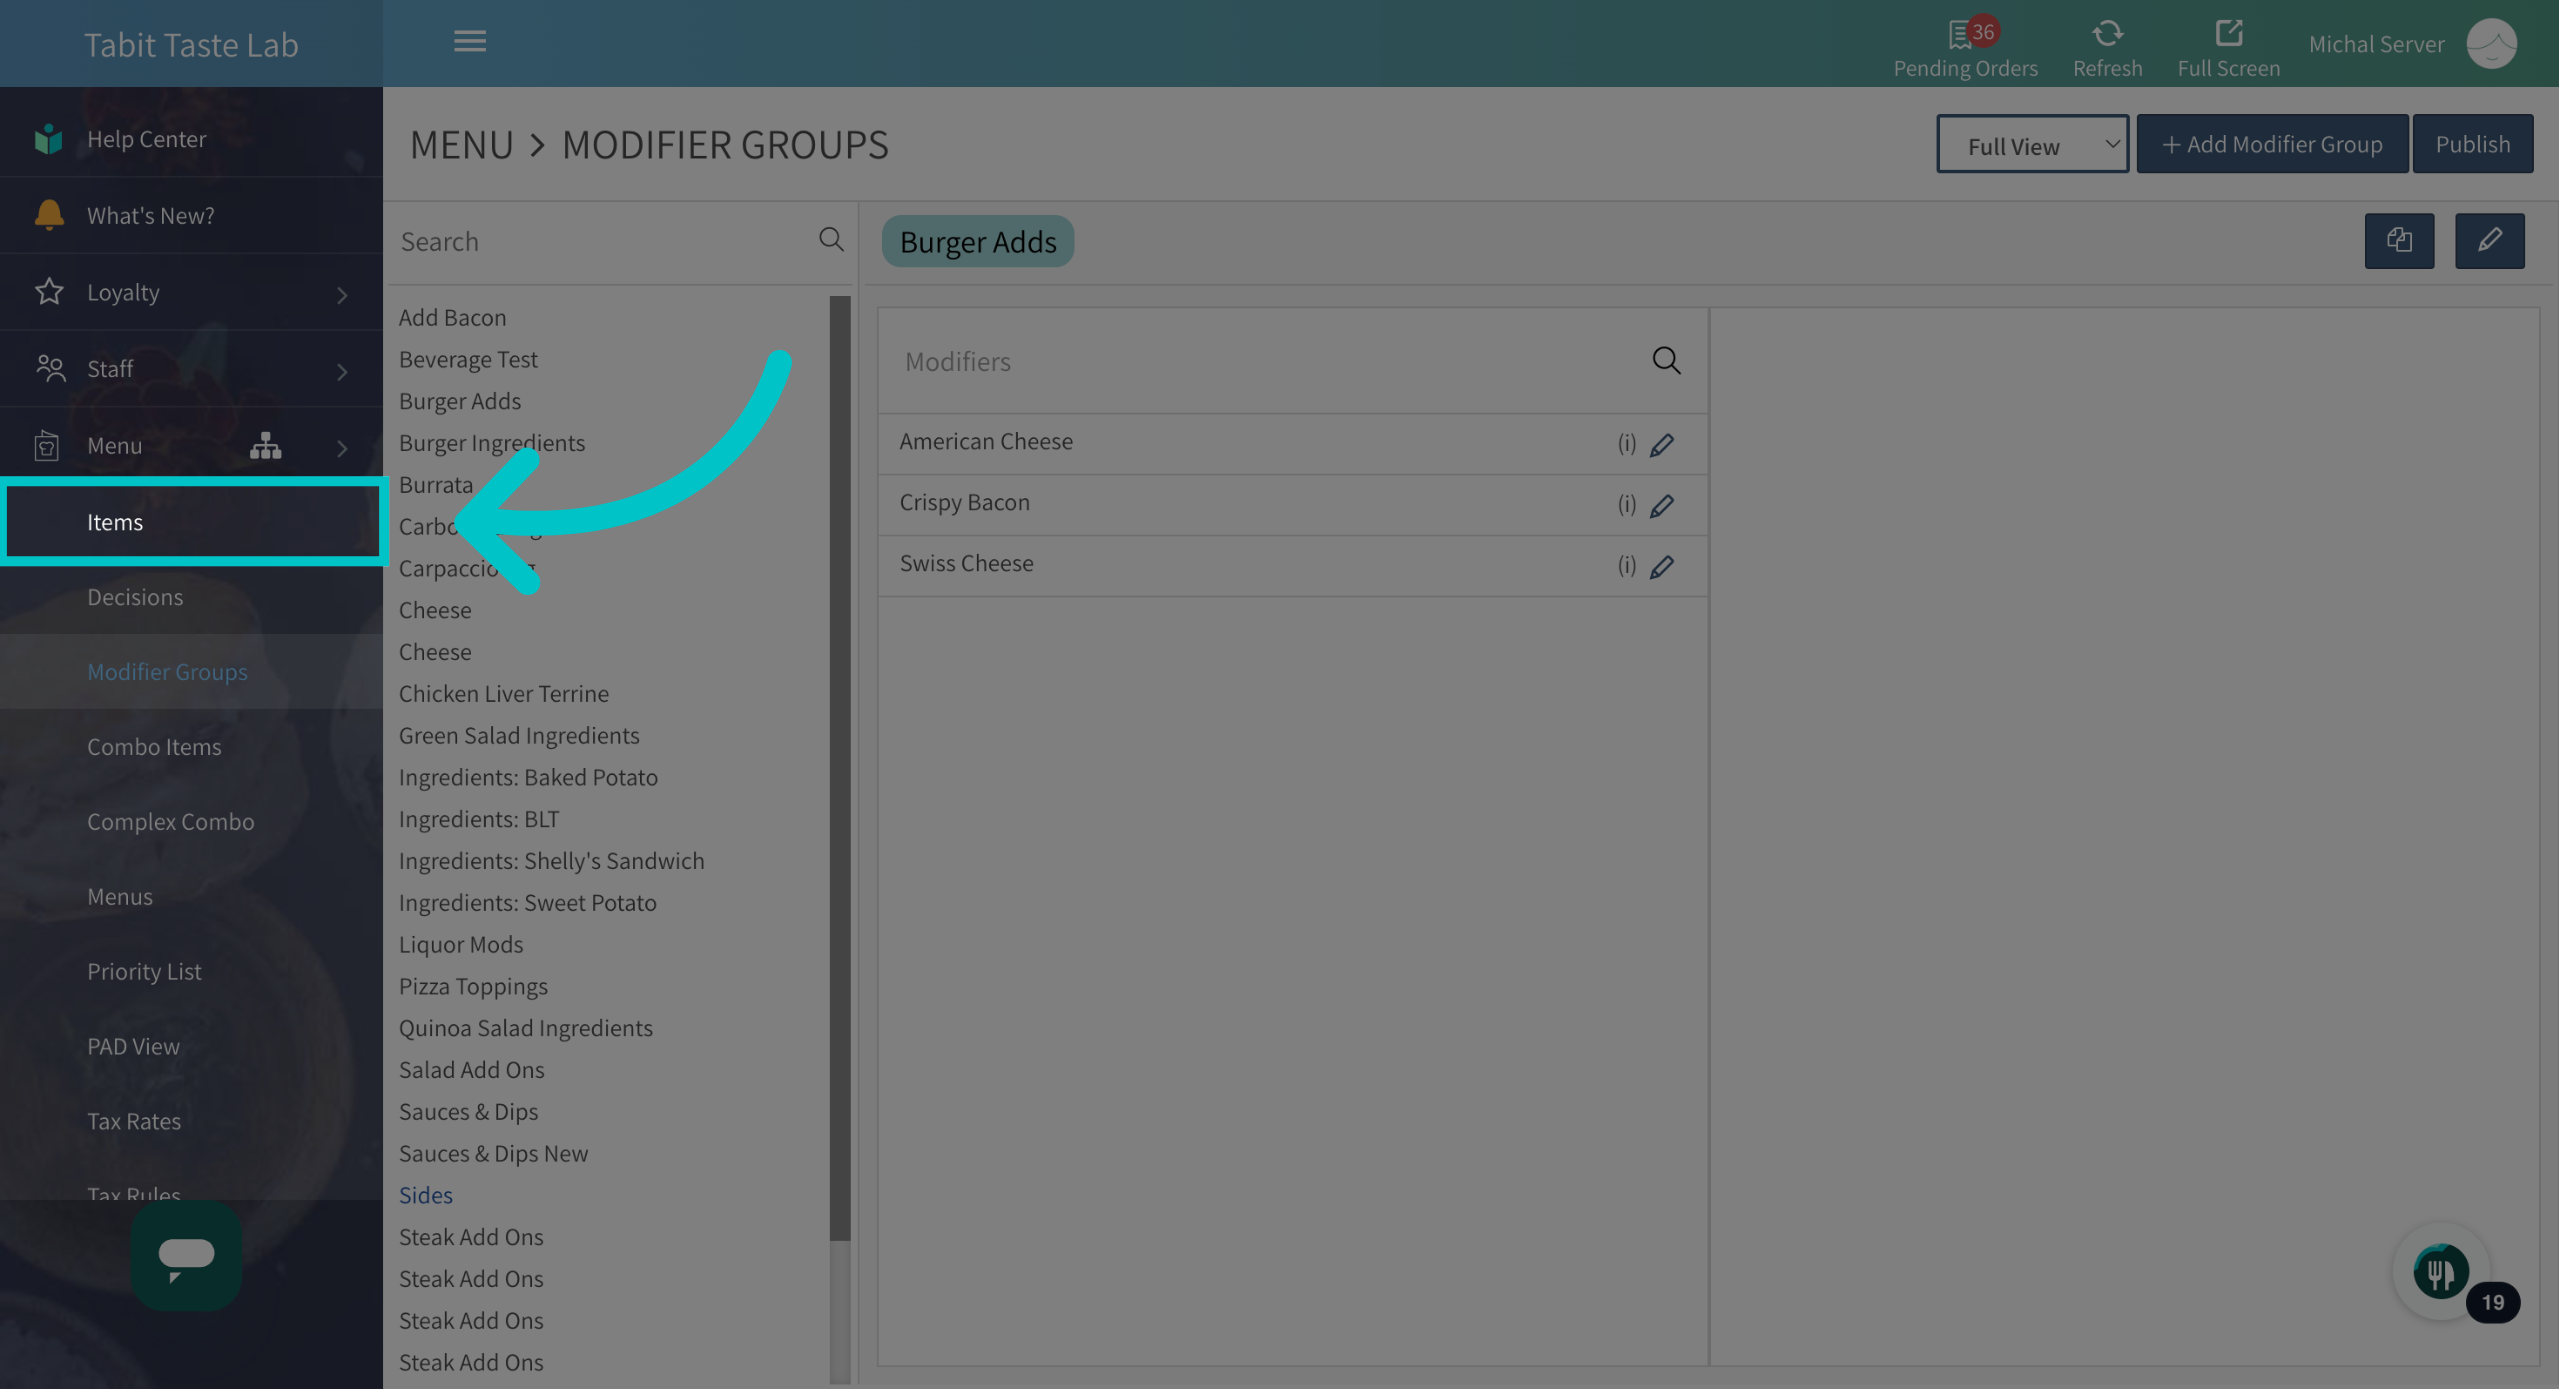
- To manage modifier placing from the item settings, go to Menu > Items
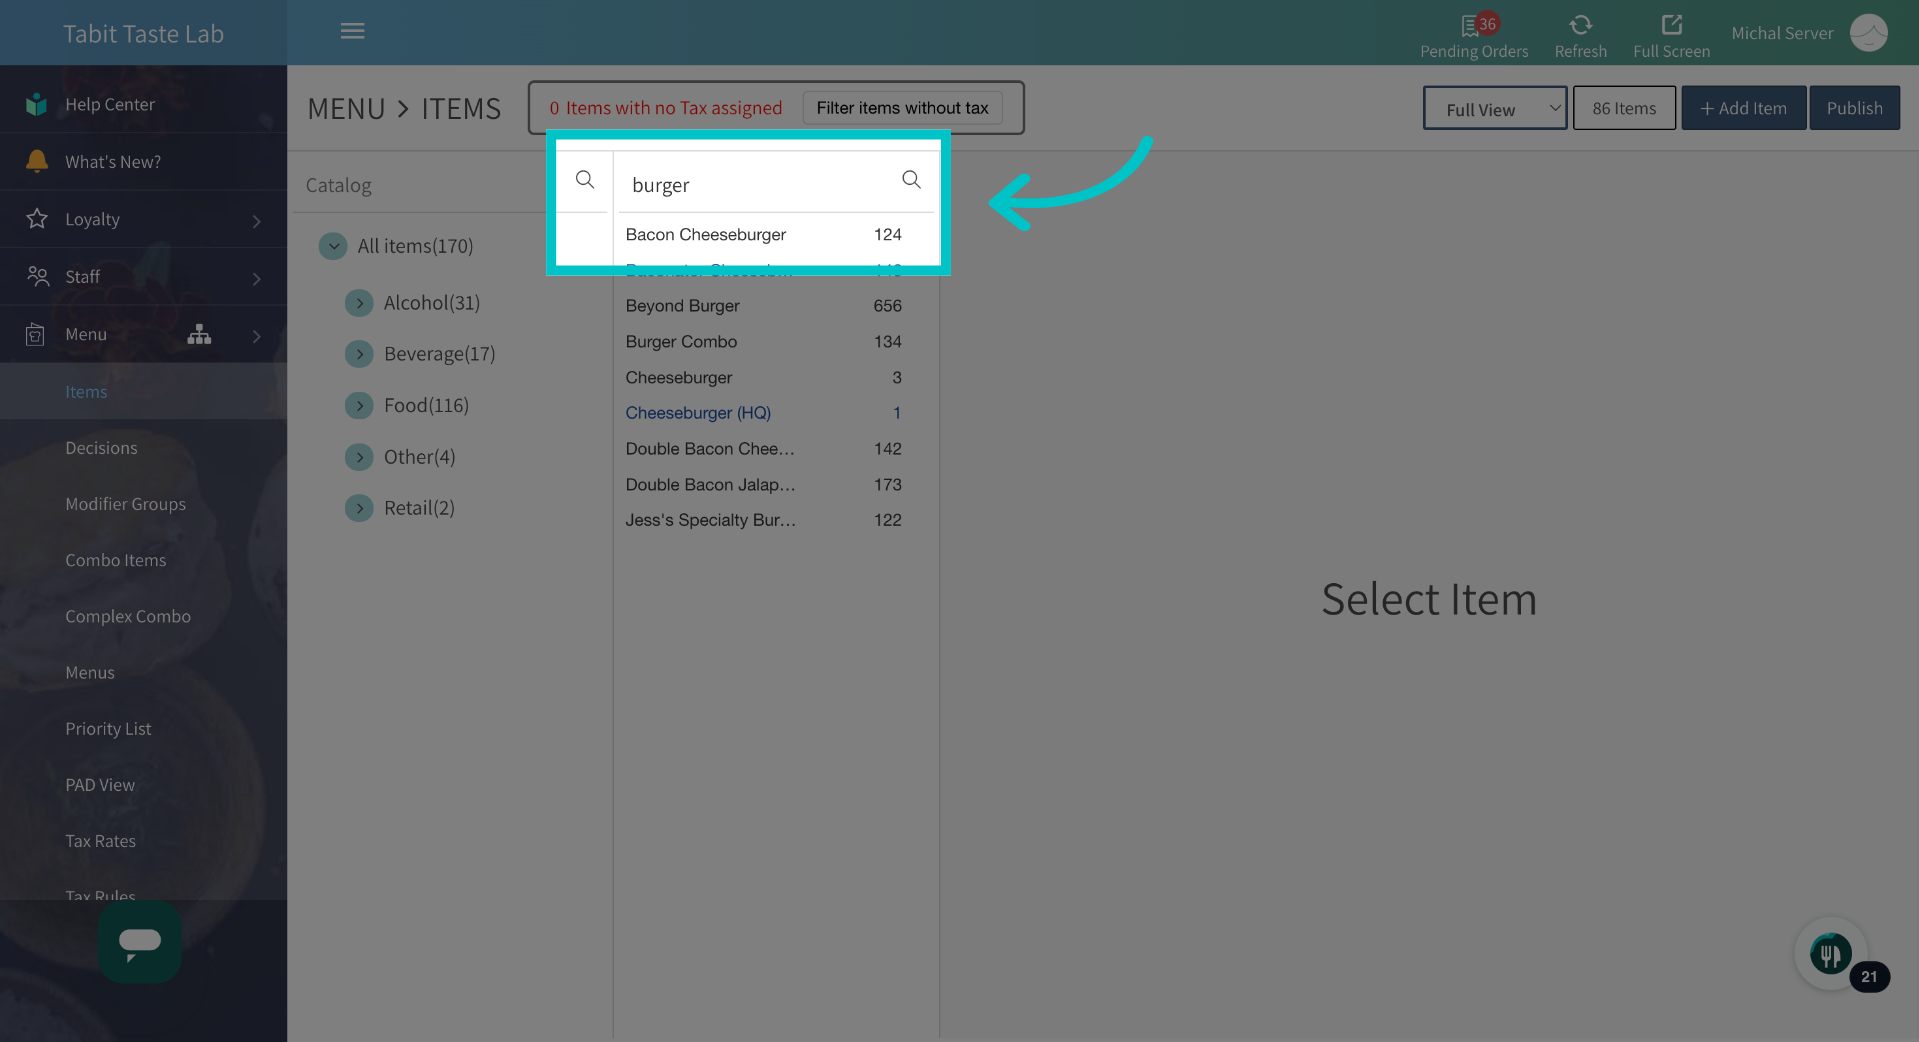
- Locate the item and click it to enter the edit screen
- Go to the Modifiers tab
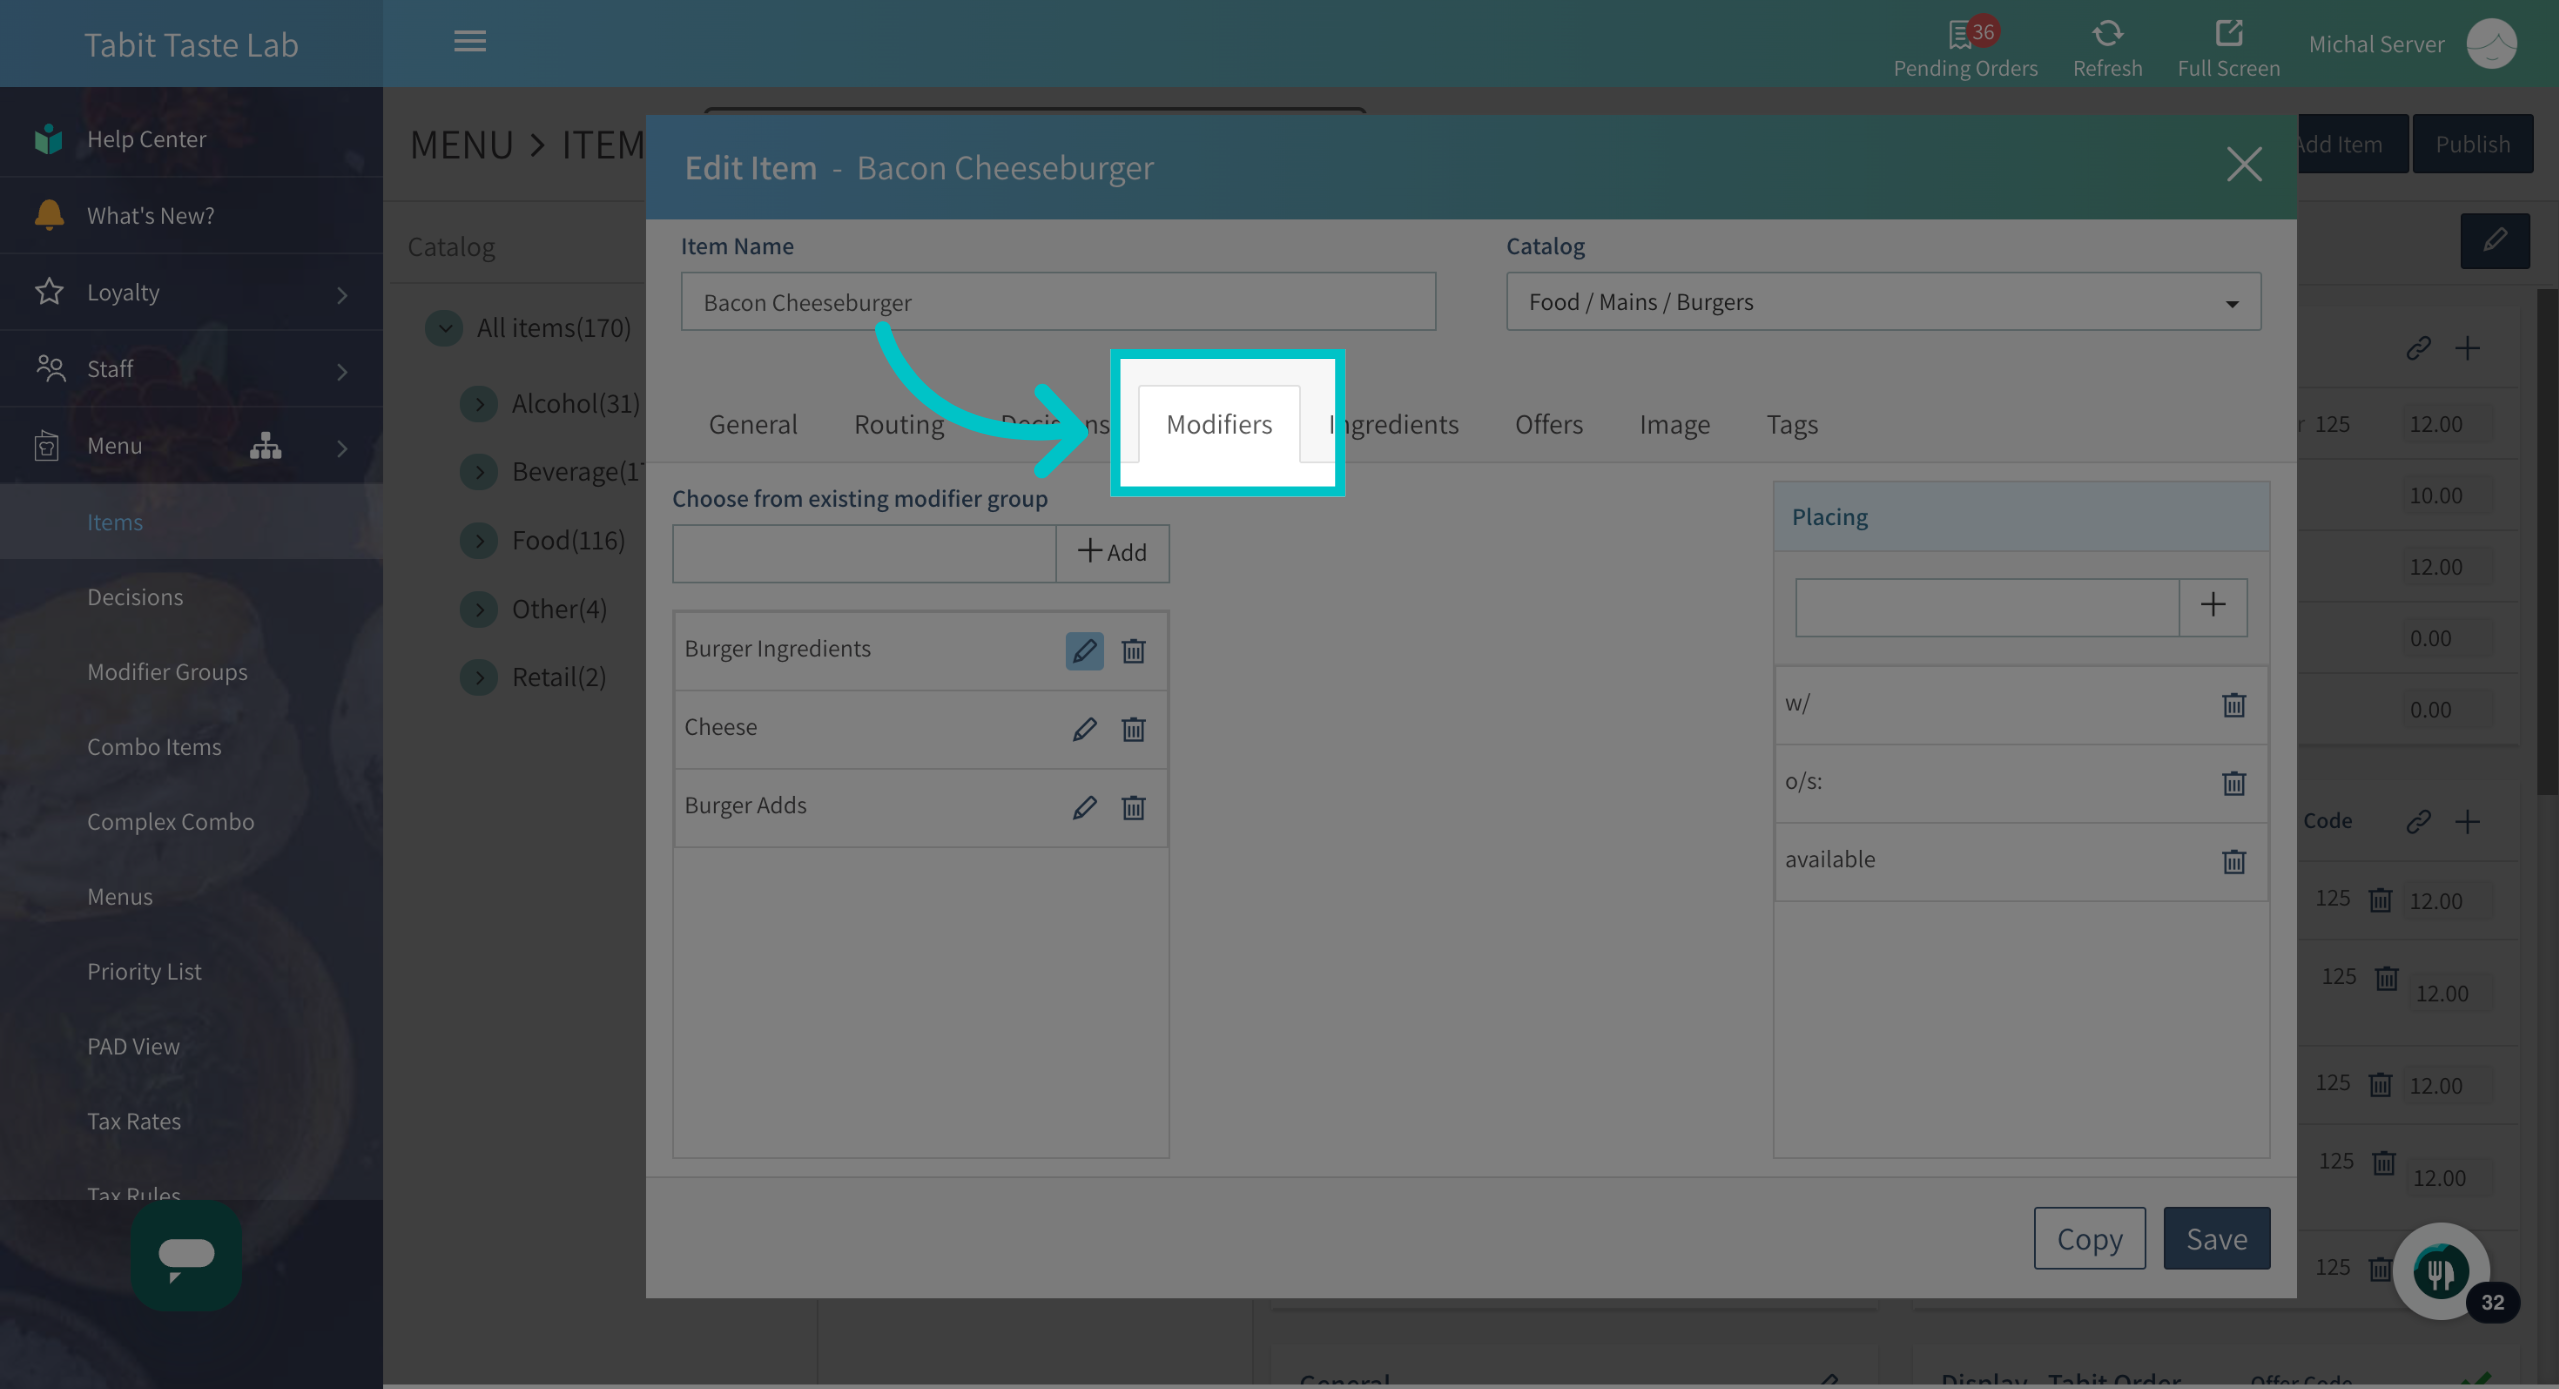
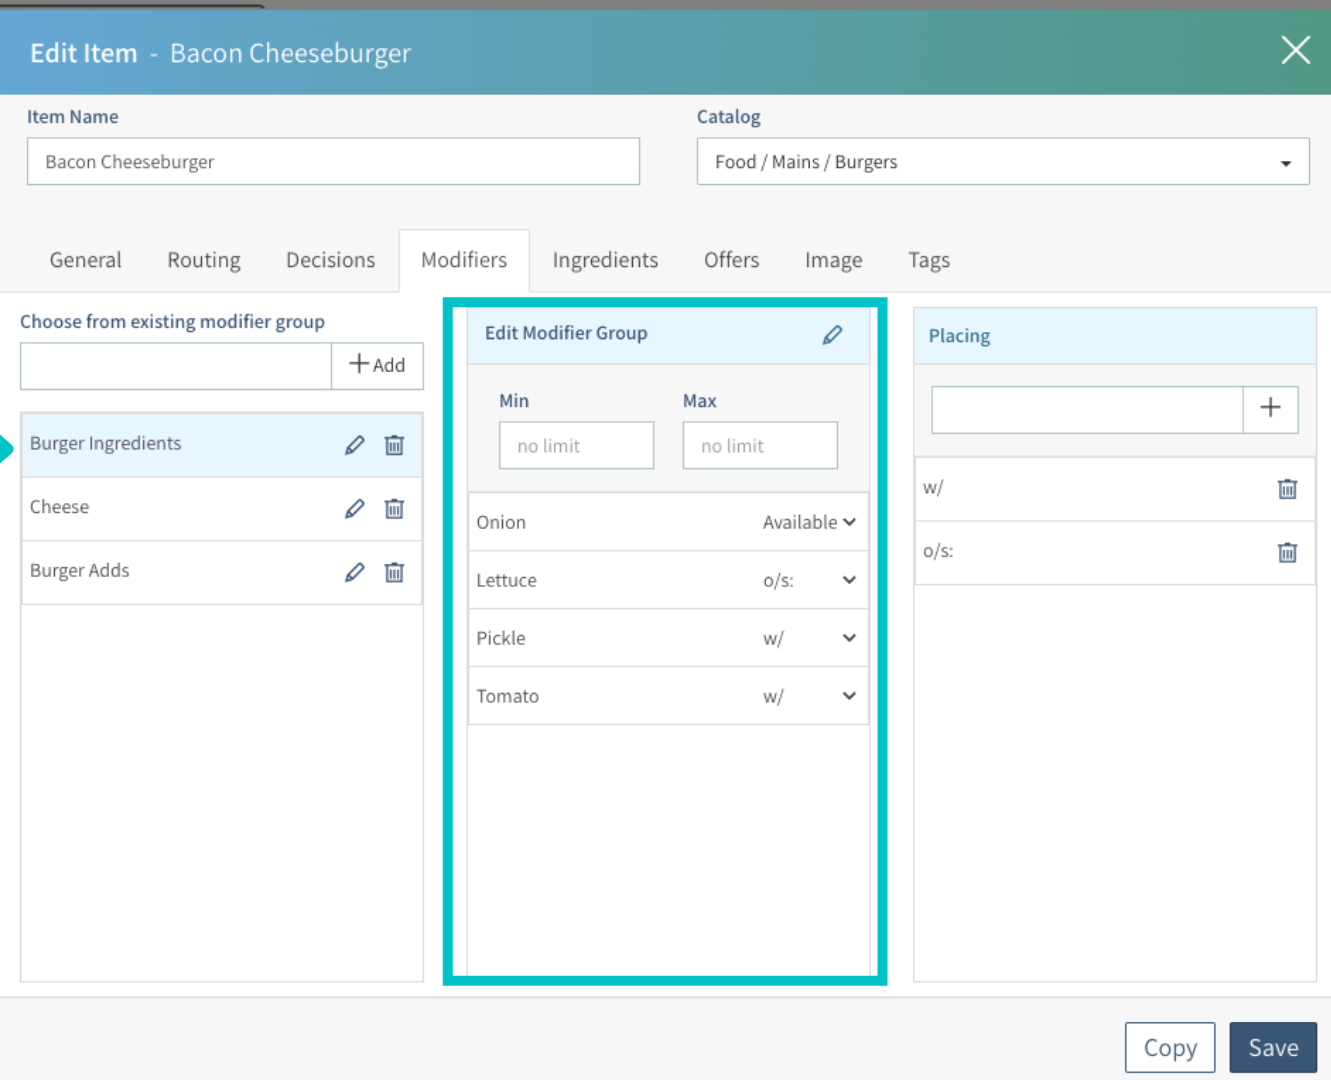
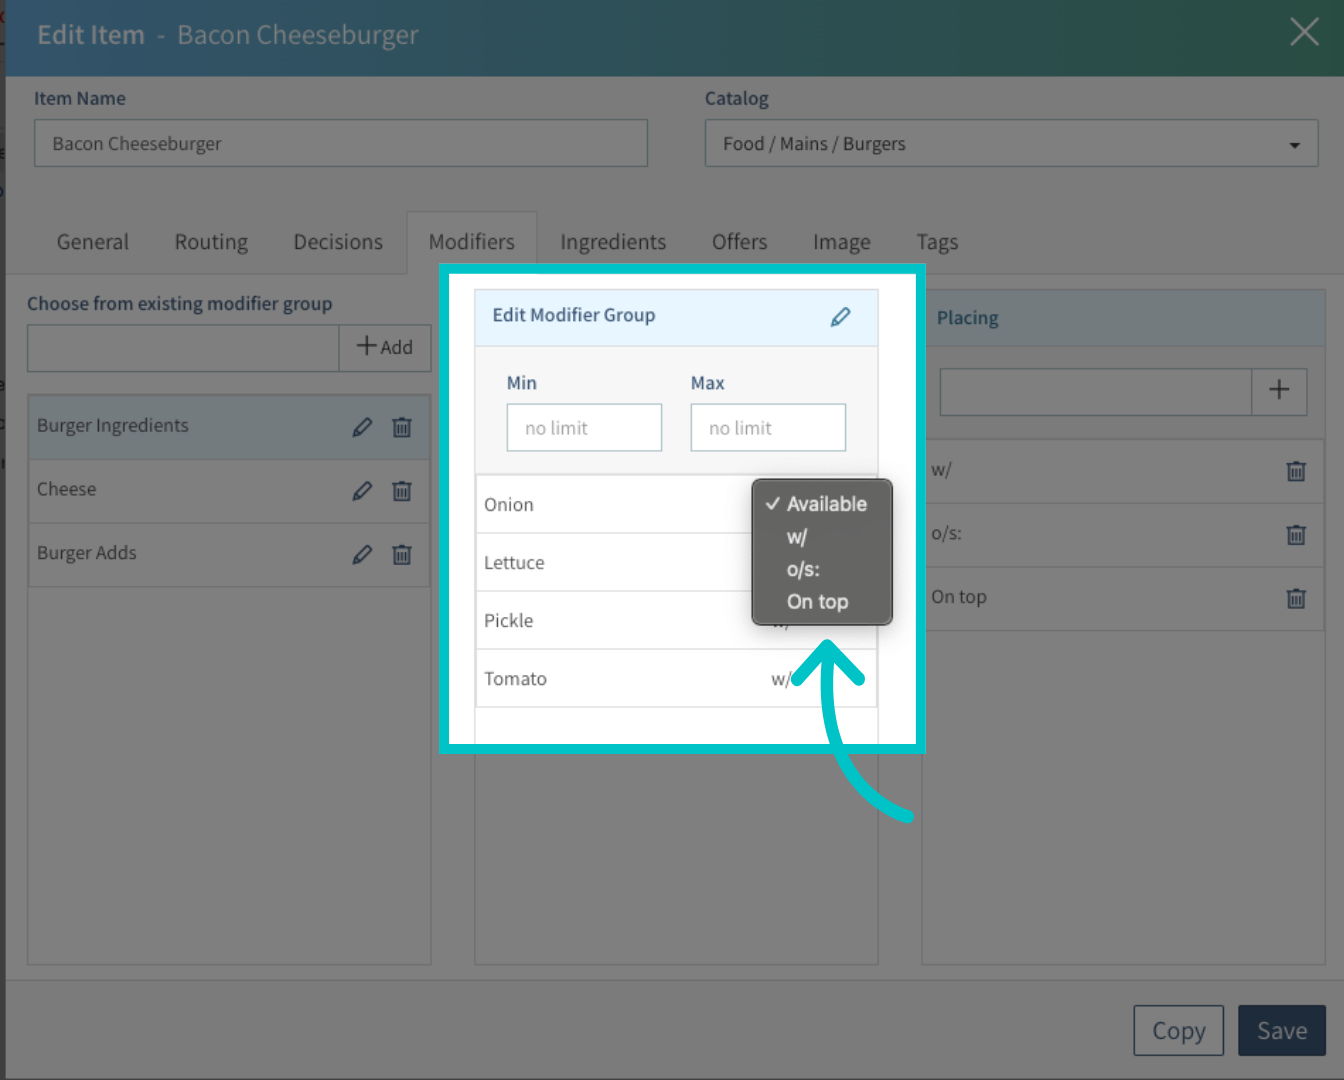
- Select the modifier group name on the left. A center tab will appear where you can adjust the placement of each modifier
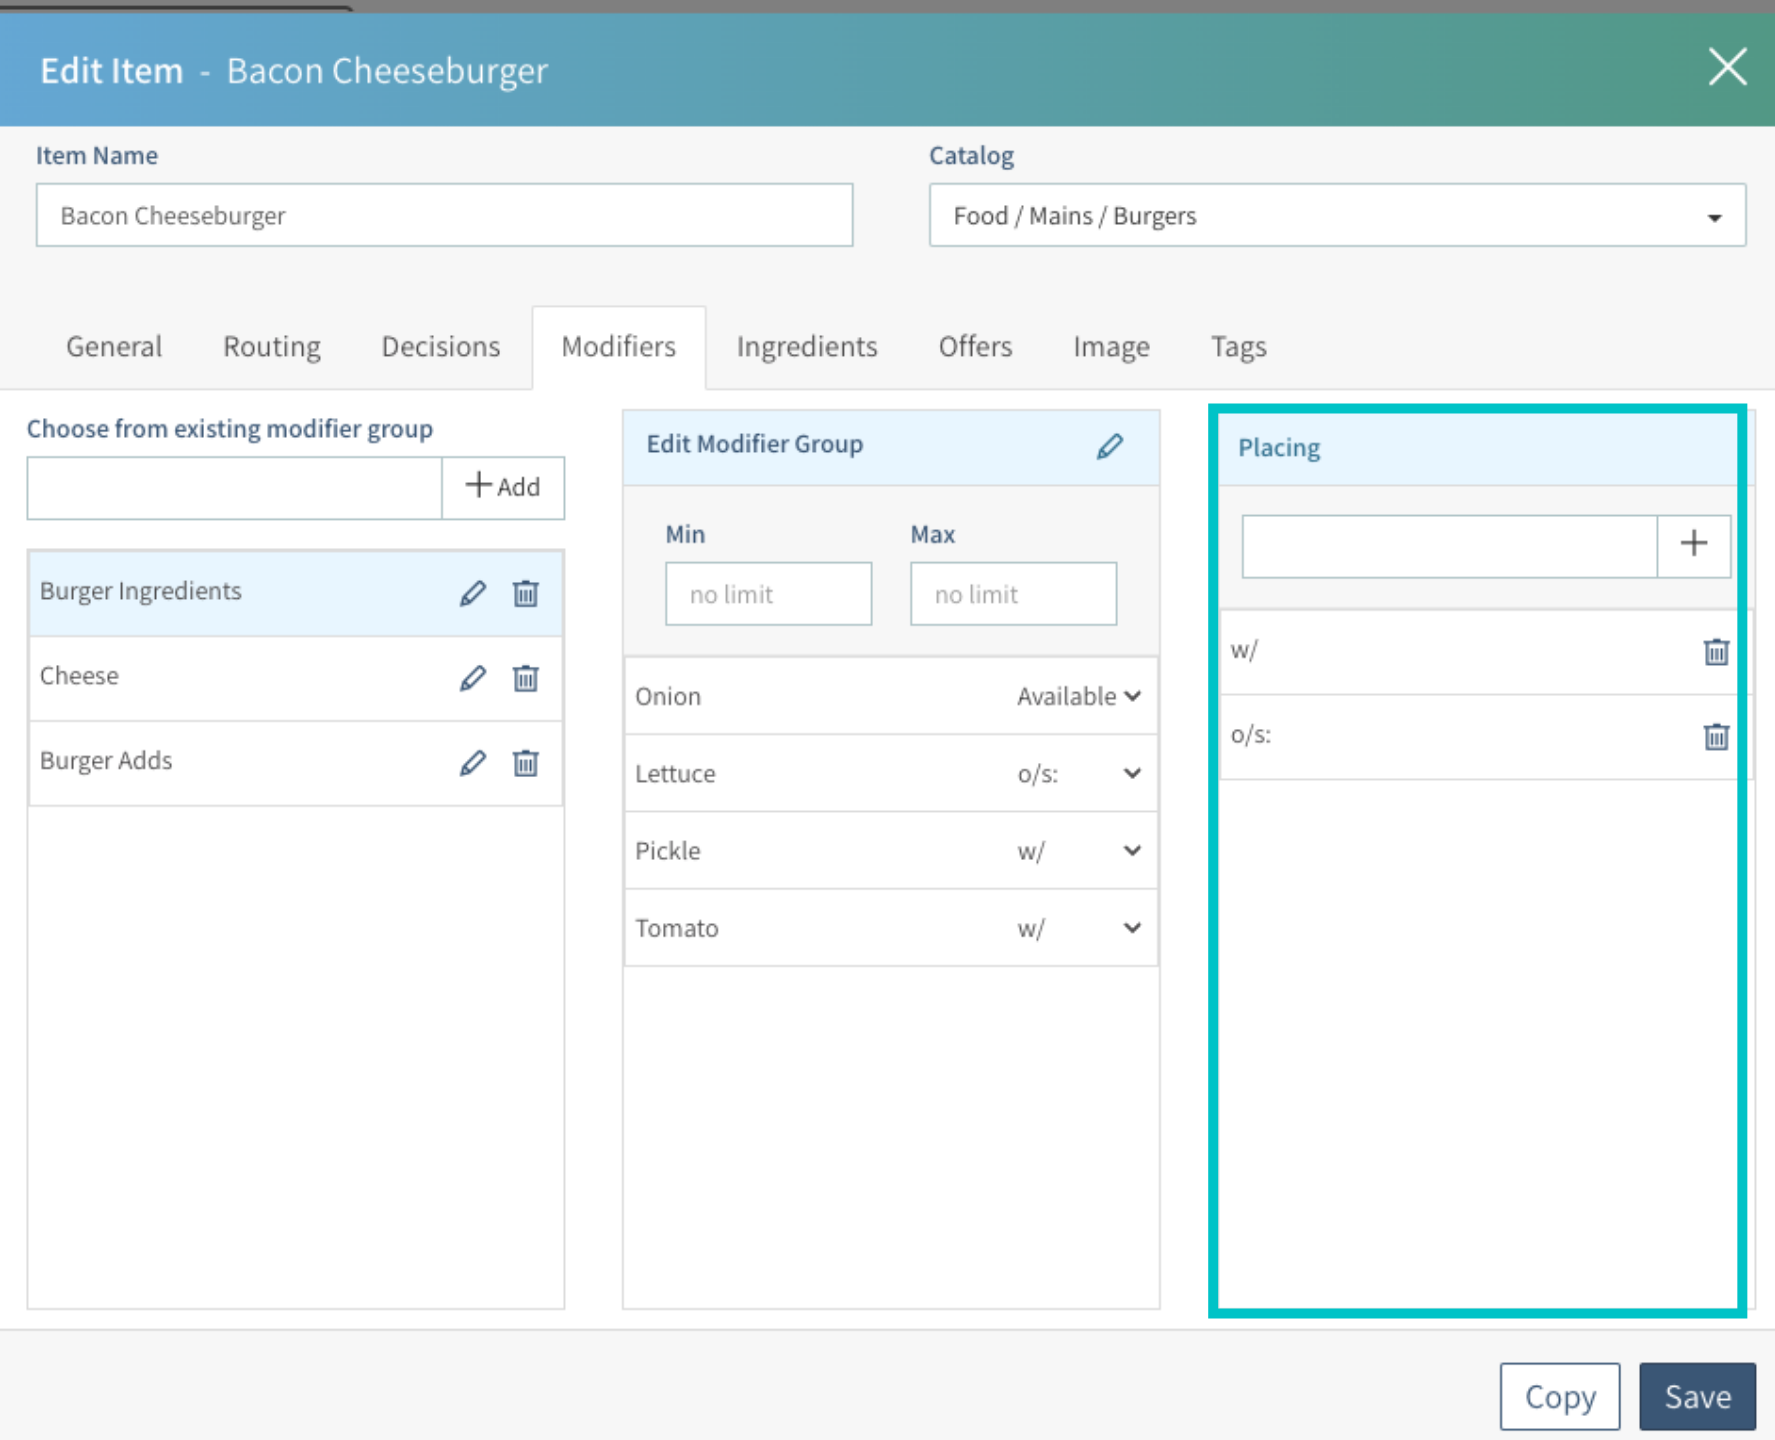
- On the right side, you can add different placing options. The default options are "With" (w/) and "On the Side" (o/s)
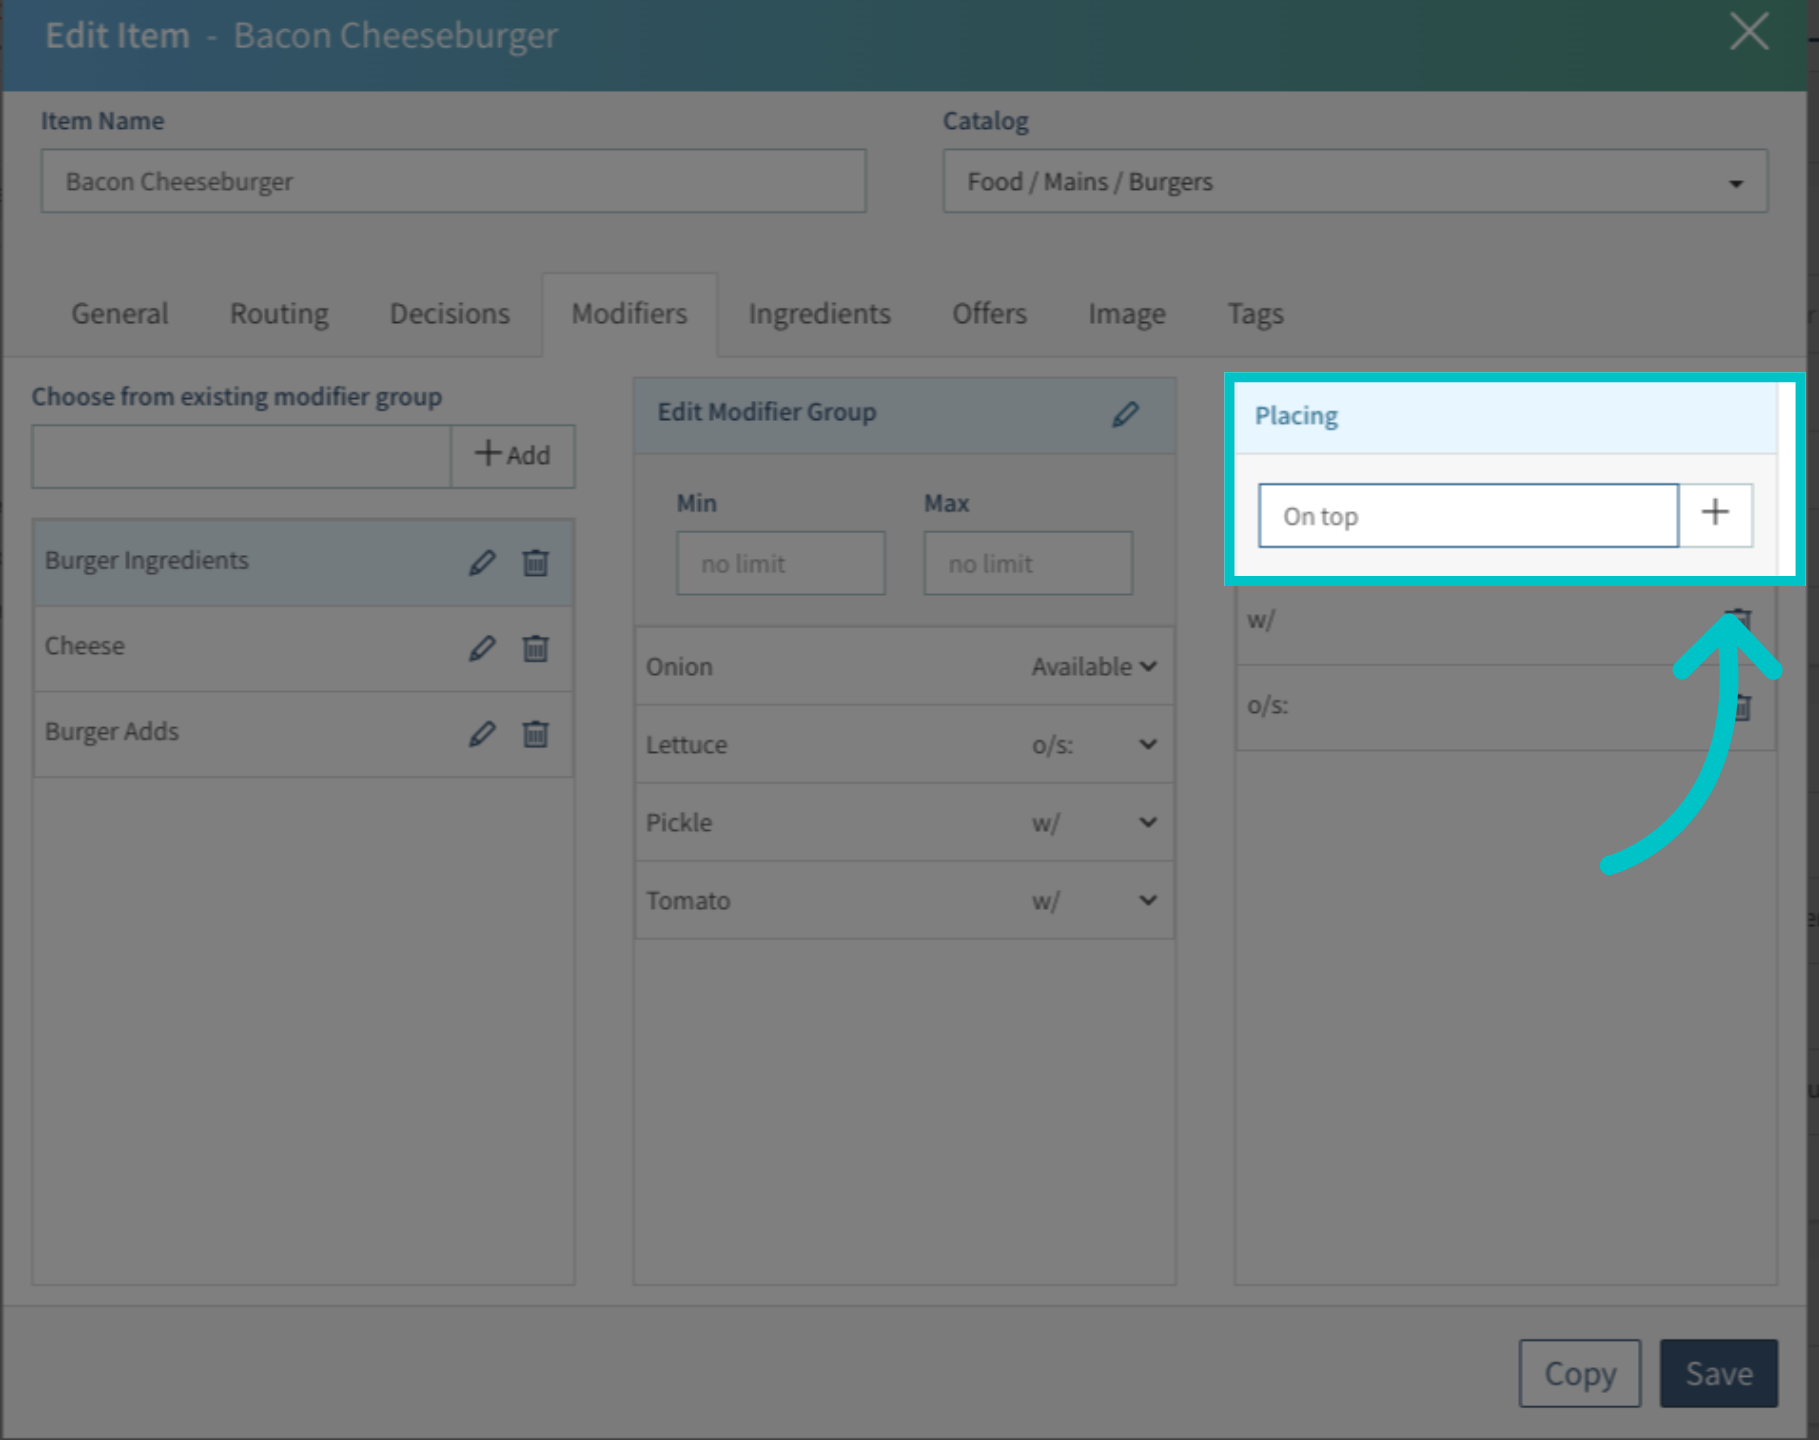
- Enter a name for the new placing and click the ‘+’ symbol to add it
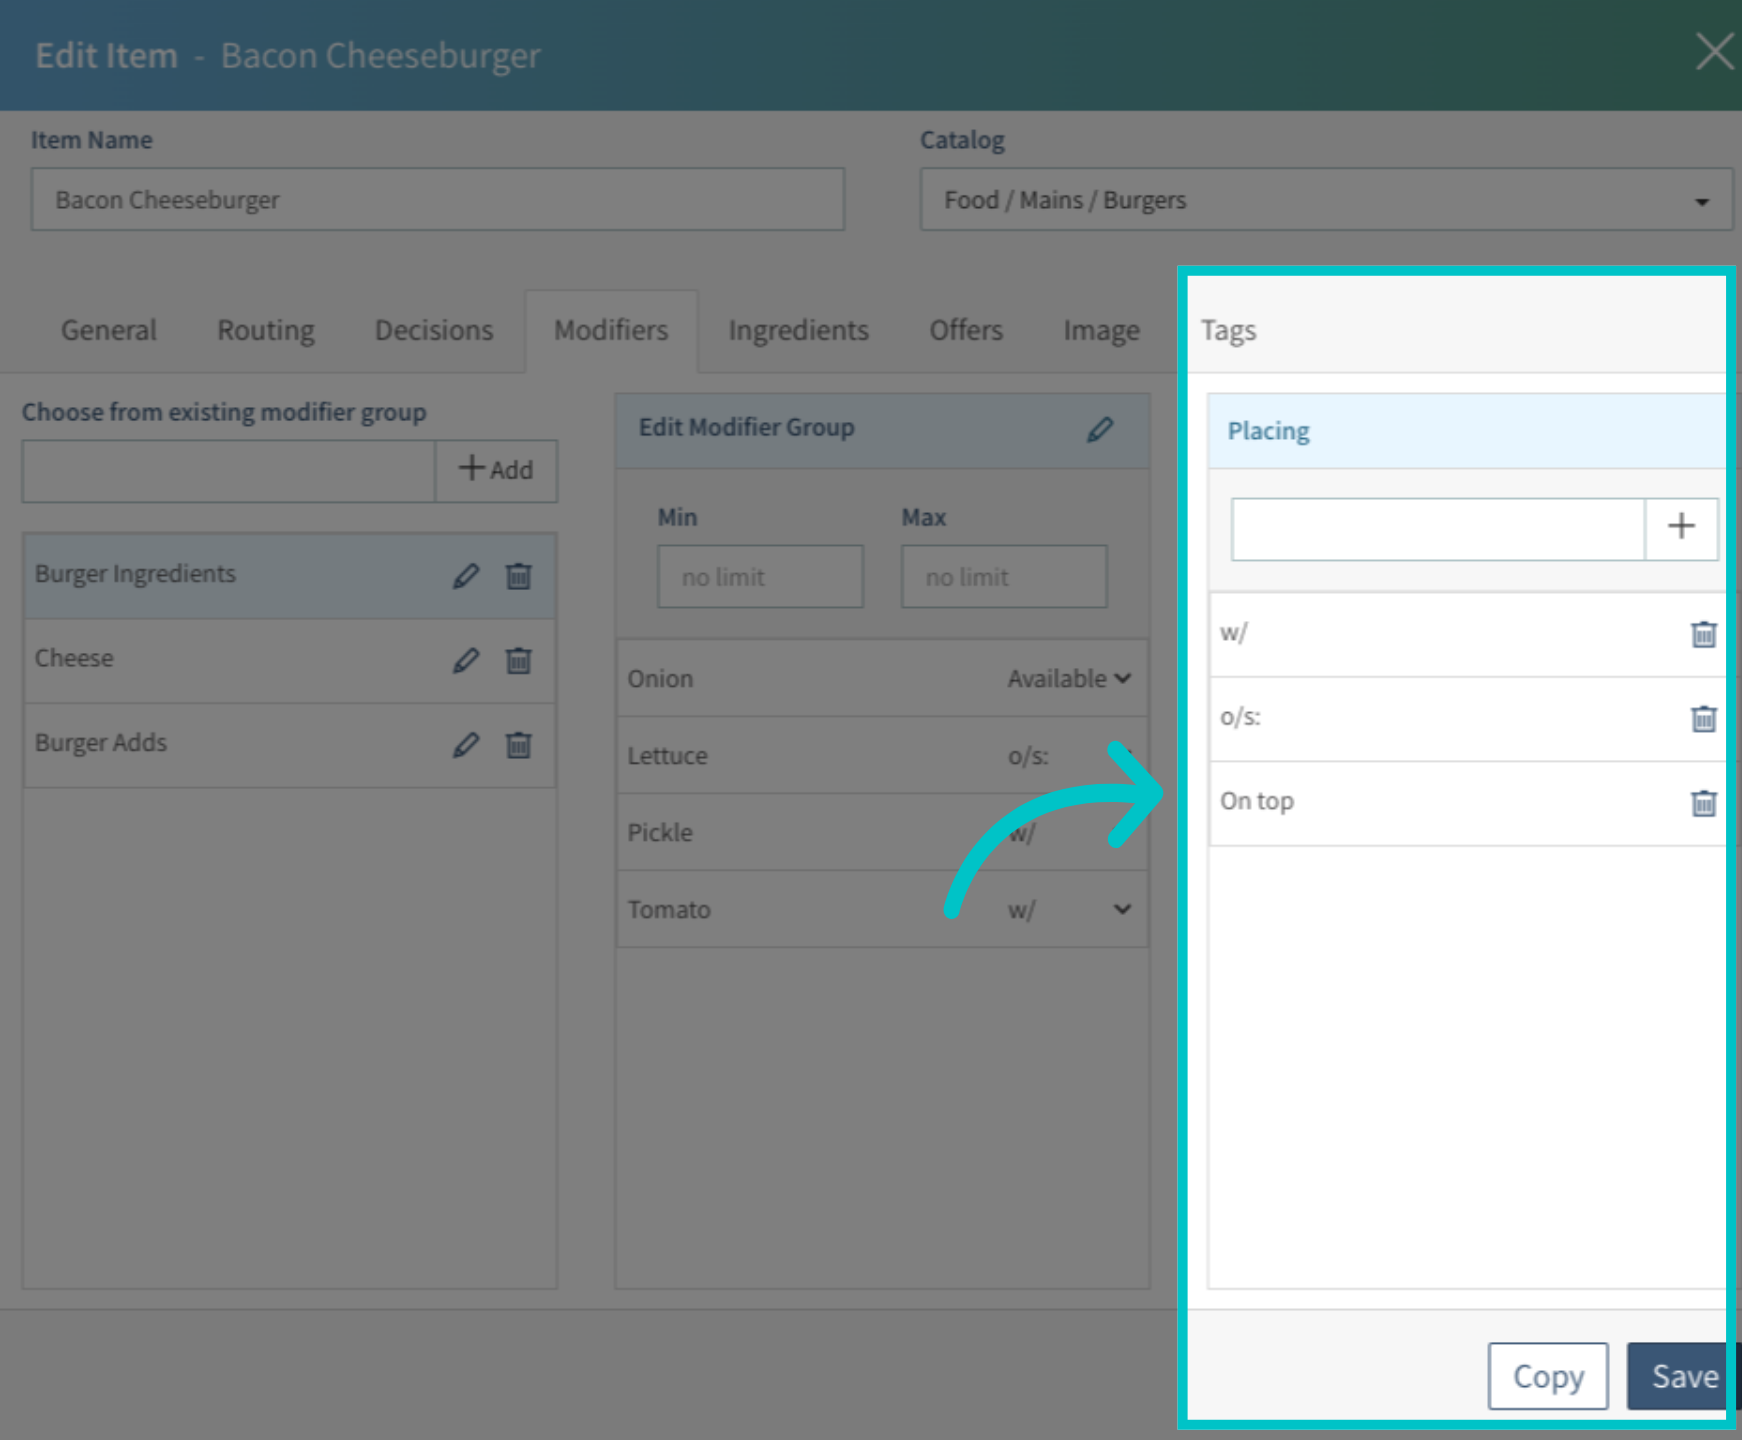
- The new placing is now added to the list
- In the center tab, use the drop-down menu to assign the placing for each modifier
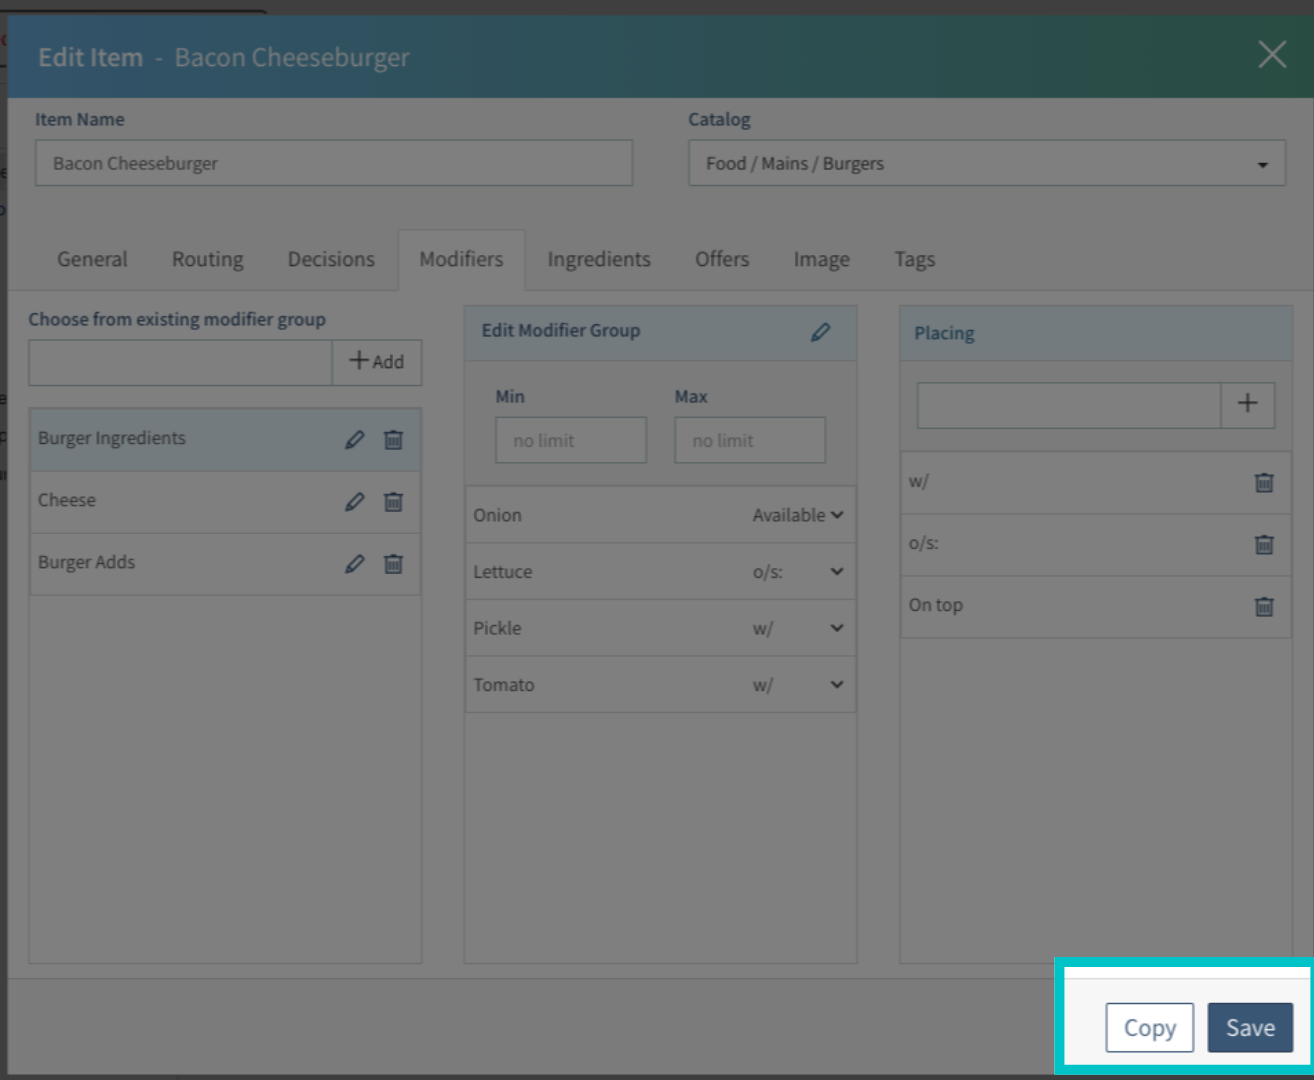
- Click Save to confirm your updates
Using the right modifier placing setup ensures a smooth ordering flow, accurate kitchen communication, and helps guarantee that guests receive their orders just the way they want them.